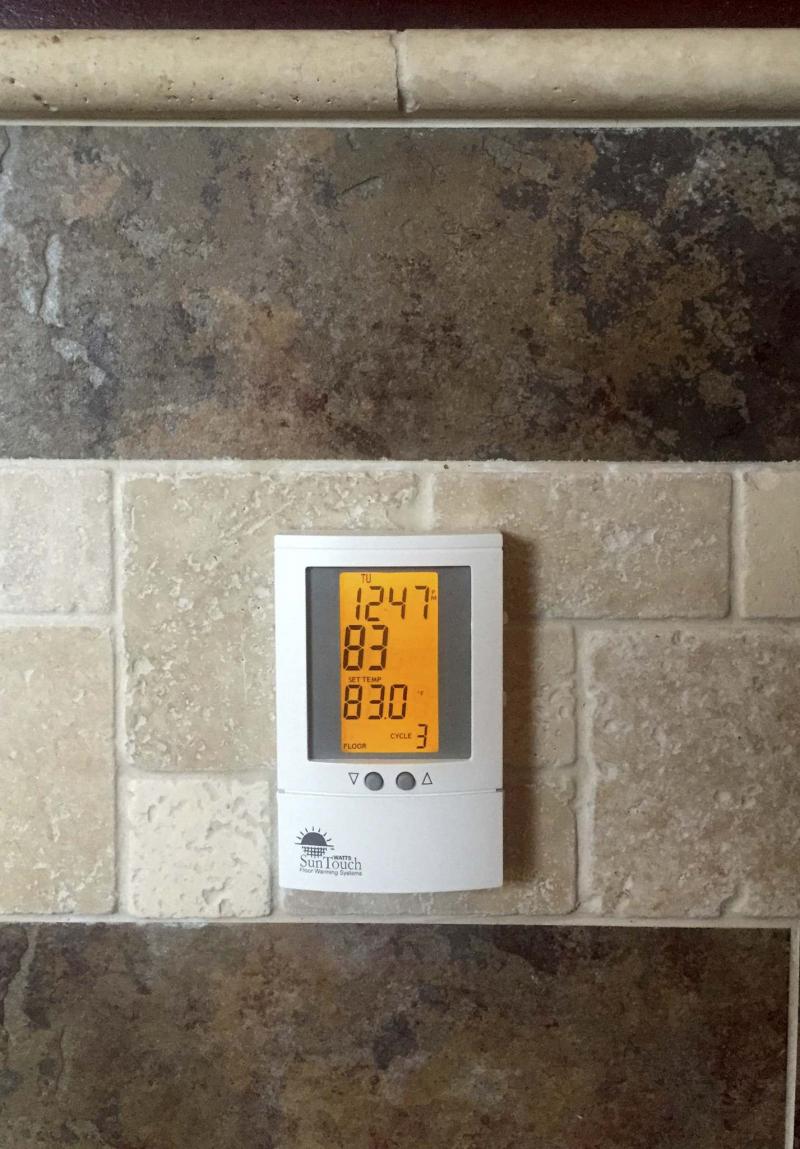
An E2 error message on the thermostat may indicate an issue with heated floors.

When repairing a heated floor it's critical not to accidentally cut the heating cable, which would render the entire system inoperable.
Nothing feels better than a hint of warmth beneath your feet, especially during the winter months.
When I decided to renovate my home, the plans included an extension to the existing main bathroom on the second floor. My design called for ceramic tiles on the walls, and slate tiles on the floors. And of course, heated flooring throughout the bathroom, which I’d heard nothing but great things about it.
And the rumours were true — the heated floor was fantastic.
Well, at least it was for a while. The heated flooring worked for roughly nine years without fail, until the floors went cold in the fall of 2013. The thermostat displayed an "E2" error message. Although a simple reset erased the message, the error returned immediately and the floors remained cold.
I called the manufacturer to inquire. They gave me information I did not want to hear. An "E2" message indicated a floor sensor failure. I then asked, "How would one go about just replacing the floor sensor?" During installation, floor sensors are embedded below the tiles within the floor thinset, which is poured to hide the heating cable before tile installation. I was told the only way to get my heating system operational was to remove the tiles and dig out the sensor to replace it.
This was ridiculous to me. Not only could I not recall exactly where the floor sensor was placed within the heating cable layout, but digging out the sensor meant there was a very good chance I could accidentally cut the heating cable, rendering the entire system non-repairable — the ENTIRE floor would then need to be removed and replaced. I was not prepared to remove my entire floor, nor was I prepared to accept a cold floor — what was I to do?
Heated flooring systems aren’t all that complicated, regardless of the manufacturer. Each system includes a programmable thermostat, a floor sensor, the heating cable and one of several methods to secure the cable to the subfloor — I intend to detail heated floor installation in a later article.
I scrutinized my heated floor issue for quite some time, and inevitably drew the following conclusion: I’d need to introduce a new floor sensor without disturbing any of the slate tile flooring, nor the shoulder-high ceramic tiling on the walls. But how would I do that?
First, I purchased a new thermostat, which included a new floor sensor. After shutting off the electrical breaker to the heated flooring system, I removed the old thermostat. I now needed an access point without disturbing the tile.
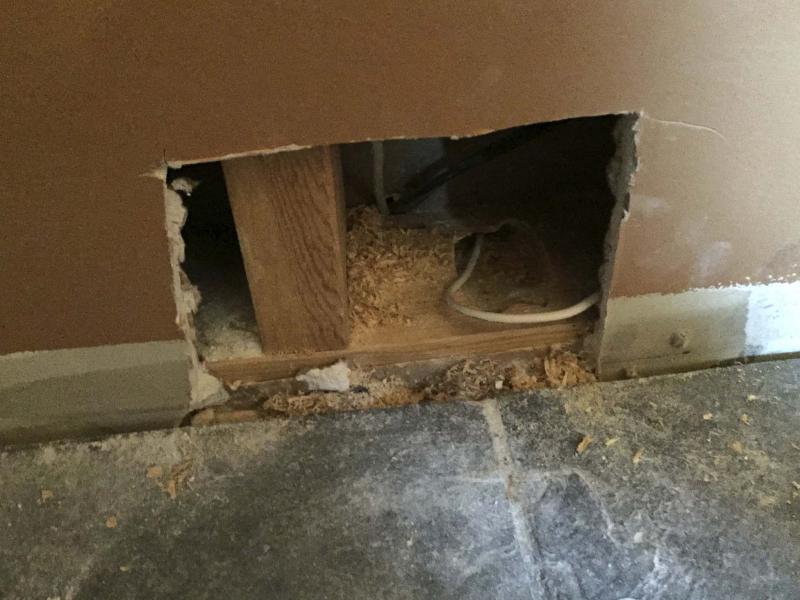
I removed the baseboard located in the hallway, on the opposite side of the same wall that housed the thermostat, so I could carefully cut a small hole in the drywall near the floor, directly below the thermostat’s position. This exposed the wall cavity slightly above the sole plate, which is the horizontal base of the wall framing. It was a hole small enough for the baseboard to completely conceal once reinstalled.
From the bathroom side, I began to dig out the grout between the two floor tiles nearest to the wall where the thermostat was located, as well as the grout at the base of the wall between the floor tiles and the tiles that served as bathroom baseboards. It was imperative I didn’t dig too deep — cutting the heating cable would render the entire heated flooring system inoperable.
Once the grout was removed, I drilled a 5/16-inch hole from between the two floor tiles, and at the junction of the baseboard tile directly below the thermostat location, through the sole plate and into the hallway. From the hallway side, I drilled a 3/4-inch hole through the top of the sole plate. This second hole intersected the 5/16-inch hole at almost a perpendicular.
I fished the new sensor’s wires up into the wall’s cavity to reach the thermostat’s electrical box. I then pushed the new sensor into the bathroom by maneuvering it into the 3/4-inch hole at the top of the sole plate and through the 5/16-inch hole into the bathroom. I positioned the sensor between the two tiles where I had removed the grout, as far down as it would go, ensuring the sensor was below floor grade.
Once the floor sensor was in place and the wire connections were made at the thermostat, I turned the breaker on to perform the manufacturer’s recommended tests. It seemed to be working properly. So, I regrouted the areas where grout had been removed, and reinstalled the baseboard in the hallway, hiding the access hole.
A few hours later, the grout had set. I fired up the flooring system, and the sensor worked flawlessly. I programmed the thermostat and my bathroom floors once again provided that soothing heat beneath my feet.
I hadn’t realized how accustomed I’d grown to having heated flooring, until the floors went cold.
BossEnterprise@outlook.com