Marc LaBossiere / Free Press
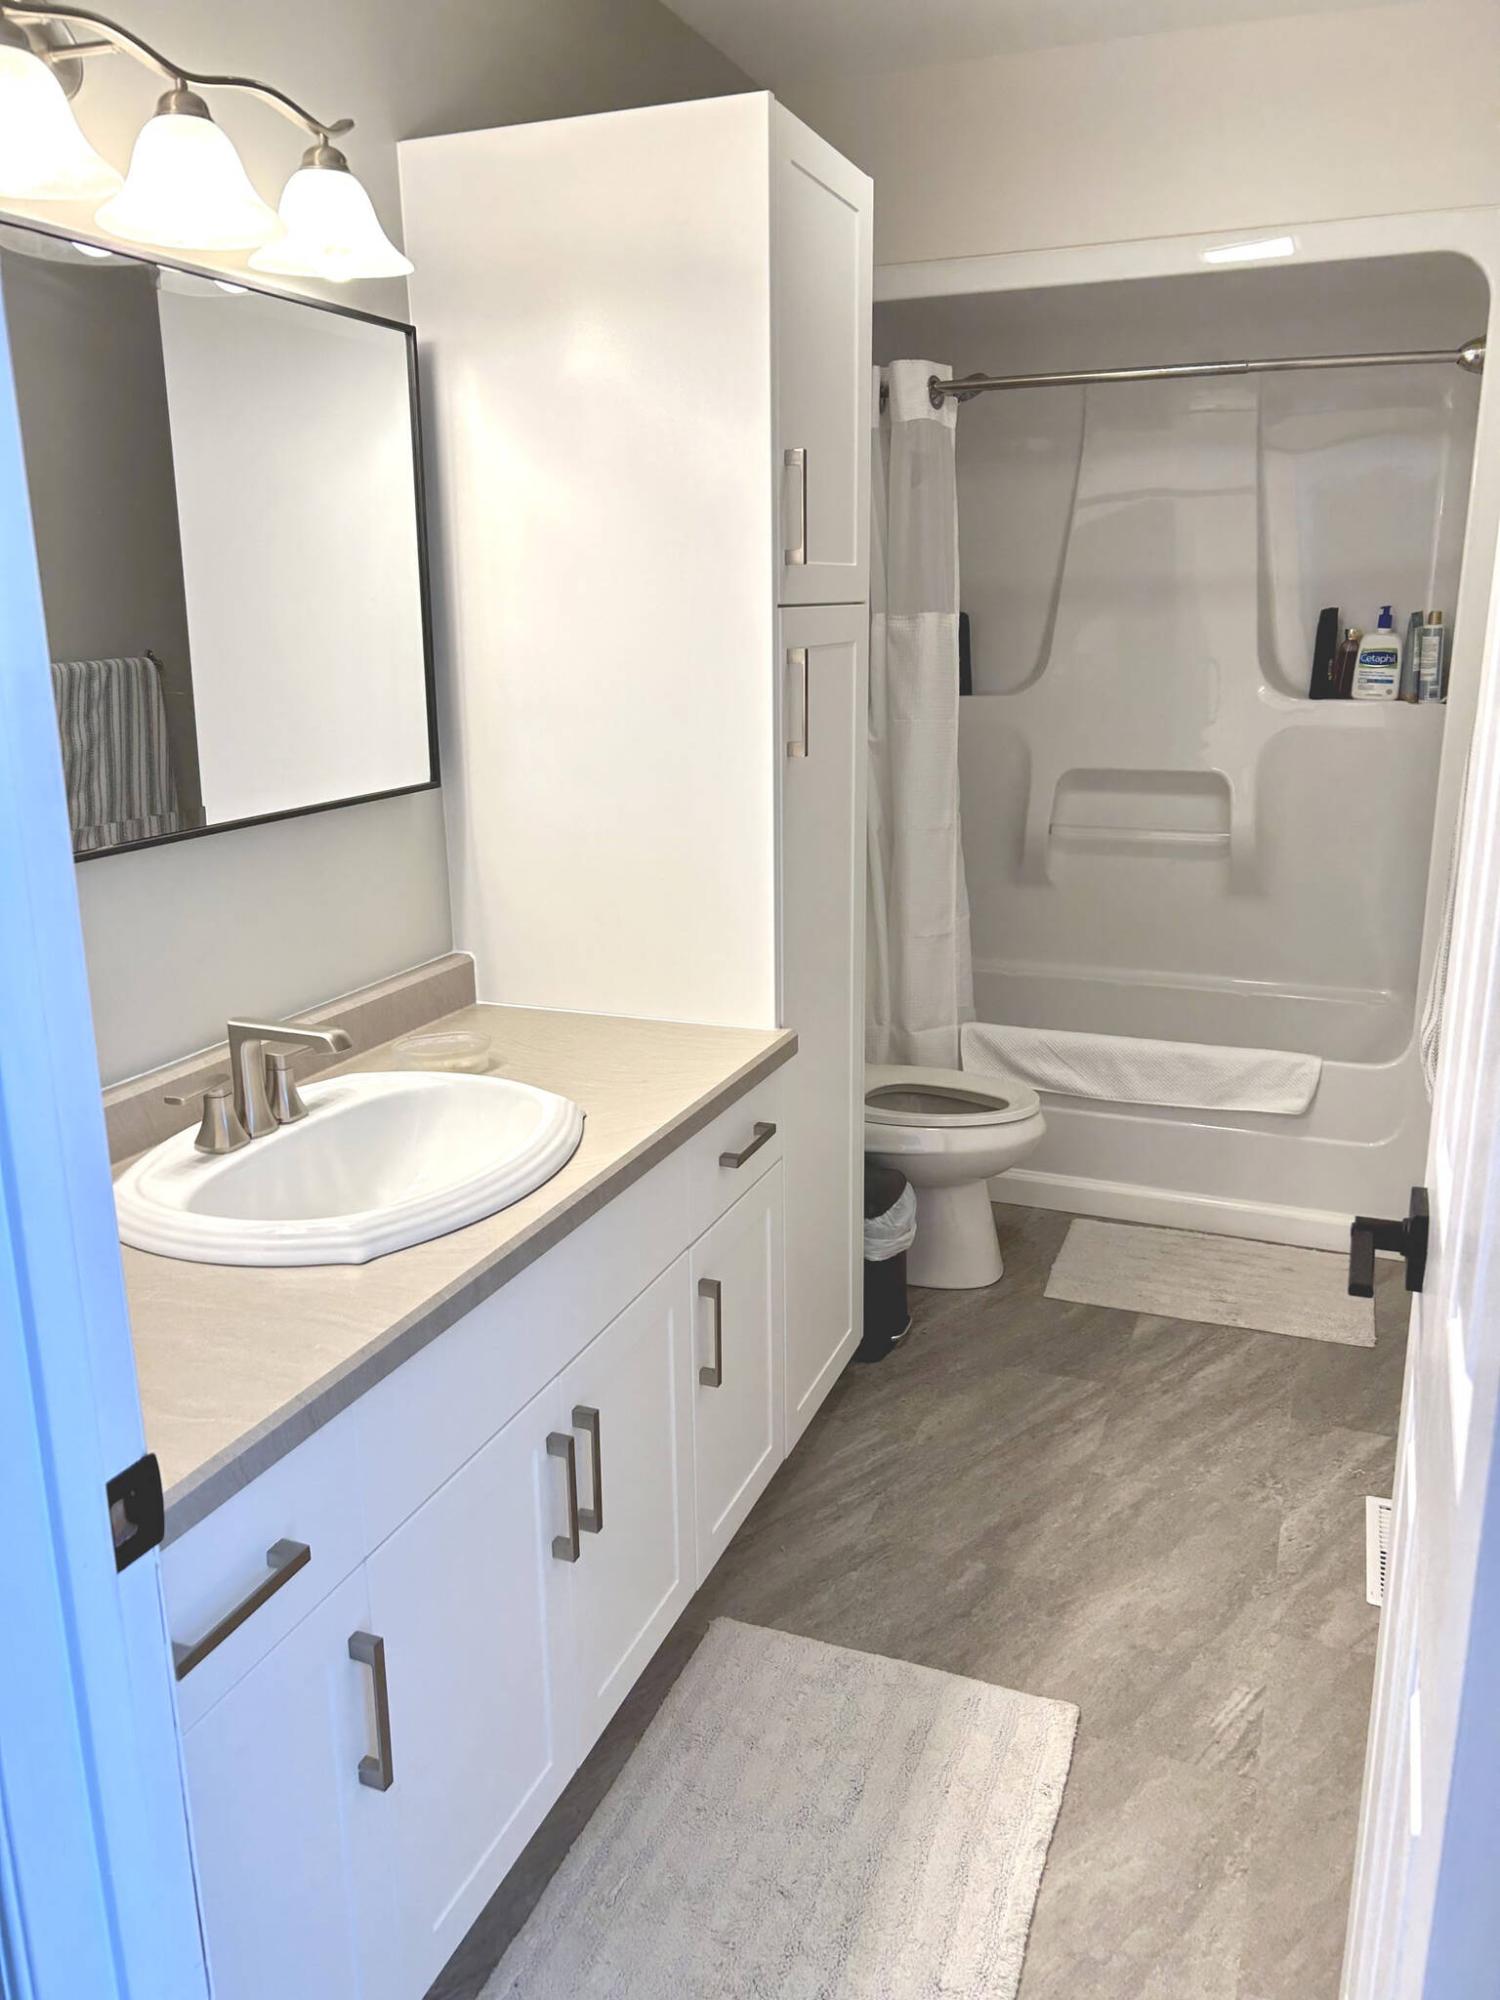
AFTER: The bathroom update only involved a bit of new ‘icing’ on an old ‘cake,’ which greatly restrained potential renovation costs.
Marc LaBossiere / Free Press
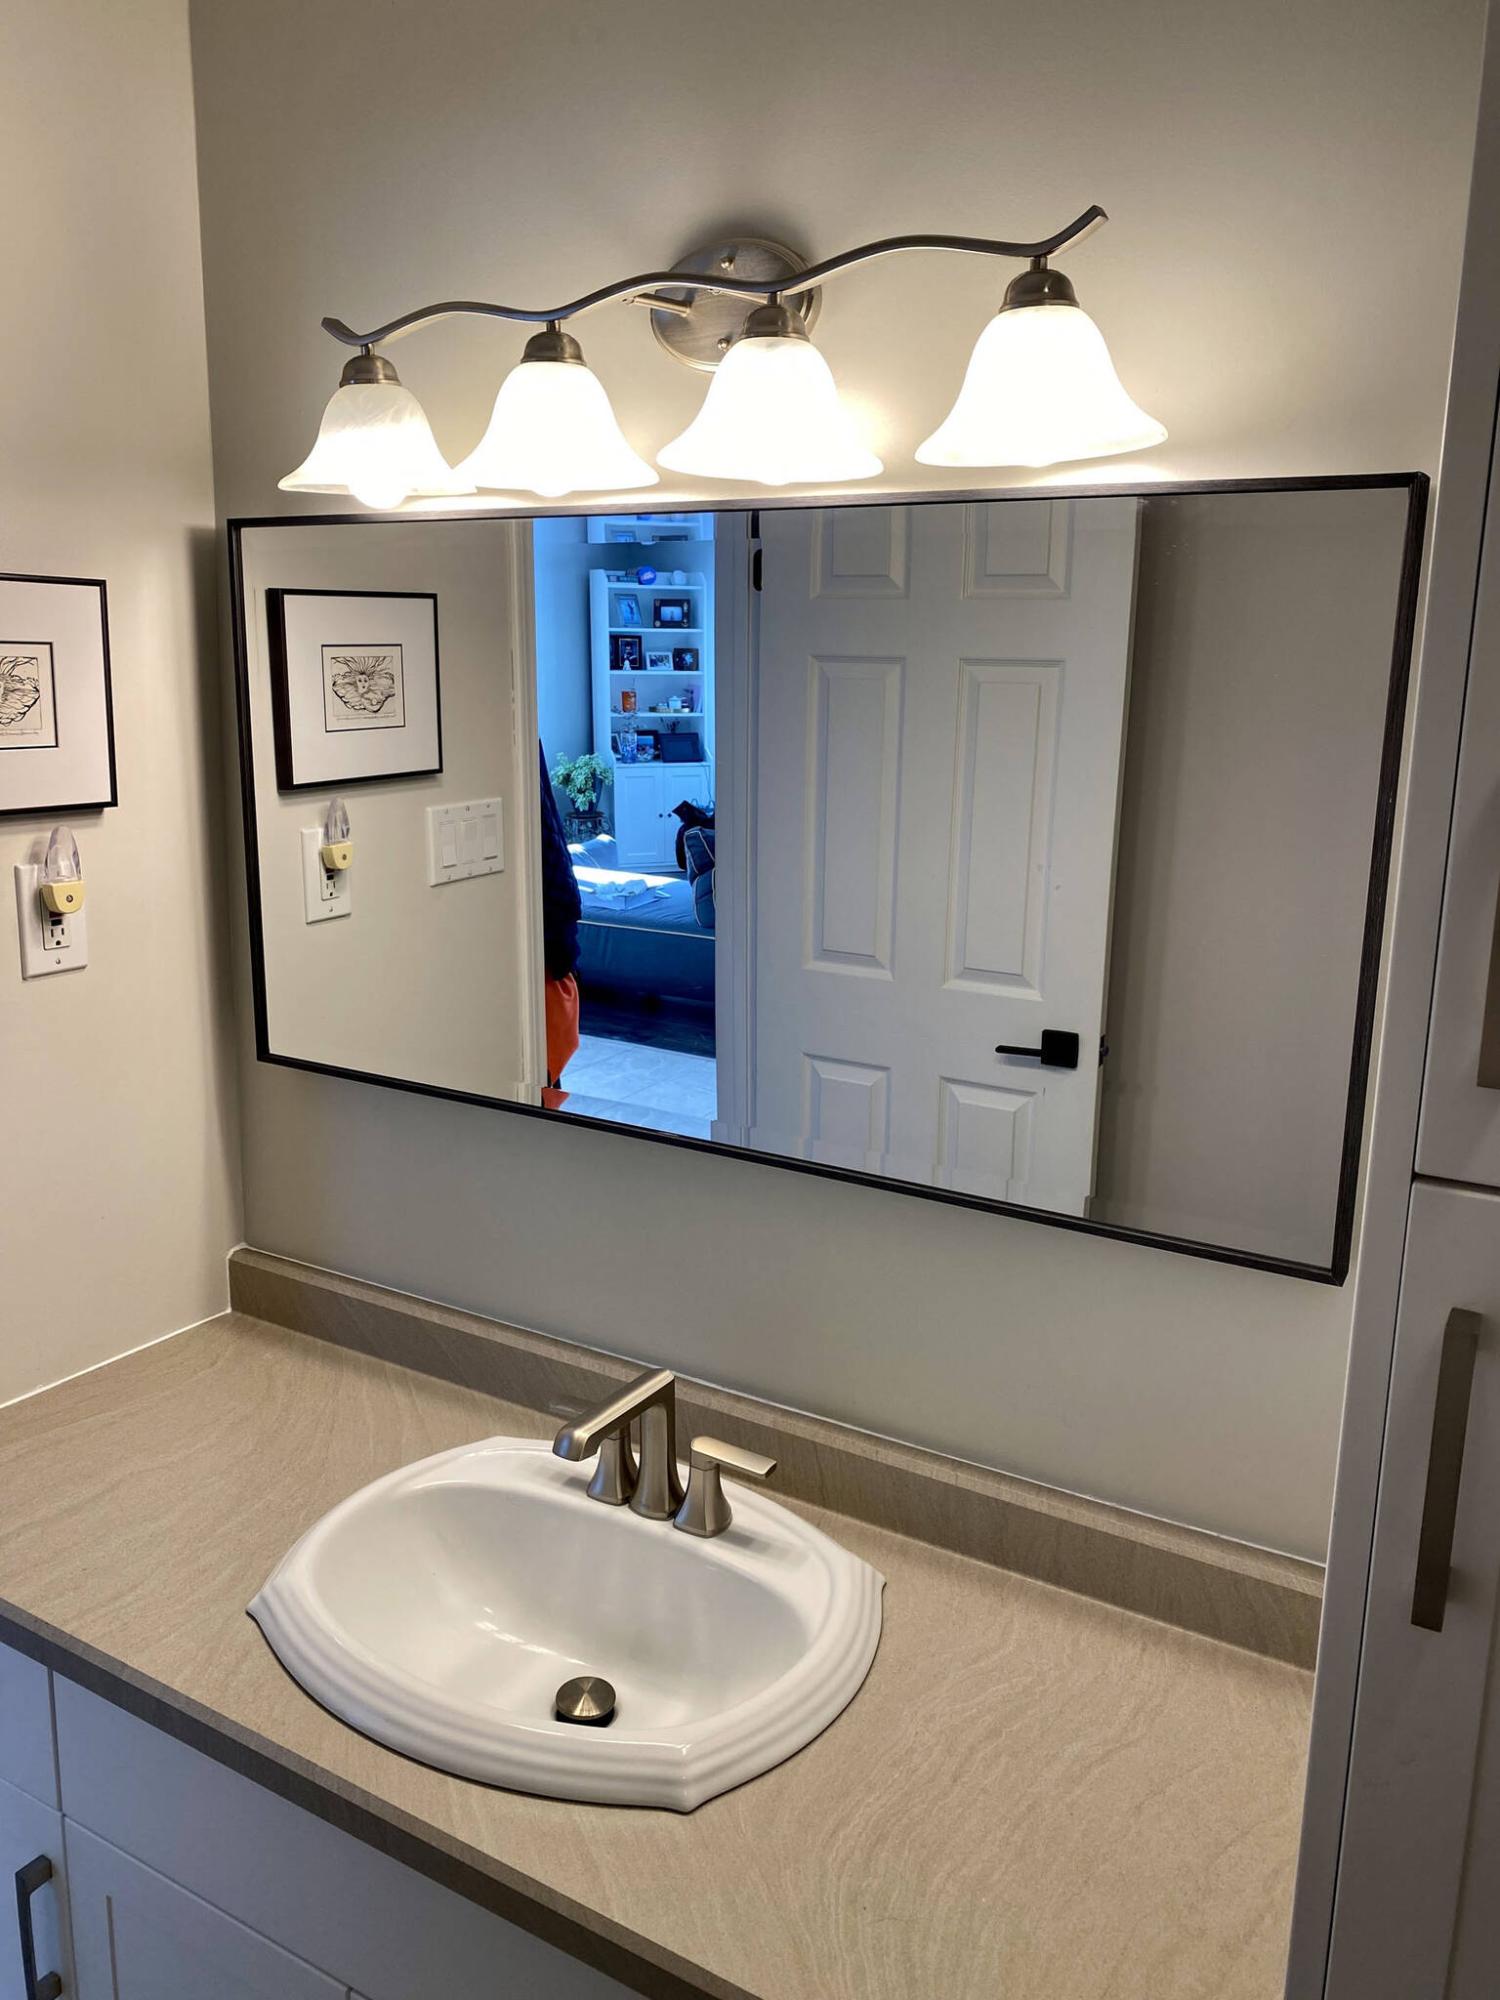
The rectangular mirror nicely fills the countertop area, along with a repurposed vanity light mounted above.
Marc LaBossiere / Free Press
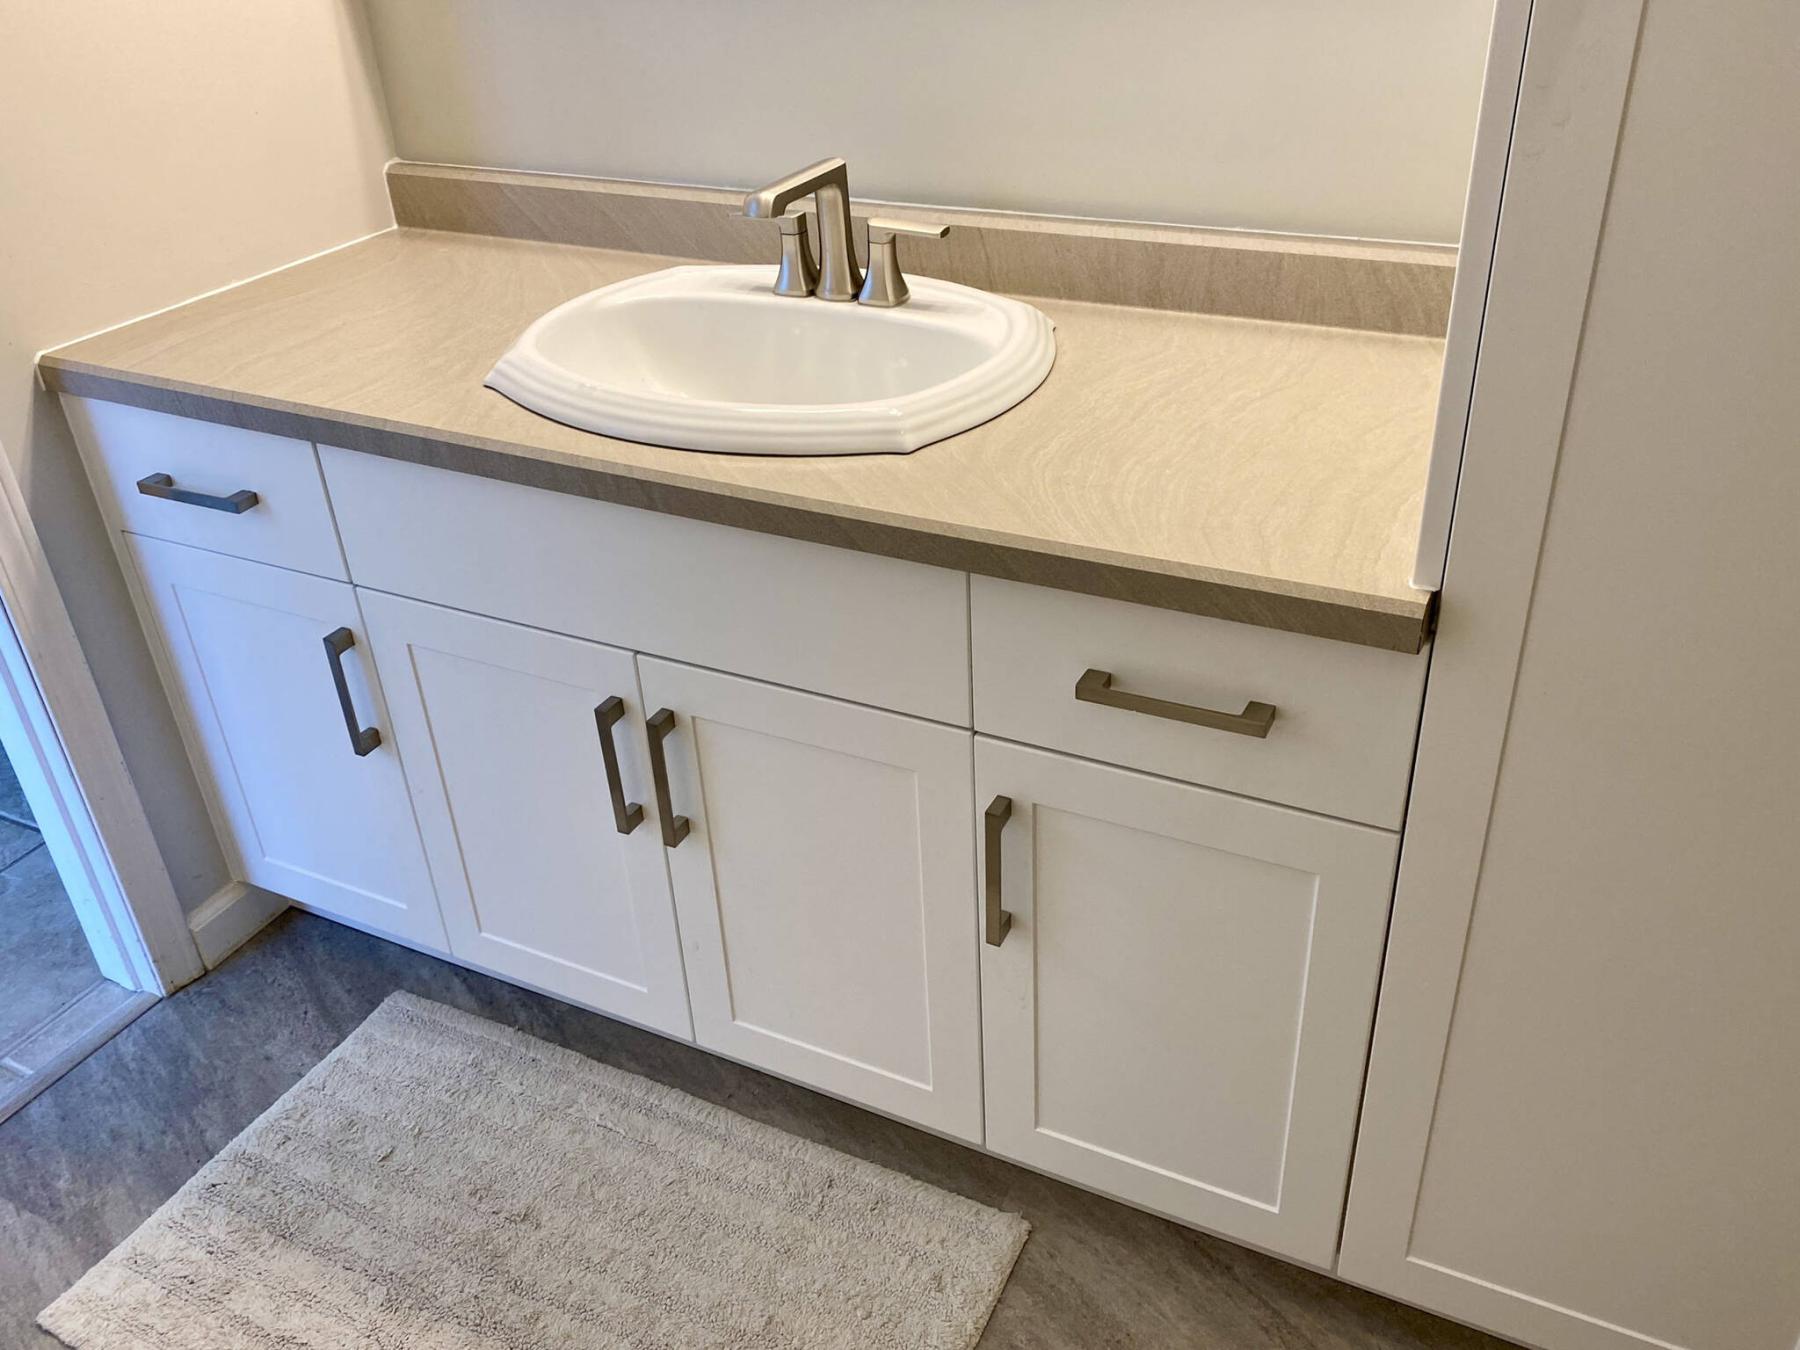
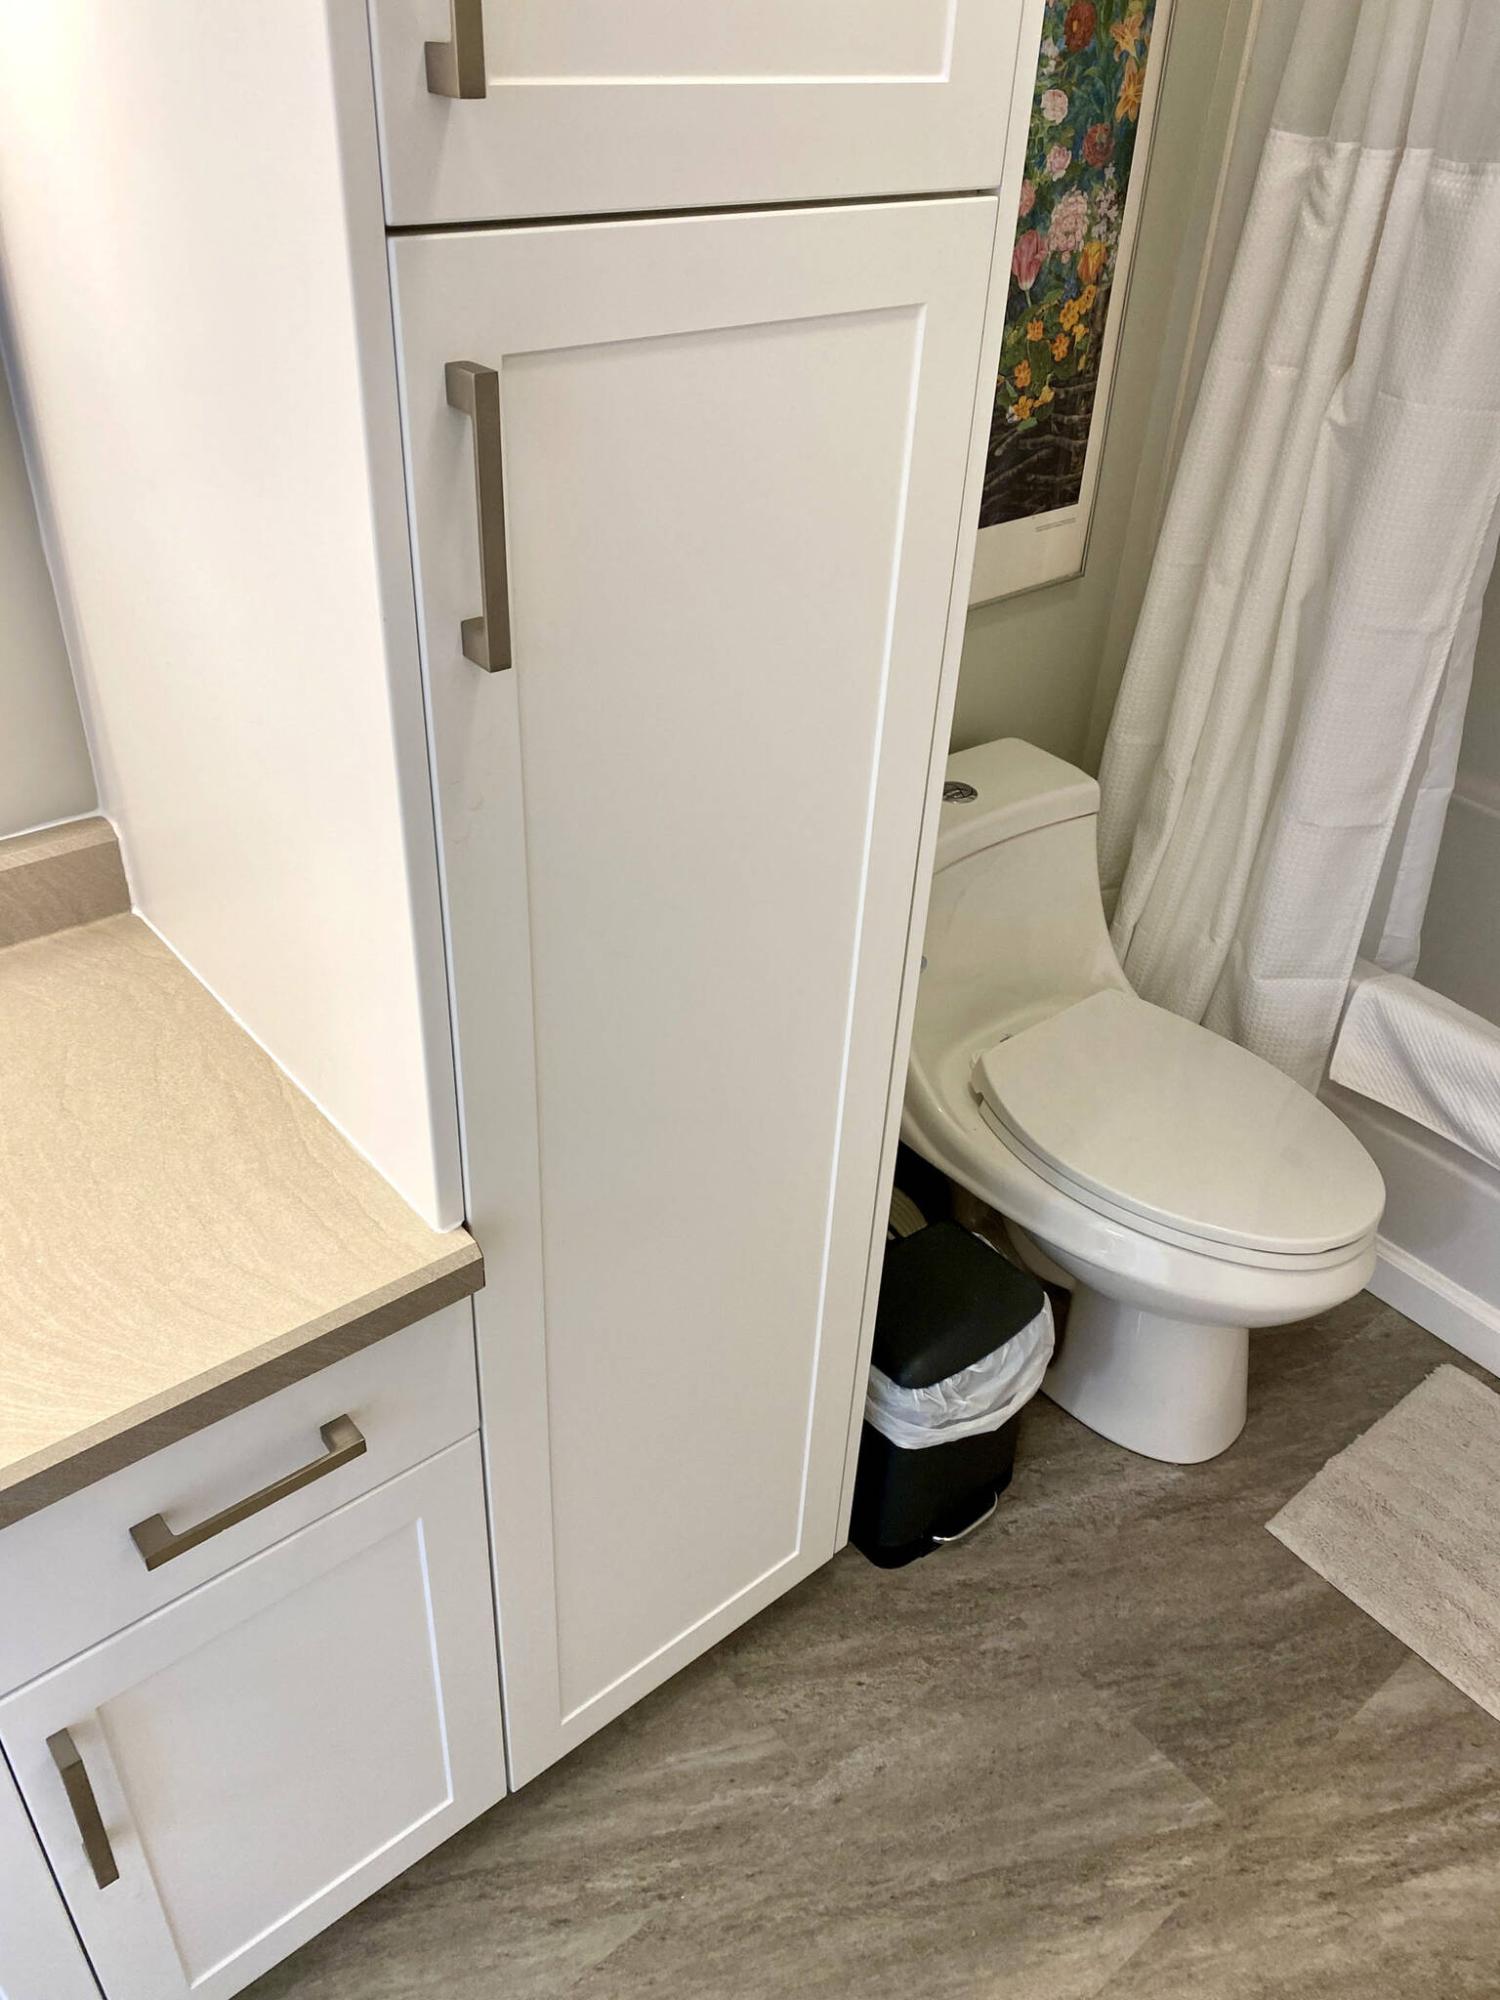
The cabinet doors and drawer fronts were replaced, and also adorned with new pulls.
Marc LaBossiere / Free Press
Light-grey vinyl-plank flooring was installed throughout, with white PVC baseboards along the perimeter.
When planning a bathroom upgrade, it is sometimes easiest (in theory) to gut the space completely and remodel the entire room. However, this is often cost-prohibitive.
When faced with budgetary concerns for a bathroom reno, my attention always shifts to the current vanity and cabinets: Are they worthy of being repurposed? Often when cupboards remain in satisfactory condition, incorporating them into the new design can save a fair bit of money. Provided the cabinets are in good shape and cater to the functionality desired, the doors and drawer fronts can be updated without tearing everything out.
For this job, the old bathroom’s esthetics seemed dated, straying far from the homeowners’ favoured colour palette. As such, the walls were first painted a light grey, prior to my involvement, to conceal the ostentatious lime-green paint that had clashed with the newly introduced themes throughout the house.
Beyond the walls, the existing tub and shower surround received a new shower faucet and cover, as well as a curved shower curtain rod that eliminates an awkward set of bi-fold doors that opened inward, greatly reducing available space within the shower stall. New light-grey vinyl-plank flooring was installed to conceal the old linoleum, and a modern, high-flush one-piece toilet is also a welcome upgrade.
Regarding the existing sink vanity and upright cupboard, the homeowners had intended to paint them, as they still functioned well and were in good shape, esthetically. However, the cabinet doors and drawer fronts were not in the best of condition.
As such, I suggested these elements could simply be replaced with a newer style in a desired colour. And to ensure consistency, any other cupboards would then also receive plant-ons in the same colour and style.
Careful measurements of these elements were provided to my favourite cabinetmaker at Cabinet Corner on Des Meurons Street. Once the new cabinet faces were ready, they were all delivered to the homeowners’ address.
On installation day, the new doors were locked into the existing hinge positions, which had been mimicked by the cabinetmaker. Slight adjustments to every hinge allowed the doors to be properly spaced and levelled with one another.
The plant-on piece facing the countertop was jigged to fit along the back wall and with the four-inch raised countertop backsplash, then fastened using one-inch particle-board screws from inside the upright cupboard. The plant-on on the far side of the upright was then secured in the same fashion.
Along the wall at the close end of the vanity, the existing spacer filling the gap between the wall and edge of the cupboard was replaced with a new spacer matching the colour of the new cabinet elements.
The drawer fronts were a bit trickier, in that the fronts themselves were a part of the drawer box, not just a face. To mimic the existing holes that fastened the front to the metal sides of each drawer, the existing screw locations were copied onto the backside of the new drawer front by drilling one quarter-inch through the old into the new. This allowed for precise screw-hole positioning and easy reconstruction of each drawer box.
Once completed, the drawers were placed into their respective tracks and adjusted to create a uniform gap along the tops of the doors already adjusted below. The last remaining front at the sink location is a decorative plant-on, held in place with spring-loaded clips.
With the doors and drawer fronts in place, the holes for the new pulls were introduced by creating a template. Once the handle location for each door and drawer was determined, clamps were used to hold the template in place as holes were drilled. The pulls were then fastened from the backside, using the machine screws provided.
And just like that, the old vanity and upright cupboard look completely updated, even though it involved only a decorative sheathing upgrade that proved to be very cost-effective.
The old adage, “if it ain’t broke, don’t fix it,” definitely comes into play now and again. Although the existing vanity and side cupboard did receive some needed attention, the cabinets themselves were in great shape, so why bother ripping them out if they continue to satisfy storage requirements?
Along with the other esthetic modifications to this bathroom, the simple yet effective replacement of cabinet doors and drawer fronts proved to be a great way to achieve an updated look without an exorbitant cost.
RenoBoss.Inc@outlook.com