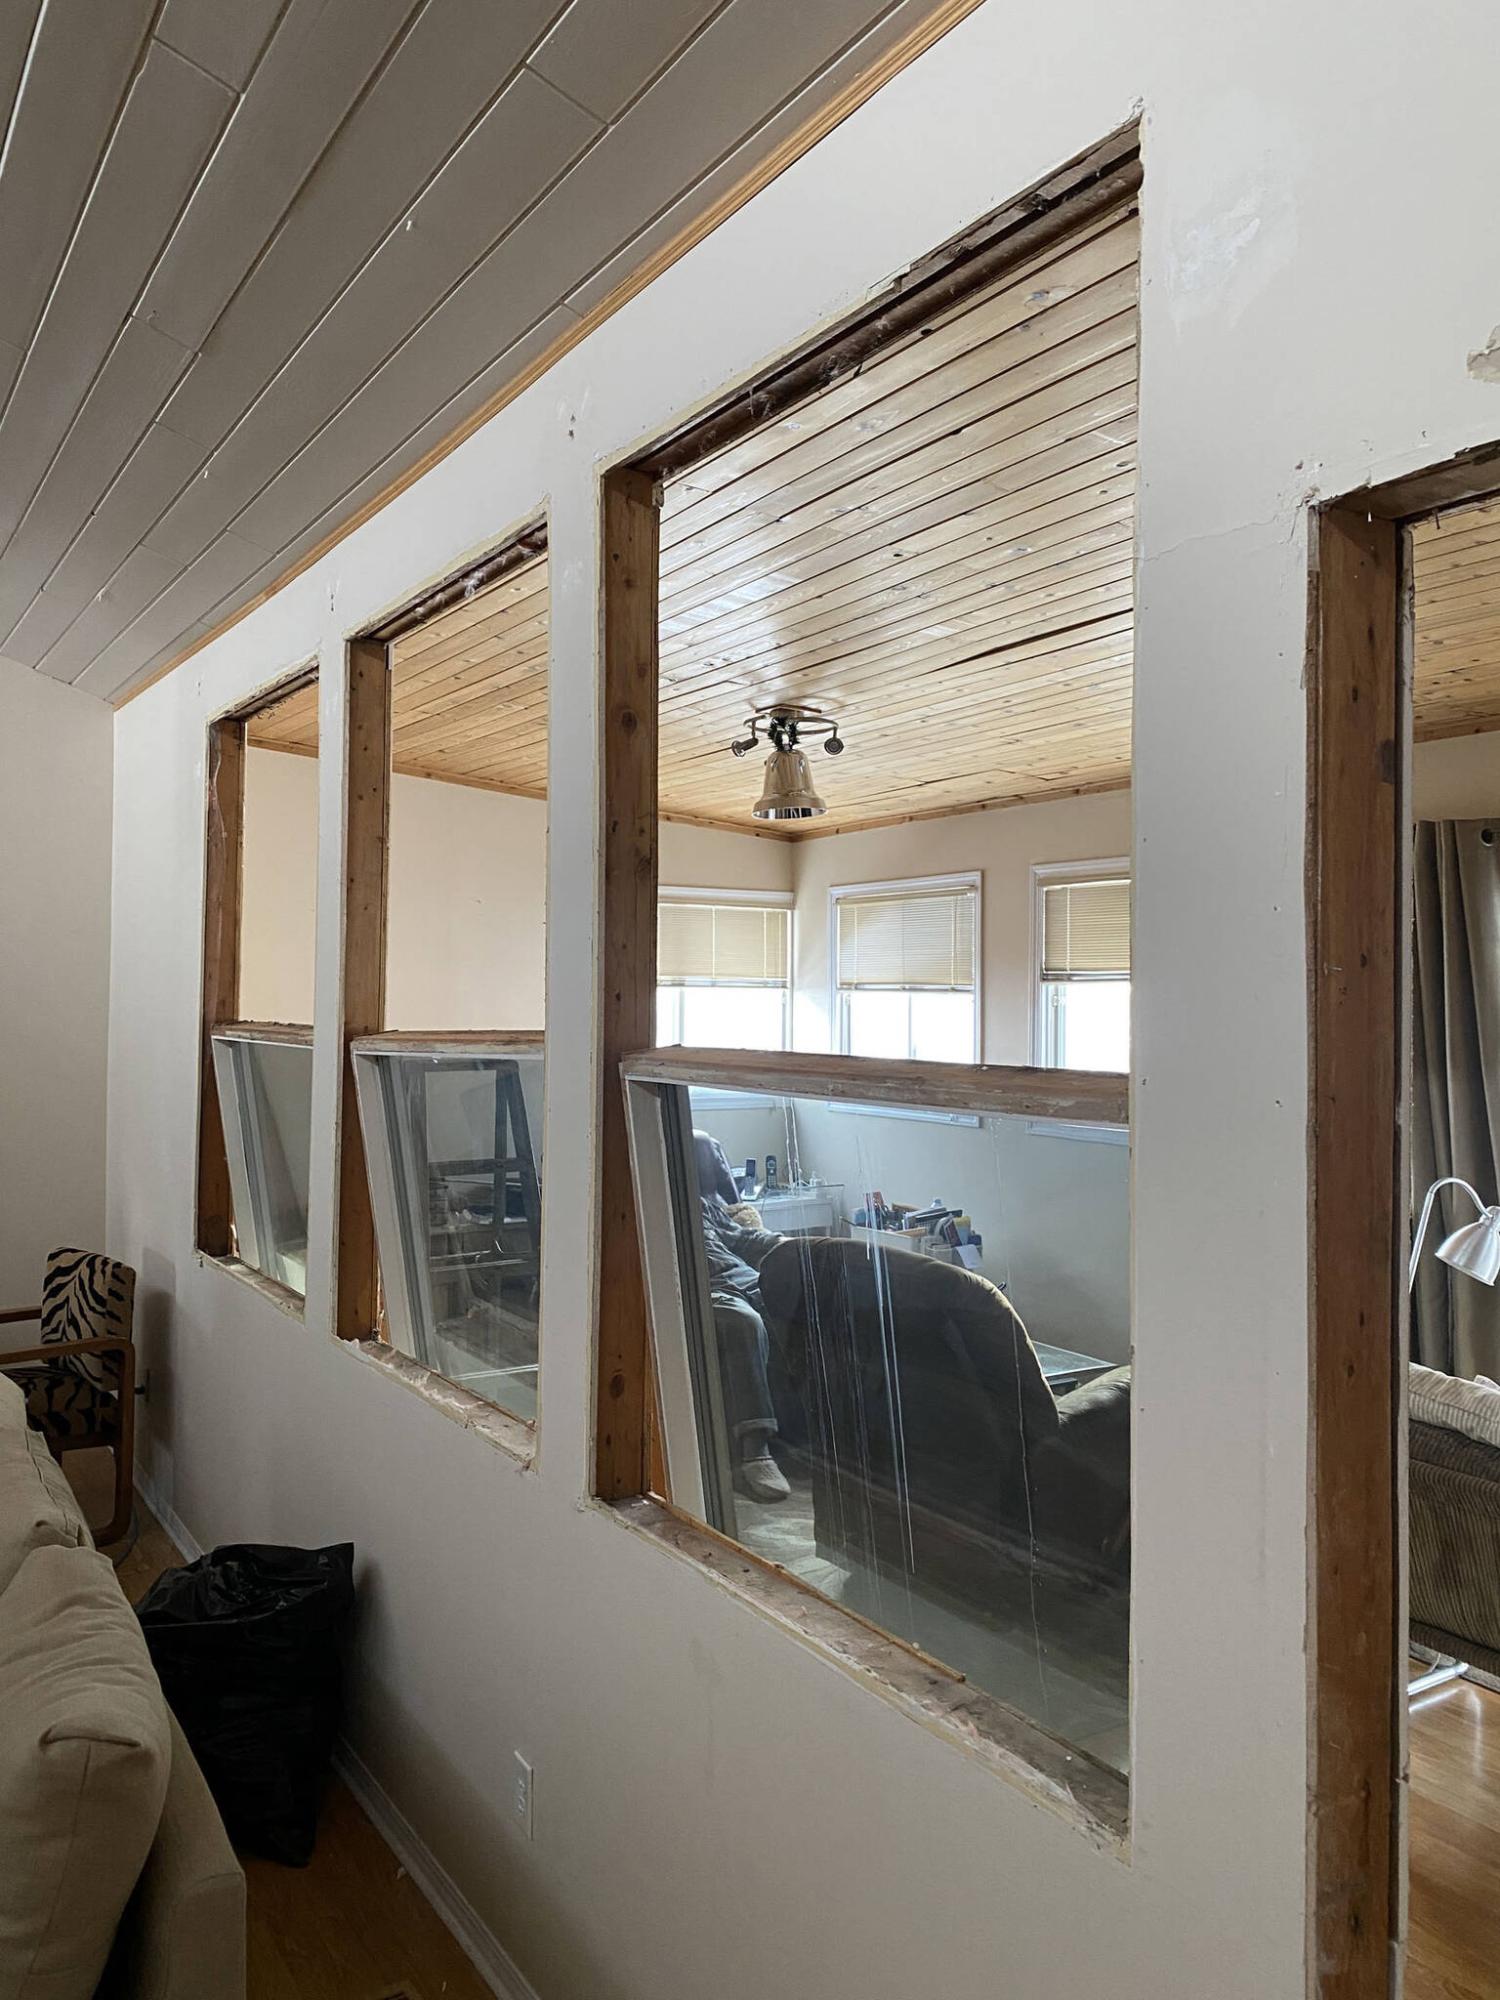
The three windows separating the addition from the existing house are finally removed after many, many years.
PHOTOS BY Marc LaBossiere / Free Press
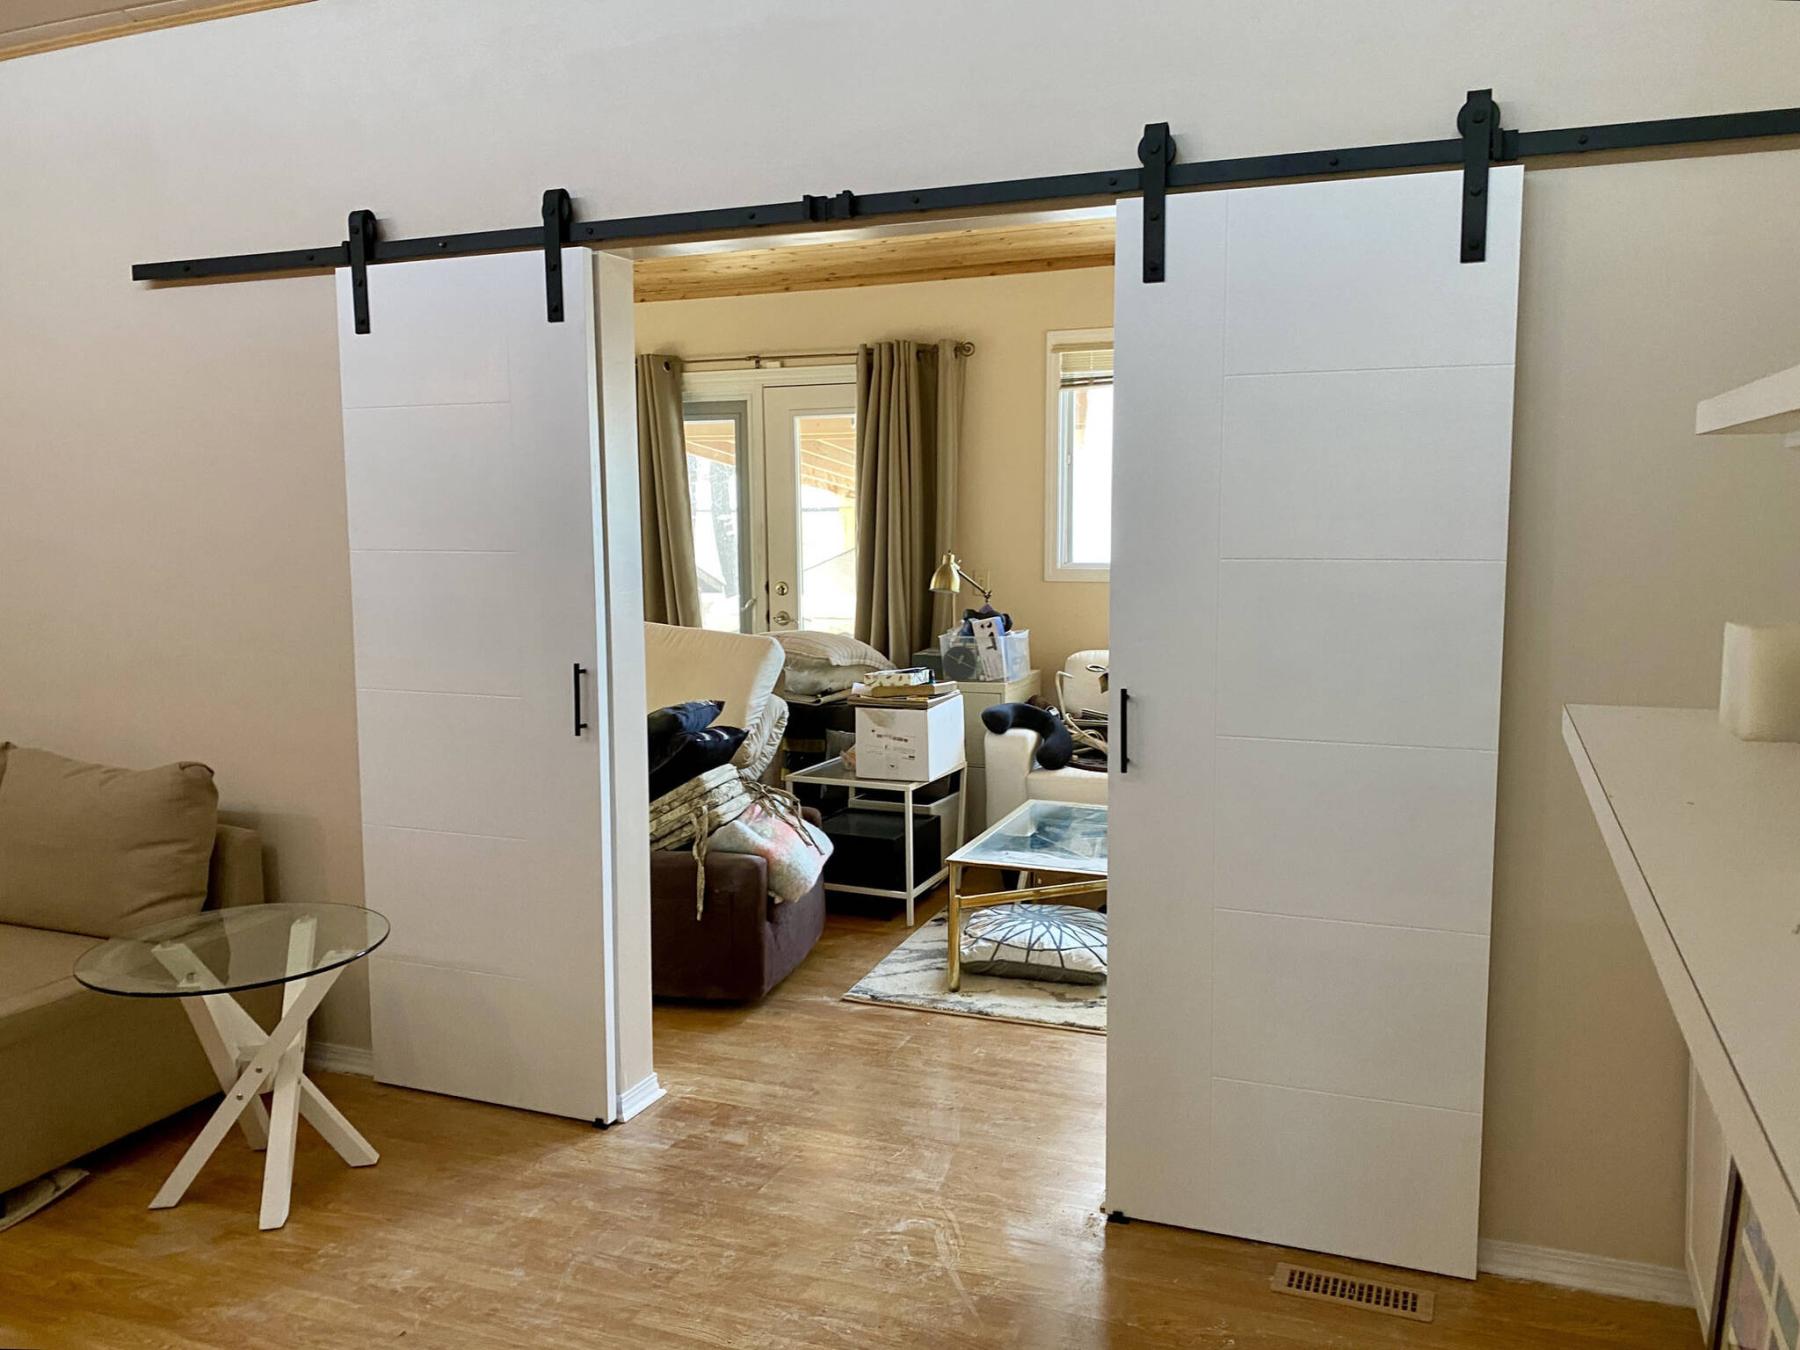
French-style barn-doors are introduced along the finished wall where the entryway to the rear addition was narrowed.
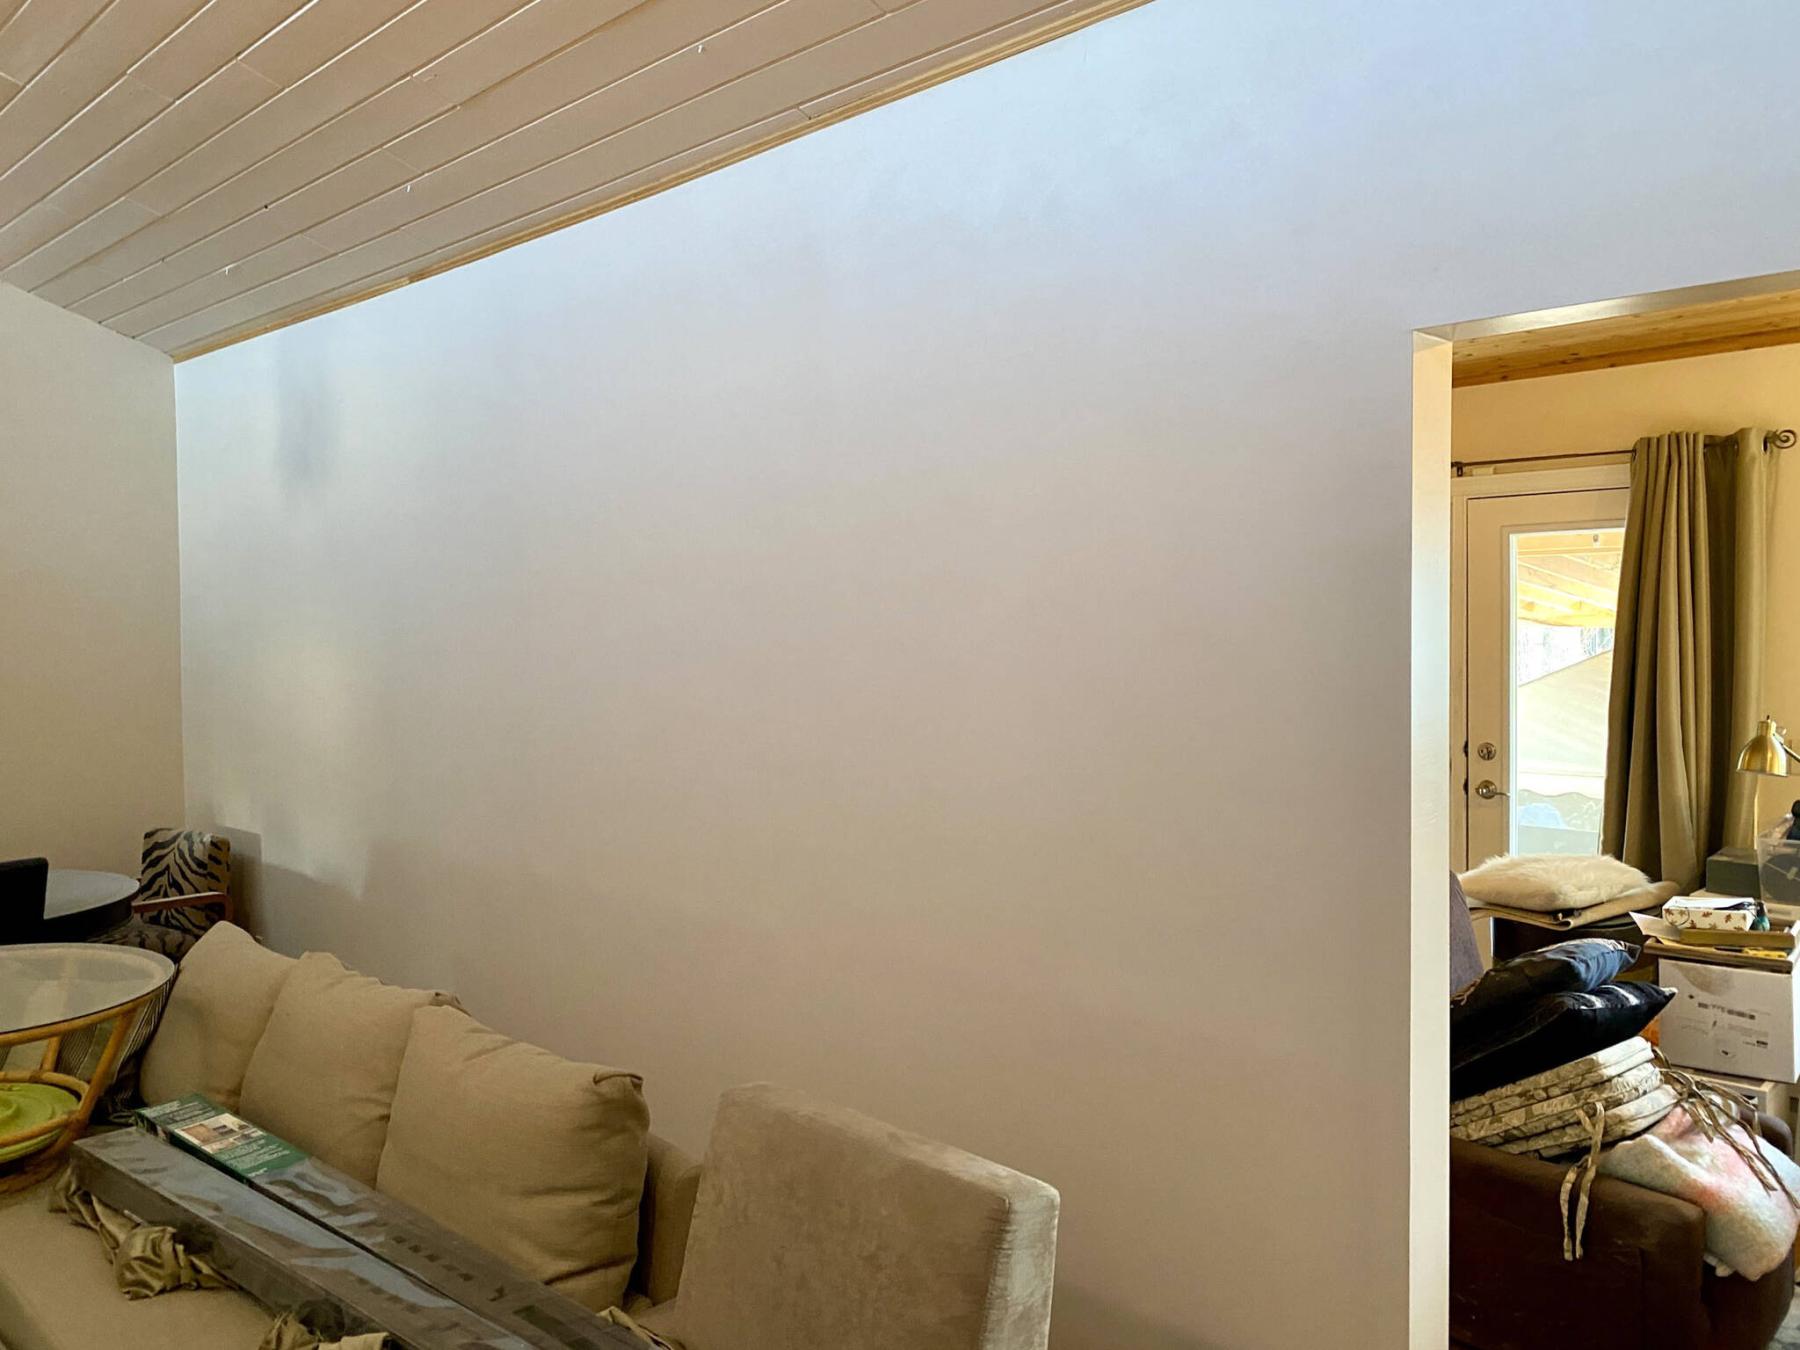
Once the painting process was completed, the updated interior wall was truly transformed.
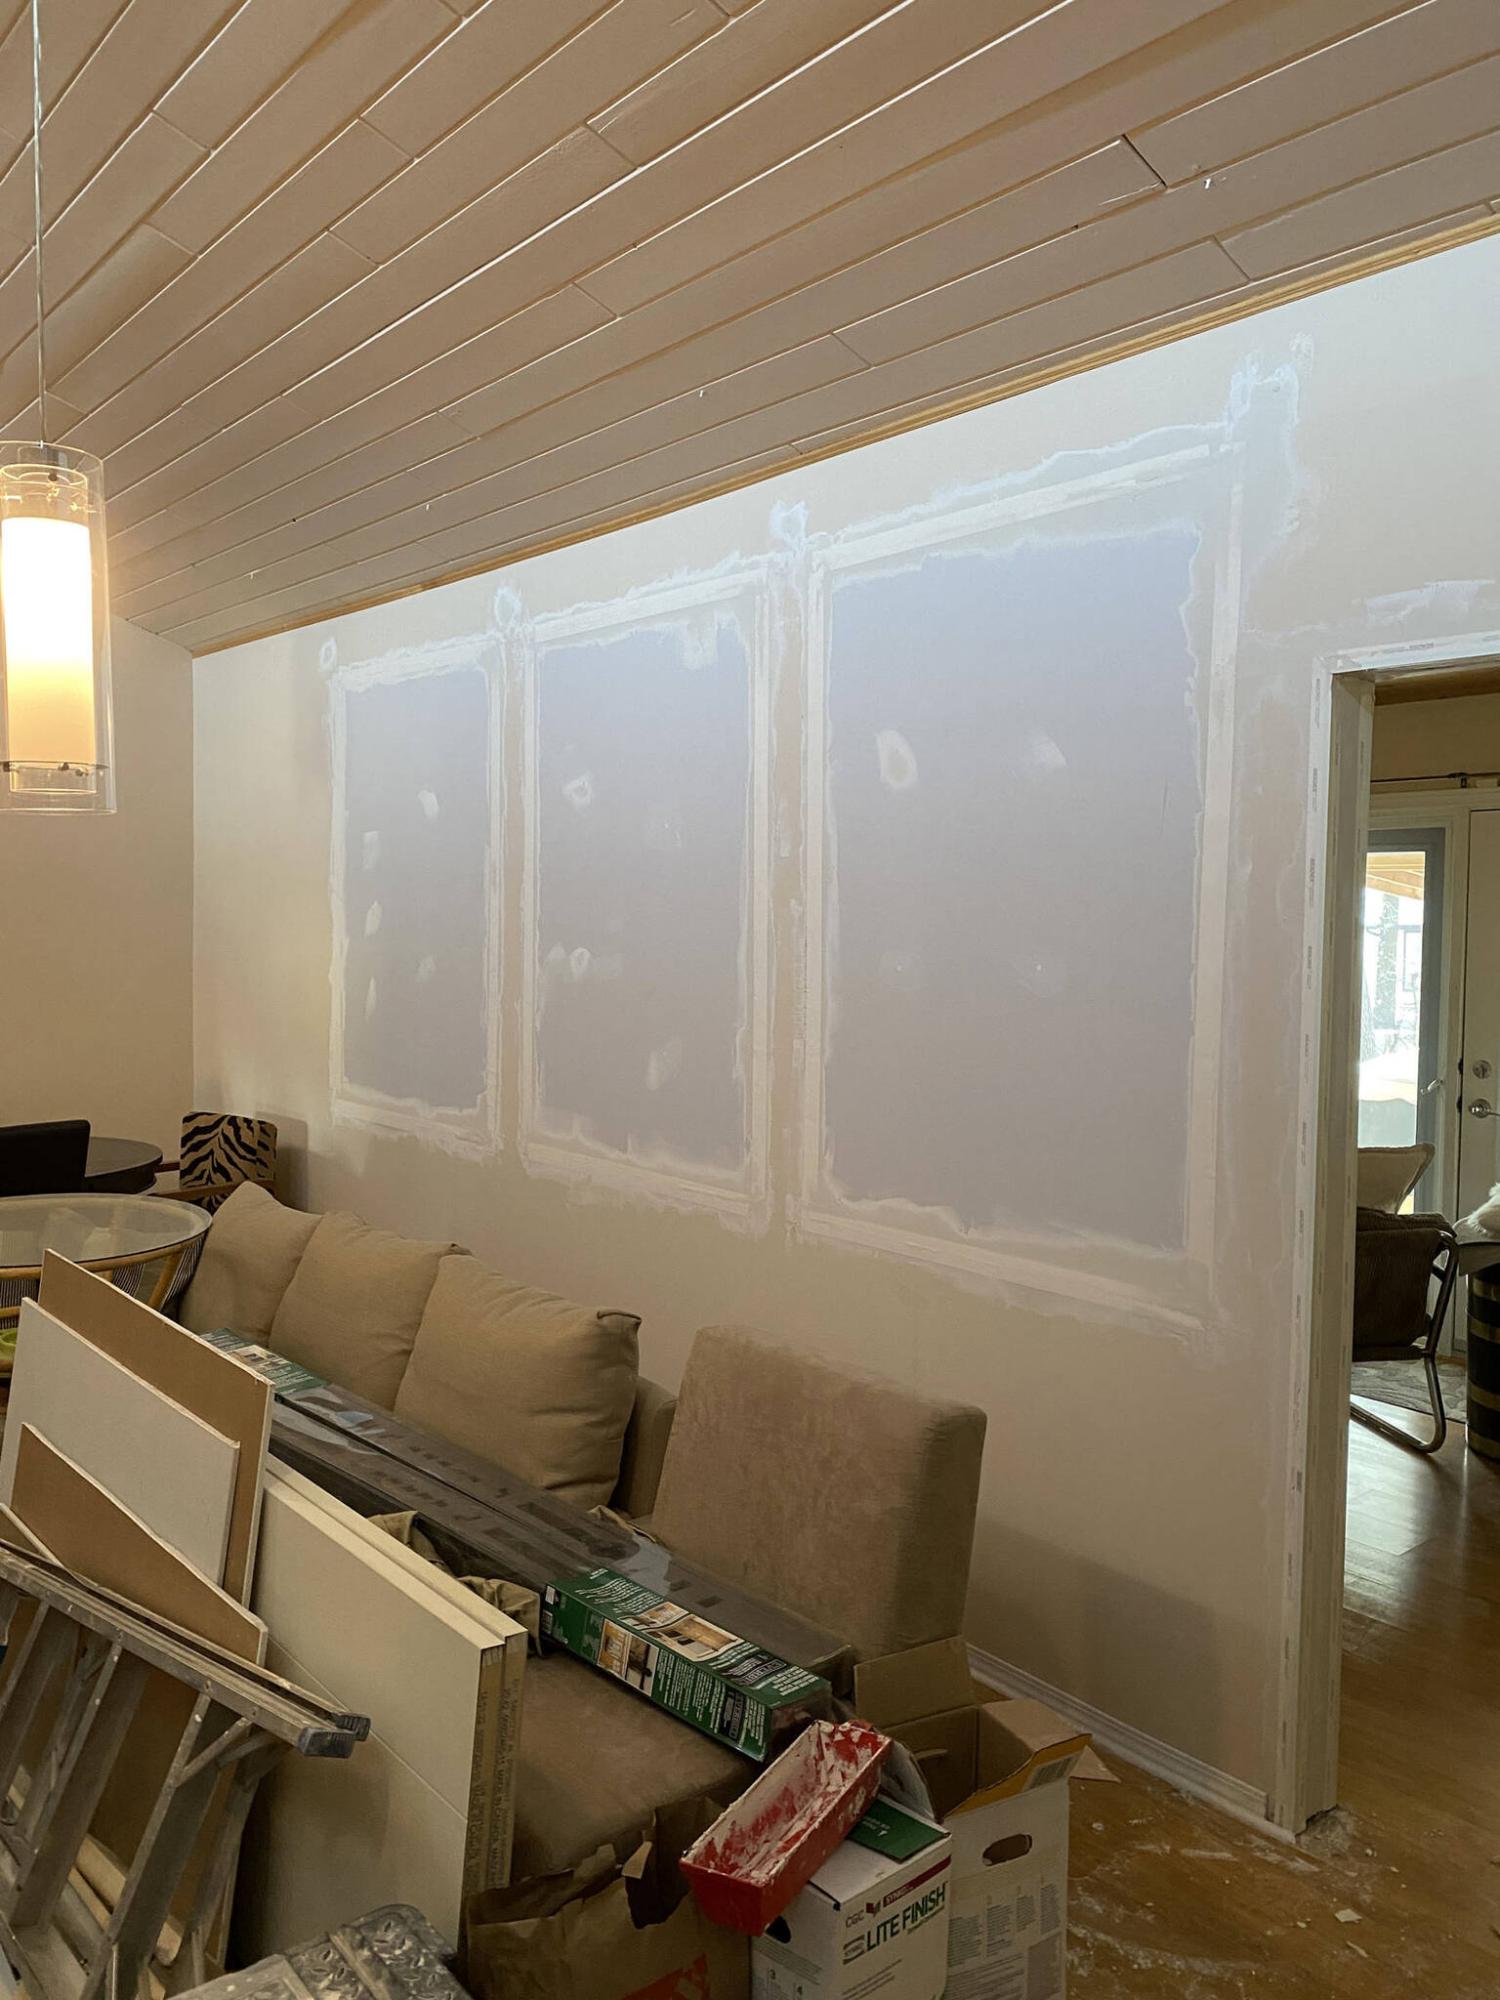
The drywall seams are taped and mudded, awaiting the painting process.
Long before my involvement, the homeowners of this split-level abode elected to introduce more interior living space by adding a new room along the back side of the house.
The existing “double back door” was converted into an entryway, while the existing three windows remained untouched. Although the added space greatly benefitted the functionality of the main floor, the windows had always made the addition feel unfinished. Recently, these windows were finally removed — a process that should have been undertaken long ago.
The process to fill in the wall where a window once existed is actually very straightforward. The original framing should include a lintel along the top of the rough opening, so adding framework within the opening is simply a matter of erecting studs on 16-inch centres, preferably placed in step with the existing studs along that wall.
In this instance, there were three 42-by-61-inch windows to be removed. Once the interior trim was unfastened from the original interior side of the window wall, the brick mould along the old exterior side was dislodged from the now concealed exterior sheathing. No longer fastened to the wall, the windows were then dismounted, and lowered onto the floor of the addition, ready to be hauled away. The openings were then cleared of any insulation and debris so the two-by-four framing could begin.
For each window, top and bottom horizontal supports were introduced within the openings, with vertical studs at every 16 inches. On the addition side of the framing, half-inch spacers were then added to the framing to meet the plane of the old half-inch plywood exterior sheathing.
With the framework in place, drywall was then cut and fastened to fit both sides of all three openings. The seams were then taped and mudded, with several coats of finishing mud to ensue. While this window-filling process was taking place, the existing 60-inch entryway was also narrowed to 48 inches using the same framing and drywalling process. This narrower entryway would better suit the impending barn doors chosen by the homeowner.
After the final coat of mud was allowed to cure, all surfaces were sanded smooth and the newly altered walls were primed and painted to match the existing wall colour. This step alone truly transformed the existing interior living space, making the living room seem larger for some reason.
Once the paint had dried, the existing baseboards were extended to meet the new shape of the narrowed entryway. The homeowner was amazed at how drastically and quickly this project had transformed their home.
The two decorative panels that were chosen to serve as French-style barn doors were then painted satin-white, and allowed to dry completely for the final tasks on the last day of the project.
Hanging barn doors to open as French doors requires two sets of barn-door track hardware. This can be a tricky installation as both tracks must not only be level unto themselves, but they must also meet at the same elevation where joined in the centre.
As such, the right track was installed first, whereby the leading edge was centred with the entryway opening at an elevation that allows a half-inch gap between the bottom of the door panels and the floor. Ensuring the track was perfectly level, the outer lag screws were installed to mount the track, with the inner lag screws added subsequently. The left track was mounted in much the same manner, keeping a close eye on lining up the tracks where they meet in the middle.
With both tracks mounted, barn-door stops were then installed along the tracks where required for the proper opening and closing function of each door. The roller mechanisms were then carefully mounted on each end of both doors, and carefully set onto their respective tracks.
After testing roller functionality, and ensuring the doors met at plumb and level, guides were then installed on the floor to keep the doors from rubbing against the walls. Pulls that match the barn-door hardware were mounted as handles roughly two inches from the inner edges of each door. Et voila, the project was complete.
The homeowners had likely grown complacent, accustomed to seeing the three windows as part of their interior space, still adorned with the old curtains that had been there before the addition was built.
Now that the wall is window-free, isolating the living room from the back addition, both spaces have been given a completely new lease on life, transforming not only the interior esthetics, but also allowing the homeowners an opportunity to re-invent each room and find how best to utilize the space. This was a long-awaited project — thankfully, the wait is over.
RenoBoss.Inc@outlook.com