Marc LaBossiere / Winnipeg Free Press
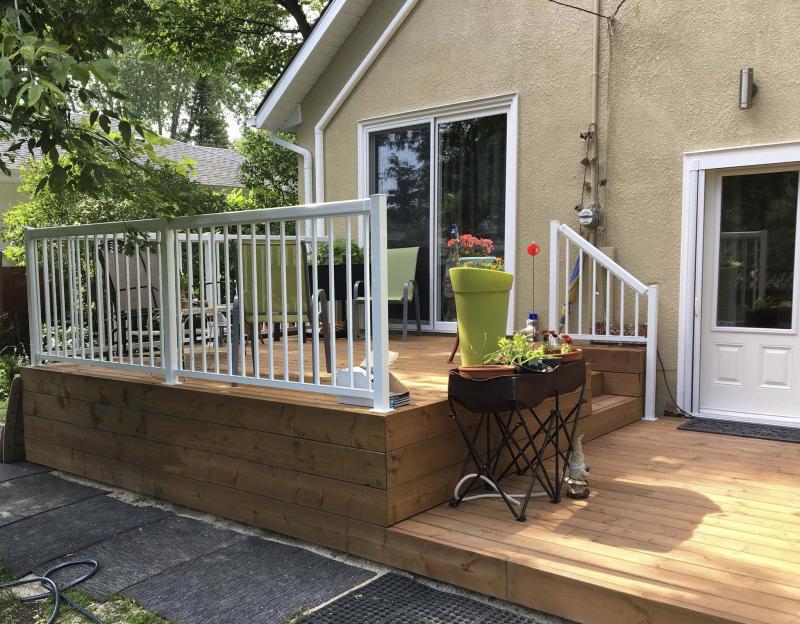
Back two-tiered deck, which showcases the new brown-treated construction, with white aluminum railings consistent with the front porch/deck.
Marc LaBossiere / Winnipeg Free Press
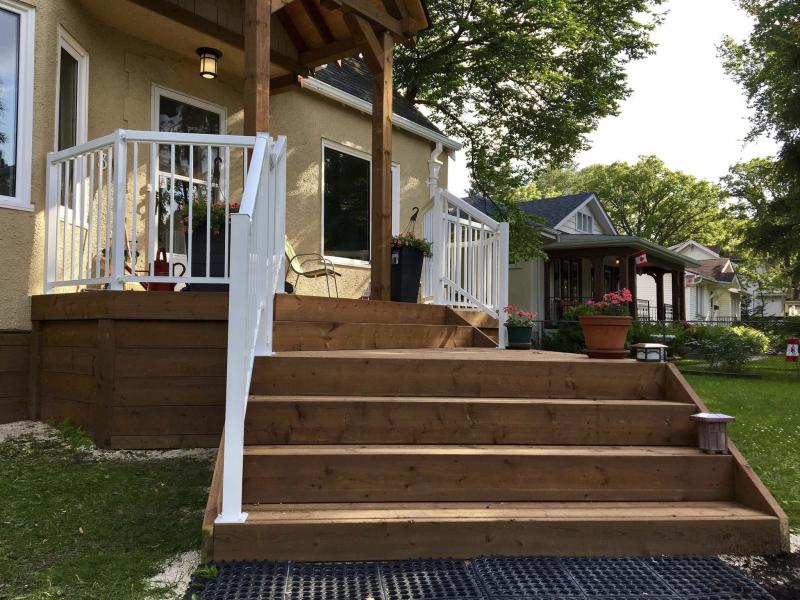
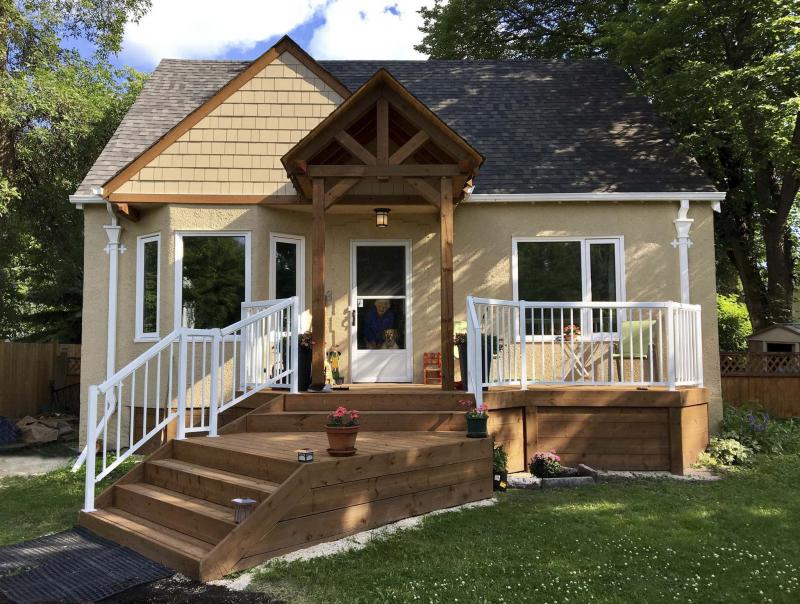
Front facade of house, which showcases the new brown-treated front porch/deck, with white aluminum railings. Netty and her dog Presley approve!
There is no better feeling than the sense of accomplishment that comes from a completed project, especially when it exceeds the client’s expectations. Netty Aptekman’s wish list was short — she wanted a back deck that would allow her to simply waltz through patio doors onto the higher tier of a two-tiered deck, and a front porch to replace the ugly concrete front steps that had sunken forward over time.
Her wishes have been granted.
The back deck was completed over a weekend, and as far as deck builds go, was more or less business as usual. My focus here will be primarily the front porch/deck — the design has truly transformed the front facade of this house into something breathtaking and everlasting.
My involvement in the front porch project began after the timber-look portico had already been constructed. The existing concrete front steps were in rough shape, listed forward and were difficult to negotiate. Aptekman recalls "the old concrete steps were slanted, and a hardship for me." It was essential to create a pathway that was inviting, with easy access to the front door. The design would also require a tie-in with the already-constructed timber portico. Upon further discussions, Aptekman also revealed her bay window was very frigid during the winter months, and wondered, "was there a way to prevent the cold drafts from coming in?" She was assured we could insulate below the bay window, and extend my front porch design ideas to include the bay window as part of the design. After a few sketches, the build was set to begin.
It would be a two-day build, using strictly brown pressure-treated lumber for the deck’s framing, topping and fascia. The initial step involved securing the ledger boards to the house at the proper height, to ensure that once the top decking was installed, the front door had adequate clearing to open and close. The framework consists of two-by-eights, set on laminated two-by-eights that sit on a series of adjustable deck jacks atop four-by-four posts and concrete deck pads. The skeleton of the upper tier includes many angles, which ties-in with the nature of the bay window on the opposite side.
Once the framework for the upper tier was in place, I began to construct the lower tier (stairs landing), which jets toward the front driveway at an overall 45-degree angle, from the front face of the upper tier. Stair stringers were then custom cut on site and affixed to the lower tier.
The top decking is two-by-six throughout. For flow, the top boards shift by 45 degrees on the lower tier, which leads you up and onto the main porch/deck. Because the entire porch would be fully enclosed below, it was clear to me from the onset how to tie-in the bay window area — once the framing, insulation and vapour barrier were secured below the bay window, the two-by-eight fascia, which envelops the entire porch/deck using horizontal boards, would continue through and under the bay window area. This feature balances the deck, contributing to the illusion the deck is centred within the front of the house, when in actuality, the bay window prohibits the centring of an elongated front porch.
The six-by-six corner posts, directly below the high row of mitered two-by-eight fascia boards, are set flush with the exterior of the upper fascia. The lower rows of two-by-eight fascia boards are inset by one-and-a-half inches, the width of a board — this highlights every corner post, which in turn ties in nicely with the existing timber-look of the six-by-six portico posts — a design requirement.
White aluminum railings with thin pickets were chosen for both the front and back decks. I had suggested that white, top-mounted railings would blend nicely with the white trim of the windows and doors. And to not distort the grand portico entrance, the very front of the lower tier should be left without railings — always best to leave an unobstructed view of the front entryway, if and when possible. The back deck’s railings form an L-shape at a perfect 90-degree angle, and were easily installed. However, the front porch and deck boasts a multitude of angles, twists and turns. From a railing installation perspective, this was a toughy.
Luckily, my commercial rep, Scott Schappert at the RONA on Kenaston Boulevard, prepped a railings materials list that was flawless — I had exactly what was needed on-site to get the job done efficiently.
Netty is so sweet, and was very kind to me while I was hard at work — "Marc, would you like some water? Or some coffee?" Her coffee was fabulous, and the fresh cherries… boy, hard to eat just one at a time! It was always a welcome break to chat with Netty and spend a little time with Presley, her beloved four-legged companion. I always knew we were on the right track when Netty was smiling, and Presley’s tail was waggin’. I couldn’t help but smile the first time she tested the new front porch stairs, Presley by her side. "Now, I can just walk up or down so easily… and my dog Presley seems to love the lower tier, where he lays down to keep a watchful eye on neighbourly passersby."
A fun project, to say the least. The complexities of the design are subtly concealed by the inviting attributes chosen, which discretely yet thoroughly enhance the curb-appeal of this house. With the proper design, it is always possible to create functional aesthetics. Once I had completed the final leg of railings, Netty and I sat in the sun on the back deck. She suggested I should include her project in one of my columns. She then continued, "I’m very happy, exactly what I was looking for… and the craftsmanship is second to none — good job, Marc. Thank you".
No, thank you! It was my pleasure, Netty. I truly enjoy projects that make people smile.
BossEnterprise@outlook.com