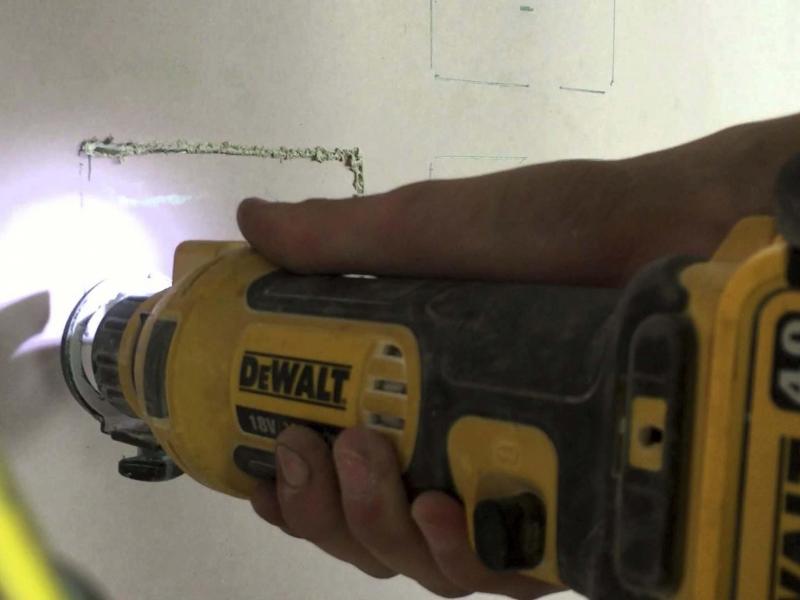
Using a cut-out tool allows precision when following the outer edges of the electrical box.
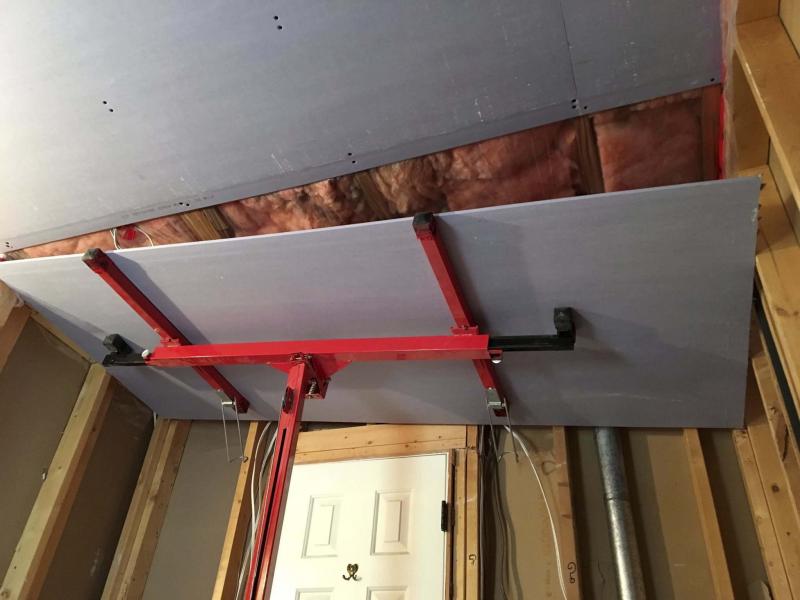
A drywall lift hoists the ceiling drywall into place at Garth Nemy’s bathroom reno, eventually allowing it to be secured safely.
Those four-by-eight sheets can be somewhat awkward to lift into position... yup, you got it — I’m referring to drywall.
The first time I encountered drywall in an installation setting, I had no idea how to cut it cleanly, let alone precisely. I was handed a utility knife and a straight edge — "just score the good side, and snap it in two," were my only instructions.
Who would have thought all you needed was a T-Square and a utility knife to prep sheets of drywall for installation? That is, of course, an over-simplification of the facts. Although it is true most cuts can be achieved in this fashion, a few handy gizmos at your disposal will increase overall efficiency and precision during the process.
Before the taping, mudding and corner-bead stages can begin, drywall must be properly secured to the framing. Traditionally, the first surface to receive drywall is the ceiling — drywall is fastened to the joists or trusses, and secured with drywall screws doubled-up at roughly eight-inch intervals. Whether the framing above is on 16-inch or 24-inch centres, it is imperative that the fasteners hold the weight of the drywall.
By doing the ceiling drywall first, the sheets of drywall along the walls will lend added support to the outside edges of the ceiling drywall once installed. The first sheet set into position will dictate the layout of the drywall for the entire ceiling.
Ensure that the bevelled edge on the long side of the drywall rests at the midway point of the joist or truss on which it is being fastened — the edges of the subsequent sheets that are installed adjacent to the first sheet should then rest roughly midway through their respective joists or trusses. It is also important to stagger the sheets on the long sides, to lessen the appearance of seams during the mudding and taping stage. Sounds simple enough — but, how do the sheets get hoisted into place?
An indispensable tool, the drywall lift, makes sheeting ceilings easy — an entire ceiling can be achieved by just one person in a relatively short amount of time.
The lift features an adjustable top platform which holds the drywall level or at an angle, three caster wheels allow the lift to be easily positioned, and a convenient hand crank lifts loads up to 11 feet high. Provided the floor area is clear and the lift can be rolled into position, sheets of drywall can be hoisted into place and held there, until the sheet is adequately secured to the ceiling framing. By using four-by-eight, four-by-10, or even four-by-12-foot sheets, the ceiling surface area takes no time to complete with a drywall lift at your disposal.
Once the ceiling drywall in place, it’s time to tackle the walls.
Although drywall can be installed on wall framing horizontally or vertically, I prefer the latter — vertical sheets ensure all seams have bevelled edges, which are easier to conceal during the taping stage. With eight-foot ceilings, four-by-eight-foot sheets of drywall work perfectly.
It’s simply a matter of pre-measuring your wall heights, and ordering drywall accordingly. Installing the drywall on the wall can be awkward – the top edge of the wall drywall should rest flush against the underside of the ceiling drywall. Lifting a four-by-eight-foot sheet, holding it in position while trying to secure it in place can be challenging.
There is a handy little tool for this — a drywall lever. Basically, it’s a tiny lever you place on the floor, under the middle of the bottom edge of the sheet of drywall, that you can step on. Your body weight then lifts and holds the sheet in position, allowing you to secure it in place with drywall screws at roughly every eight inches on every stud. Once again, this tool allows one person to sheet entire walls without much effort.
The last tool on my list of "must-haves" regarding drywall installation is less common. However, in my opinion, it increases precision tenfold when properly used — the drywall cut-out tool. Most ceilings have at least one octagonal light box, or an array of pot lights for lighting, and walls have the occasional light-switch and a plethora of outlets.
These must be allowed to show through the drywall, for installation of the various aforementioned services. Traditionally, a utility knife is used to cut out each of these holes. Sometimes they are pre-cut before the sheet is installed, which increases the potential for error (even when measuring twice and cutting once). A faster, and more precise way, is to use the powered cutout tool. Here’s how it works:
The cut-out tool looks much like a drill, with a small bit. The bit is merely a half-inch, or so, long, and the surface from which it protrudes is flat. The bit acts like a quick cutting tool, and rapidly slices through the drywall.
Once the drywall is mounted, with the intended hole location having been pre-marked, breach the drywall in the middle of the intended hole and find the edges of the electrical box by moving the cutout tool along the surface of the drywall. By running the bit along the outer edge of the electrical box, it is possible to cut out an exact hole for each box, in an amazingly short time. Despite the dust it creates, it has become my preferred method of cutting out holes in drywall.
Drywall installation is a forgiving task – it really doesn’t have to be perfect. Why? The mudding and taping stage will hide most drywalling flaws. It is important, however, to ensure that every sheet of drywall is properly secured to the framing behind it — there can be no movement of the drywall. Once the sheets are taped and mudded, any slight movement will promote cracks and chipping of drywall mud. So, use lots of screws and fasten those boards properly.
With all the time you’ll have saved by using the handy drywall gizmos, you can afford to spend more time on extra screws!
BossEnterprise@outlook.com
Choice of Photos:
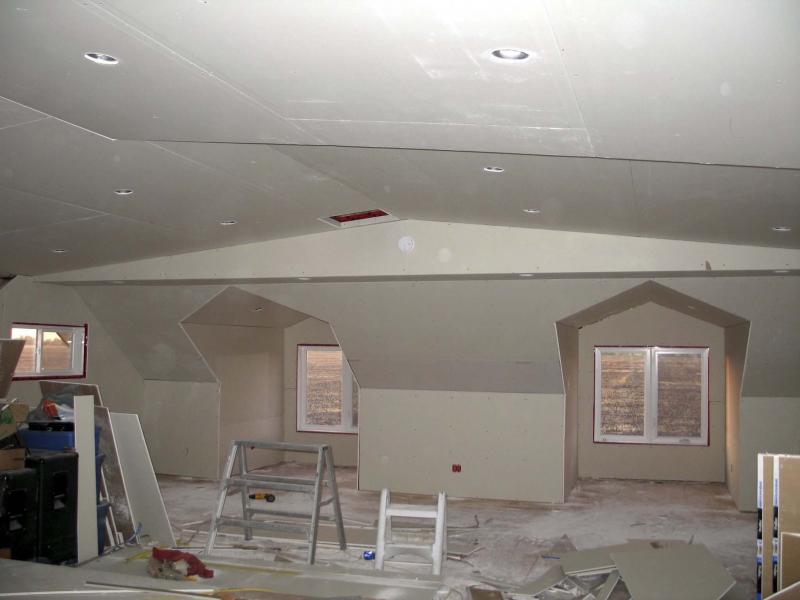
Studio Drywall.jpg, drywall stage completed in Marc’s studio, which highlights the variety of angles in the space
…photo by Marc LaBossiere
Ryan Drywall.jpg, drywall stage completed nearly completed at Duane Ryan’s lower level, which highlights the variety of angles in the space
…photo by Marc LaBossiere
Drywall Lift.jpg, drywall lift holds the ceiling drywall in place at Duane Ryan’s lower level, allowing it to be secured safely
…photo by Marc LaBossiere
Drywall Lift2.jpg, drywall lift hoists the ceiling drywall into place at Garth Nemy’s bathroom reno, eventually allowing it to be secured safely
…photo by Marc LaBossiere
Drywall CutOut.jpg, drywall cut-out tool easily cuts through drywall with precision, by following the outer edges of the electrical box behind the drywall
…photo by Marc LaBossiere