Renovation & Design

Renovation & Design
Aluminum wiring requires a professional
Question: A family member recently bought an older home, built in the 1970’s, which has aluminum wiring. The insurance company said that all the aluminum wiring connections would have to be checked by an electrician and all the receptacles changed to meet current safety codes. Is this a legitimate concern, or just another reason for insurance companies to look for ways of dodging their responsibility, jack up the premiums, or not pay out claims?
I have been doing some research and are “pigtails” allowed for all types of connections in Manitoba? Otherwise, will I have to buy all new expensive duplex receptacles rated for aluminum?
— Thanks, Ben
Answer: Concerns with overheating and electrical fires are a true concern in homes built with aluminum wiring. Pigtailing all the junctions in the home that have aluminum wires should be fine, as long as it is done with proper connectors and other safety factors are all taken into consideration.
Aluminum wiring was used in North America for residential branch wiring from the middle 1960s to the mid-’70s. In our area it is commonly seen in homes constructed from about 1967 to 1974. That may be due to the conservative nature of the builders at the time, who were not keen to use newer building materials until they were proven to be reliable. The concern with this type of wiring — overheating — was initially seen at duplex receptacles in the very early ’70s. This overheating would normally be observed first at the screw connections for the wiring at the sides of the devices. There were also signs of oxidation at those points, and it was discovered that the metal alloys used for the receptacles were not compatible with aluminum. Oxidation would lead to micro gaps between the metal components, which leads to arcing, overheating, melted plastic sheathing, and even fires.
There may also be other reasons that contribute to the overheating issues with aluminum wire due to the nature of the metal itself. Aluminum wire was used at the time because it was less expensive, lighter, and easier to transport than its copper equivalent. It is also not as good a conductor as copper, so wiring one size larger was needed for the same size circuits for proper conductivity. Unfortunately, aluminum is also much softer than copper, which makes it more prone to crushing and breaking when installed. Strong-handed electricians, used to cutting, bending, and fastening stiffer and more durable copper wiring may not have properly adapted to the weaker new material. Too often, the soft aluminum was crushed and flattened at the screw attachments on receptacles, making it thinner at the junctions and more prone to overheating or breaking when under load. It also expands and contracts more than copper, when heated and cooled, raising the risk of damage at tight connections.
By the early 1970s, newer duplex receptacles were developed that were constructed with other metal alloys that did not oxidize or corrode when connected to aluminum wires. These original devices may be found in some homes built in the early to mid-’70s, or retrofit into others where the original receptacles have been swapped out. The adoption of these new devices almost eliminated the fire hazard but some problems still occurred, likely due to the installation issues noted above. After that point, all builders reverted back to using copper wiring and the situation drastically improved. Most homes that still had aluminum wiring and original fixtures were fine, likely due to more careful electricians and no overloading of circuits.
The two possible fixes for the aluminum receptacle issue are replacement with CO/ALR rated devices, or pigtailing all existing connections. A pigtail is a short piece of copper wire with one end connected to the electrical device, and the other to the aluminum wire. This is normally acceptable to the municipal building inspectors, even preferred, as long as several items are also included in the upgrade. The wire nut connectors, or Marrettes, have to be special ones designed for this purpose. They also should be filled with antioxidant paste, covering both the exposed aluminum and copper wires, to prevent arcing. This repair should be done at all electrical junctions in the home, which includes receptacles, switches, lights, junction boxes, and panels. The panels may only require antioxidant paste installed on the smaller circuit wiring, as all multi-stranded wiring should already have it in place from the original installation. This may be especially important, as most of the evidence of overheating and melted wire sheathing I have seen during inspections is inside panels.
Overheating, arcing, melted wire sheathing, corrosion and fires are all well-documented biproducts of the use of aluminum wiring for residential circuit branch wiring. On numerous occasions, during typical pre-purchase home inspections, I have seen heat damaged receptacles in electrical boxes, as well as charred and melted wire sheathing inside panels, once the covers are removed. Inspection and pigtailing of all connections containing aluminum wiring in the home should be done by a licensed electrician, not only to meet insurance requirements, but for the overall safety of the occupants.
Ari Marantz is the owner of Trained Eye Home Inspection Ltd. and a Registered Home Inspector (RHI)(cahpi.ca). Questions can be emailed to trainedeye@iname.com. Ari can be reached at 204-291-5358 or check out his website at trainedeye.ca
Renovation & Design
Manage snow runoff to help keep old garage dry
Question: I have a 40-year-old double garage in which water seeps through the bottom of the walls, as the piles of snow outside melt, creating puddles everywhere inside. What do you suggest to remedy this? Thanks very much for any insights, Barb.
Answer: Water leaking into an older garage during the spring thaw may be difficult to address without major, costly upgrades. Replacement of the floor slab and lifting the older building may be possible but will depend on the overall condition, to determine whether it is feasible, or not.
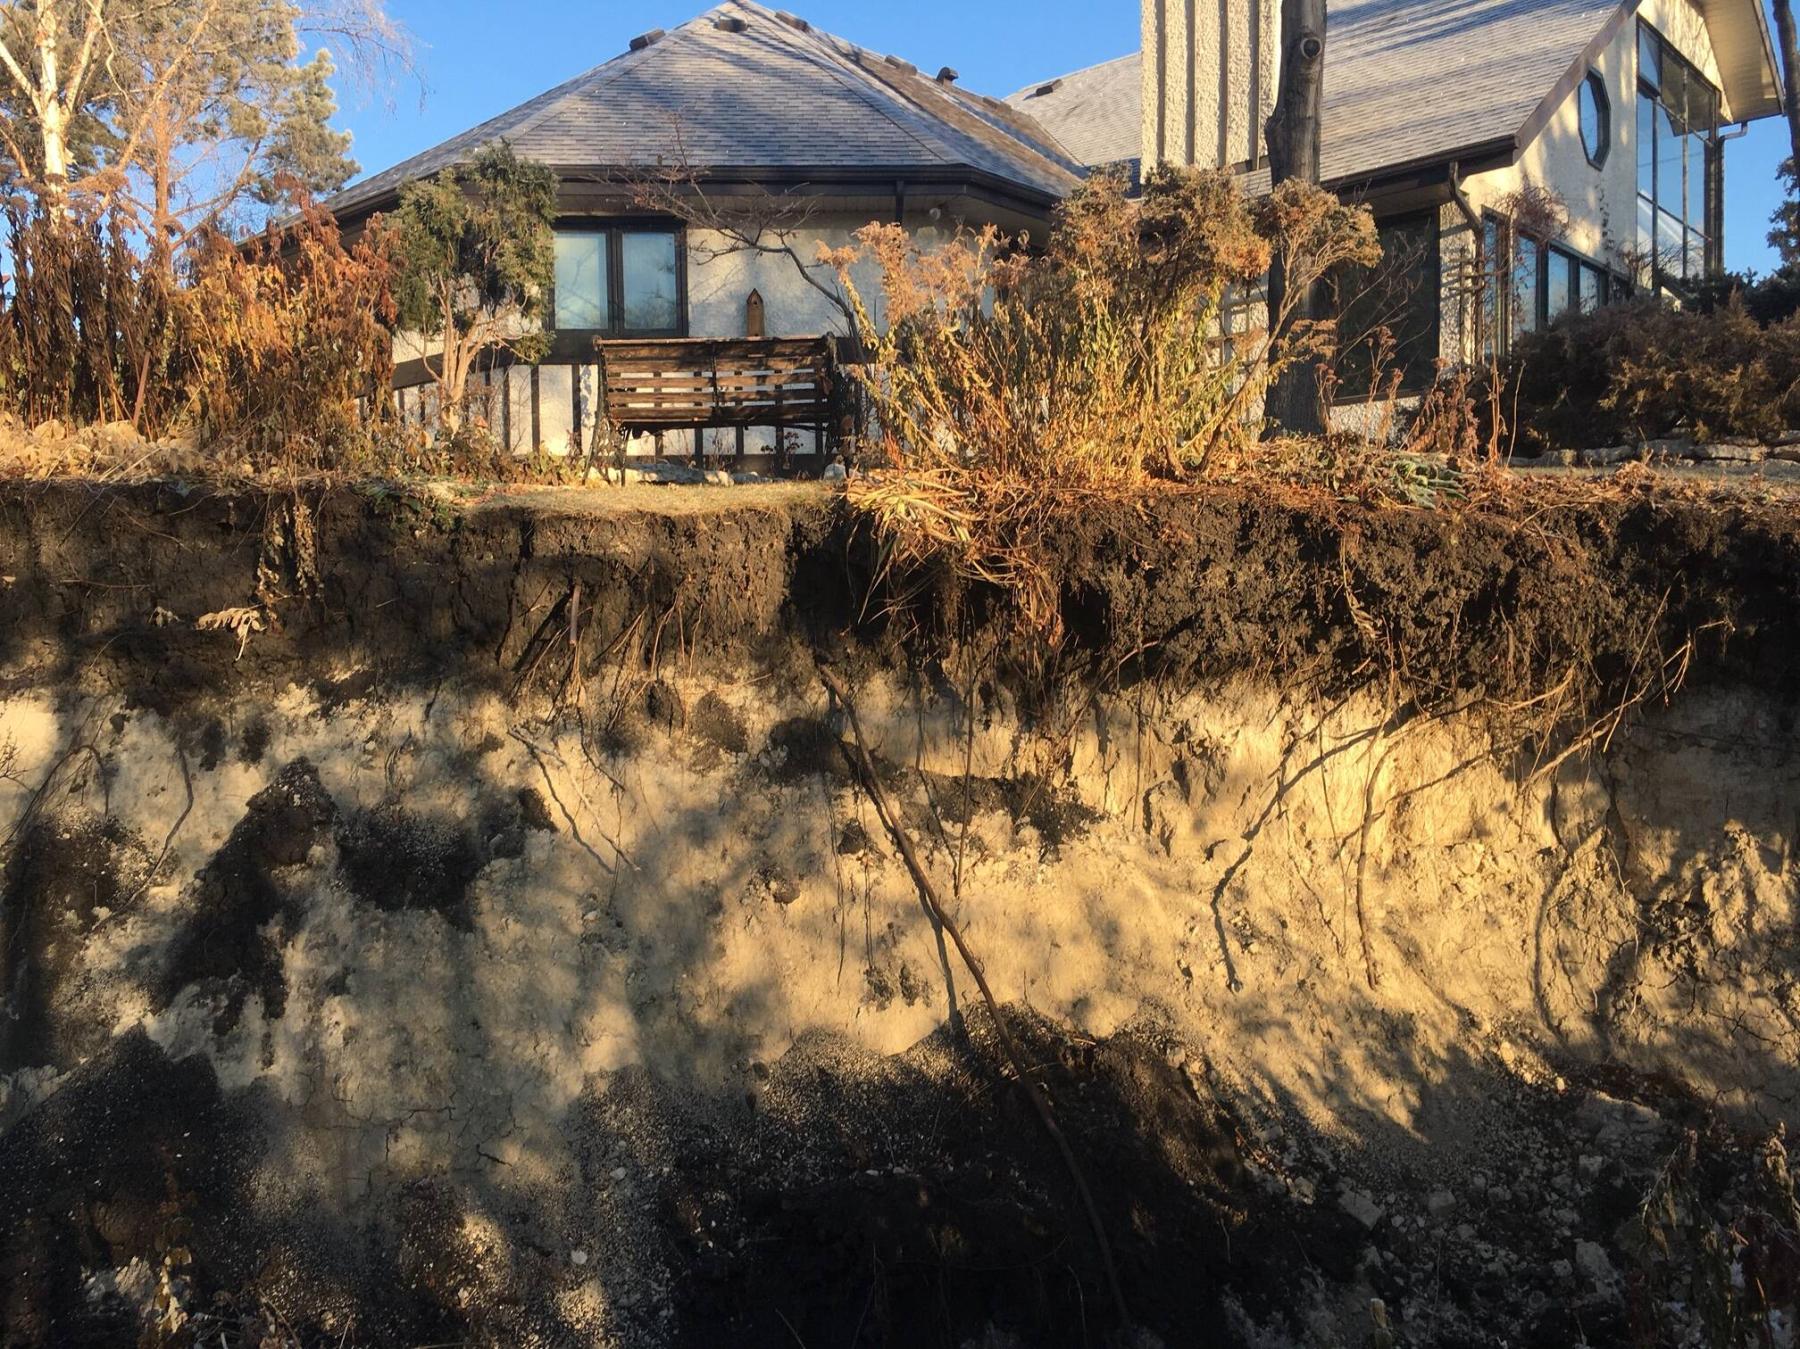
Spring seepage onto the floor of an aging garage is all too common, and may be inevitable, due to several factors. The primary reasons for this are likely due to soil erosion and settlement of the floor and building above. As any homeowner who has lived in our area knows, exterior components will move seasonally, due to our expanding and shrinking soils. These clay soils are affected by moisture content and will push fences, decks, sheds, and even detached garages up and down seasonally. As the moisture in the soil begins to freeze during the late fall, the soil will swell if it is saturated enough. This may temporarily cause your garage slab to rise, but that could change during the freezing cold weather of winter. Over several decades, this will cause the entire garage to settle, or sink, placing the floor below grade.
Once the snow begins to melt in the spring, the runoff may not readily absorb into the soil beneath, which may still be frozen solid as a rock. This water will have to go somewhere, so it will follow the path of least resistance and seek out low lying areas to drain. If your garage slab was built significantly above the surrounding grade, it may be fine. But, over many years of dry weather the garage slab may sink, putting the surface near or even below the surrounding soil. If we have significant snowfall during the preceding winter, the melting snow may easily find its way into your garage, through the walls or between the bottom wall plate and the concrete floor. If you have snow piled near or directly against the garage, which is almost a necessity in many homes, it will make the situation worse. So, the first potential remedy is to shovel the snow as far away from the garage walls as possible, when it begins to melt.
There may also be a possibility of waterproofing the bottom of the outside walls of your garage to prevent easy ingress of runoff. This will require partial excavation to the bottom of the floor slab, around the entire perimeter, and removal of some siding. Both of those are quite labour intensive, and may only be possible if there is minimal vegetation or other structures nearby. Regardless, that effort may not be very effective if the floor slab is too far below the surrounding grade. Soil moisture may still find its way inside the garage by forcing its way through floor cracks, by hydrostatic pressure. It may still be worthwhile to dig drainage swales or small ditches parallel to the garage walls, to help channel the melting snow to your yard, driveway, street, or lane.
An improvement to grading and drainage may be enough to minimize the amount of water leaking into your older garage, so that it is only a nuisance. Otherwise, a major renovation or replacement of the existing structure may be the only permanent solution. If the garage is deteriorated, with rotten walls, sagging rafters, and deteriorated roofing, the choice may be simple. Knocking down and rebuilding a garage with a proper grade beam foundation, or thickened slab raised well above grade, may be the only choices. If the structural integrity of the garage is still reasonable, replacement of the slab-on-grade foundation may be the least costly alternative.
Slab replacement on an existing structure will be more costly than if it is completely demolished. That is because the current garage will have to be detached from the existing concrete floor, and reinforced before lifting off its current foundation. It will have to be temporarily moved, or supported high enough above the old floor to work beneath. Once the new foundation and floor is poured in place, the structure will have to be moved back in place and properly secured. This may require other modifications to ensure the older garage walls, which may be warped or no longer square, conform to the level new concrete. Again, all of these factors should be considered by any contractor prior to committing to this partial replacement strategy.
At this point, I must confess that I have the exact same issue every year, for the same reasons. I have a 60-year-old garage with attached carport, sitting on a cracked, somewhat deteriorated concrete floor slab. The structure is in reasonably good condition, partially due to the extremely durable Douglas fir framing used for its construction. My neighbour’s garage, replaced in the last decade, is only about two metres away, with the space between partially filled each year with snow from our driveways and the nearby back lane. When this melts, as well as the snow in my yard between the house and garage, it runs into the settled old building. While I move the melting snow closer to the lane when the weather warms, and have created small drainage swales on the two problematic sides, the puddles still appear. I typically move yard equipment, bikes, and other storage off the floor, or away from the wet areas. This prevents them from becoming stuck in the ice created at night when the water freezes. Once the snow disappears, the weather improves, and the water dries up, I replace the moved items after ensuring the garage walls are sufficiently dry. While not a solution to the water problem, it makes the situation fairly manageable, until the time I decide to heed the above advice and build an entirely new garage.
Keeping snow away and regrading to make melting snow runoff more manageable may be the only practical way to minimize the amount of water leaking into your older garage. The real solution, however, is complete replacement, or lifting and relocating the current structure to a higher, dryer concrete foundation and floor.
Ari Marantz is the owner of Trained Eye Home Inspection Ltd. and a Registered Home Inspector (RHI)(cahpi.ca). Questions can be emailed to the address below. Ari can be reached at 204-291-5358 or check out his website at trainedeye.ca.
trainedeye@iname.com