Renovation & Design

Renovation & Design

SOLUTIONS: Clip your costs

QUESTION: Some people say coupons are a thing of the past. Do you think clipping coupons is time well spent? What are some tips on smart ways to save money using coupons? Landon, Emerson

ANSWER: When you are a frugal person, count it as a blessing for your entire family! Start by collecting coupons for items you normally purchase. Refrain from clipping coupons just for the sake of saving money. Organize your coupons into a photo album so you can see what you have. Save your coupons until products are on sale; unless the coupon specifies otherwise, you can stock up on items and save a bundle if you use the coupons when the items are already sale price.

Unless otherwise stated on the coupon, combine manufacturers' coupons with store coupons. Do not feel you need to use store coupons immediately. Many 'in store coupons' are good for several months and can be combined with other offers.

If you do collect coupons for items you normally would not buy, exchange them with a fellow coupon collector. Participating in a coupon exchange club can expand your coupon collection and ultimately save you money at the grocery store. If you do not know where to join a coupon exchange, start your own.

Be careful when signing up for coupon deals on the Internet. Some sites offer worthless promises to save you money, just to capture your email address. It's sometimes wiser to go directly to the manufacturer's website and check for coupons.

QUESTION: What is bleach and is it harmful to use as a household cleaner? Tamra, Winnipeg

ANSWER: Bleach is a chemical compound derived from natural sources used to whiten and kill bacteria and mould. Simply put, bleach works by the process of oxidation. While you don't need to garbage all of your bleach cleaners, you may want to consider alternative choices. To some people, homes just aren't clean if they don't smell like bleach, but keep in mind chlorine in the home can be a pretty nasty product, not only for yourself but for pets as well.

Hydrogen peroxide is one option. It is made up of hydrogen and oxygen and in low concentrations it works well as a disinfectant and antiseptic without the smell and potentially harmful effects of chlorine bleach.

Just as a side note: Asthma rates in children under the age of five has increased more than 160 per cent from 1980-1994. Many hospitals nowadays are using peroxide based cleaners instead of bleach.

QUESTION: Your book series is a fountain of useful tips; I have bought several as gifts for family members. Here's my dilemma -- my car reeks! It smells like it's 50 years old. I wash the outside once a month but never bother with the inside. What can I do to cover up the musty smell? I have to give my boss a ride to the airport next week and I am embarrassed to pick him up. Do you have a quick fix? Thanks.

Laura, Winnipeg

ANSWER: The time has come to clean your car interior, but have no fear, it won't take long.

Number one, vacuum the interior and number two, use soap and water to clean the floor mats. Number three, wipe all leather or vinyl with a good-quality micro fibre cloth as well as the dashboard to zap dust.

Next, make your own car jar freshener. In a pot, boil half-cup water. Add two packages unflavoured gelatine. Stir for five minutes to dissolve. Add two drops food colouring (optional) and 1 tbsp. salt (to prevent mould). Pour half-cup cold water into the pot and stir. Pour solution into a clean jar and add essential oils or other bottled scents. Or if you are really in a hurry, drop essential oils onto a piece of cardboard or a scrap piece of fabric and place it somewhere in the car. The more essential oils on the cloth, the more powerful the smell, so be sure to choose a fragrance that you can live with.

Fabulous Feedback from Reader:

Dear Reena,

In a recent column, you answered a letter about preventing ballpoint pens from drying out. I think I can help with a trick I learned from my dad. The ink doesn't actually dry up in the pen. Ink dries at the tip around the ball of the "ballpoint." You can save a dried-up pen by holding the tip briefly in a flame. This melts the dried ink and the ball will move freely again. Take care, Michele

Tips for People Ache'n for Bacon:

-- Pull bacon apart with ease. Refrigerate for two hours. Place the package of bacon on to the counter. Roll bacon into a tube from short end to short end. Hold it for one minute. Unroll and unwrap; your bacon should now pull off and separate quickly.

-- Minimize bacon shrinkage by running bacon under water before frying.

-- Instead of frying bacon, bake it! Line a baking sheet with foil or parchment paper. Lay bacon pieces on the foil with the pieces just touching. Bake in a preheated 400-degrees oven for 15-20 minutes depending on personal preference for crispiness. Remove from the oven and serve.

-- Bacon grease can be frozen for future use; however, unless you have a steady supply of bacon grease on hand you can't use up fast enough, you can just keep it in the refrigerator. Pour cooled bacon grease into a thick glass jar or mug and refrigerate, topping it up with fresh bacon grease as you have it. Refrigerated bacon grease lasts for months and months with no problem. If bacon grease goes rancid, you'll smell it.

-- If you don't want to eat bacon grease, check out recipes for making soap using bacon grease.

IMPORTANT NOTE TO READERS: If you have called 'HOUSEHOLD SOLUTIONS' (204-320-2757) during the past three weeks to order books and your call has not been returned, please call again as the phone system had some behaviour issues.

Speaking of behaviour issues ... Happy Back-To-School everyone!

Reena Nerbas is the author of the national bestselling Household Solutions series. Her website is www.householdsolutions.org. You can contact her at Box 429, Blumenort, Man., ROA 0C0.

Reena Nerbas
September 11

Renovation & Design

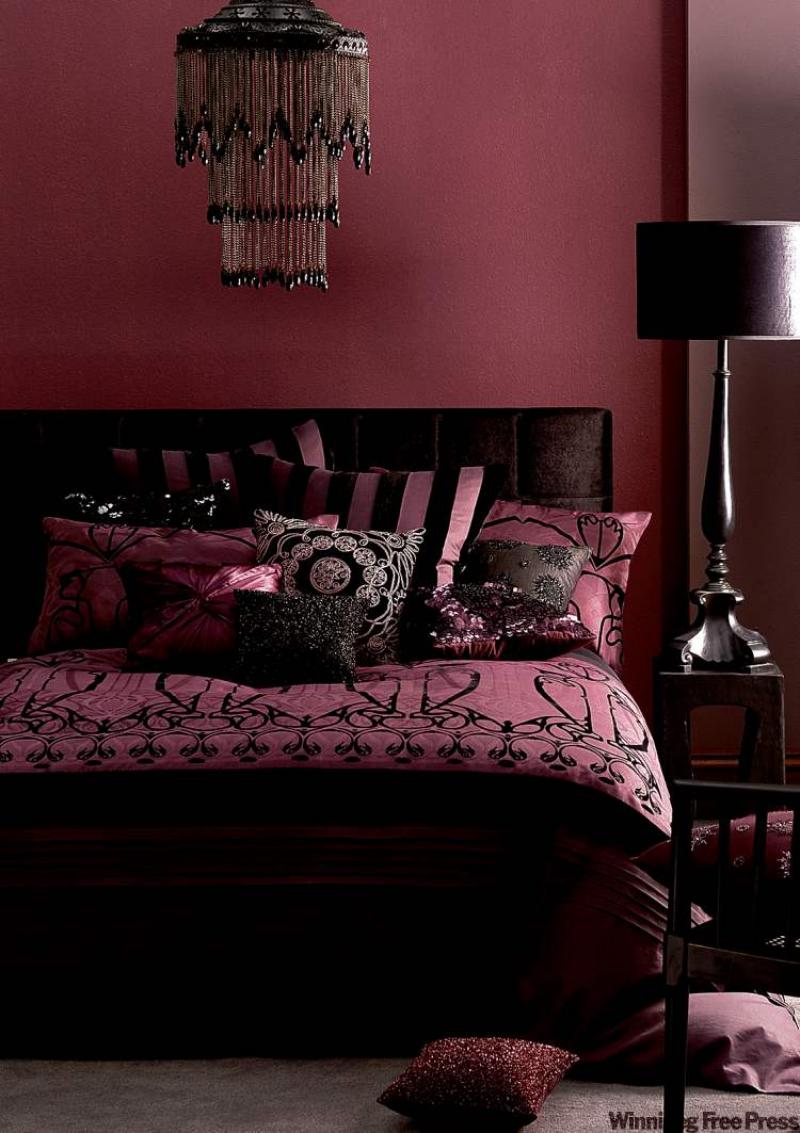
DEBBIE TRAVIS: Make it better in bed

House to Home / Debbie Travis
September 7

Advertisement

Renovation & Design

Spotlight on Secter

Tracey Thompson
September 4

Renovation & Design

CONNIE OLIVER: Against the odds

Room for Change / By Connie Oliver
September 4

Renovation & Design

Your fireplace choice: update it or re-create

Dear Leanne: We want to update our family-room fireplace from its traditional light-oak look to a more modern feel. When we bought the house eight years ago, our furniture was traditional and it worked. Now that we are changing our design scheme, the fireplace looks weak -- not much of a focal point. Do we tear the whole thing out and start again? Or can we do some quick fixes to make it work?


ANSWER: The answer to both your questions is yes. It depends on what your overall expectations are, not to mention what your budget is for this project.

If you really want to pull off a designer's wow effect, starting from scratch would give you the foundation to create the room you really want.

Staying with the existing fireplace is an option that should be considered, however. Traditional mantels fall into many different categories, including highly sculptured designs exuding historical presence. These can have a phenomenal impact in the room, but I suspect from your definition, the mantel and surround in question may not be that interesting.

So even if you sand it down and apply a striking effect, such as gloss red, matte charcoal, espresso stain or a metallic paint, the bones of the fireplace may still be uninspiring. If you have a tile surround or brick accompanying the design, these will likely need to be replaced, regardless of the oak.

Your most cost-effective option is to refinish what you have. Some of the options I have just shared will certainly change the look of the fireplace and make it more supportive of a contemporary environment. You could try this first and if it does not give you the look you want, go to Plan B -- tear it down and re-create.

You can get some wonderful ideas simply by skimming through favourite design magazines and visiting show homes. To create a stunning contemporary fireplace, consider geometric shapes such as elongated triangular and trapezoidal silhouettes. You may choose to not use a mantel on the new design, particularly if it detracts from the lines of the unit.

Keeping the upper portion of the fireplace available for artwork will enhance the focal effect you are attempting to achieve. If you do wish to have a mantel, choose materials that are sleek and modern, such as metal, acrylic or stone. Contemporary design also masters the art of asymmetrical symmetry. This means that you create balance without mirroring the items.

Balancing visual weight can be achieved with colour, shapes and sizes of the elements used. For instance, rather than one long, horizontal mantel, three shorter acrylic or stone forms can be placed in staggered configuration up the wall of the fireplace to display eye-catching accessories.

Lighting will also play an important role in bringing your fireplace to life. Strategically focused halogen fixtures can highlight the fireplace's best features, whether it's a gleaming copper facade, a spectacular work of art or staggered sculptures.


Dear Leanne: How difficult is it to convert an antique dresser into a bathroom vanity?

A: I am regularly asked about this, confirming the growing popularity of repurposing antique dressers. Their stunning lines are making statements from powder rooms to master ensuites.

To address this phenomenon, major furniture designers have added vanities to their company's lines. So buying one would certainly ensure you avoid the work of transforming an old dresser. Still, there are plenty of antiques out there looking to be valued for their former glory.

In terms of difficulty, this is not a project for a carpentry or plumbing novice. We are talking about precision cutting and co-sordinating plumbing. If you have carpentry experience, this project may be perfect for you. If not, then take your design ideas to someone who can create the vanity correctly -- the first time.

Many antique vanities use the vessel-style sink as opposed to the mounted option. This is from a practical, esthetic and a labour perspective.

If you choose a mounted sink, you may be limited in your options due to width of the cabinet. Small oval sinks and bar sinks will likely fit the space allotment, but this may not be the look you are intending to have.

Remember that you need to fit not only the basin in, but the tap and faucet assembly as well. If your dresser has drawers directly under the sink, these will need to be permanently fixed in place. Antique cabinets with doors, rather than drawers provide a more efficient design for this type of conversion.

When ready to design your project, visit a local hardware and plumbing store and discuss your plan with the experts. A number of do-it-yourself websites, such as www.houseandhome.com/design/custom-vanity, can guide you through the process.

When you are planning, remember you are converting a piece of old furniture. The integrity of the unit will determine whether it is a good candidate for the project.

You must also consider that the wood top may be exposed to water. Take precautions to protect the finish with Varathane or consider changing the top to stone or granite.

-- Canwest News Service


Leanne Brownoff is an Edmonton interior design consultant who welcomes your questions at www.leannebrownoff.com. Answers will be featured in her column, as high volumes prevent individual email responses.

Leanne Brownoff
September 4

Renovation & Design

Know the formal, informal rules, then design home to suit yourself

Dear Marc: I will be renovating and redesigning my home this summer.

While researching the rules of design by reading through magazines and watching televised design projects, I find that not every designer follows the same rules of thumb. I find the entire research and learning process overwhelming and confusing. Which rules should I follow in my design project? -- Julia


Dear Julia: Today's application of current styles and design trends can be challenging, as homeowners have many sources of information available to them. The first lesson in design is that there are two categories of design rules: formal and informal.

Formal design rules serve as the cornerstone of every design project and should be followed to create successful designs. They are found in every design project, whether the design is televised or displayed in the pages of a glossy magazine. These rules reveal traces of colour theory, space planning, scale and balance.

The formal rules are constant in every design project. Colour theory, which comprises your primary colours (red, yellow and blue) and your secondary colours (violet, orange and green) does not change. Designers use these colours, which are part of the colour wheel, to help determine which ones can be used together for a successful colour scheme. If you're unsure of the rules of the colour wheel, I suggest you seek a colour consultation from a professional or extract a set colour scheme from an existing designer space.

In professionally designed spaces, look at the layout, scale and balance of the room. Take a closer look at the proportion between the furniture and other design/architectural elements. Is the sofa oversized? Are the furniture pieces blocking the natural traffic flow of the room? If so, the space is not functional and the furniture does not complement the design.

Design also comes in many shapes, colours and sizes. Therefore, every space is different. Designers have come up with rules of thumb to help homeowners with their design process. Although most of these rules depend on the designer's taste and style, they fall under the informal design rules and are thus customized from one source to the other.

Take a designer who loves multiple neutrals. His mantra would be that the pairing of multiple neutrals in one space creates peace and serenity. But to a bold, eclectic designer, the look might be monotone and boring.

As you can imagine, these informal rules are subjective and very much customized to the needs of the designer's style and target client. The key is to find a designer who reflects your style and integrate his rules of thumb in the space, as he will successfully personalize your room, while keeping in mind the formal constant rules of design.


-- Canwest News Service


Marc Atiyolil is editor-in-chief of Canadian Home Trends, Canada's Home Decor & Lifestyle Magazine. To submit a question for Marc Atiyolil, visit CanadianHomeTrends.ca.


Marc Atiyolil
September 4

Renovation & Design

MIKE HOLMES: Be smart about green shift in your home

I'M often asked how to green an older home -- how to improve its efficiency and make it more sustainable. If you are building a new home and building from the ground up, you can pretty much do whatever you want within your budget. But restoring an old home to high efficiency is more of a challenge.

Not everyone can or wants to tear down an old home and rebuild to new net-zero standards. There's beauty and heritage in an old home -- and they don't build them like they used to.

But old buildings lag behind today's performance standards.

They were built years ago, before the products, materials, technology and methods we use today were invented. They have aged -- they have cracks in walls, loose windows and doors -- and very likely have little insulation. All of that contributes to lost energy and air leakage.

Tearing down an existing old home and building new has the obvious advantage of letting you create a high-performance home, which is greener than what was there.

But we also have to factor in the waste created when we demolish homes. There is a lot of embodied energy in the house that exists and we should factor that in before we make a decision to tear a house down and start over. It would take decades to make up for the lost resources and embodied energy in a home that is demolished to make room for a new home.

I'm not sure if the reduced energy savings in the new home makes up for all that lost embodied energy. It might just be more environmentally friendly to work with the materials that already exist in the house, and improve its energy efficiency. It's certainly less wasteful to improve than to demolish and rebuild.

Sustainable building is durable -- it lasts a long time. Old houses are doing that because they've already lasted a long time. Let's take buildings that do exist, and green them up. Anything we are able to reuse is something we don't have to replace.

Another facet of sustainable building is high performance and energy efficiency.

Houses weren't built in the past with the environment in mind.

But how green can you go with an old home? How much can you reduce its environmental impact? The answer: a lot.

The first thing to do is to take care of the basement and the attic. They'll give you the most positive result, and are the easiest to access, assuming your basement isn't finished.

Cold air pushes warm air and it will come in at the lowest part of your house and push the hot air out through the roof. So you should finish your basement properly and create a thermal break to prevent cold air from getting in. It will also keep warm air from meeting cold, which leads to condensation.

You also should insulate your attic space above code and make sure there is good venting. You have to ensure the attic stays cold in the winter, and gets hot in the summer. It is not meant to be a conditioned zone.

I don't like recessed lights in an attic space as they give off too much heat and will warm your attic space in the winter. But, if you must have them, make sure you are using the right ones. They need to be in insulated boxes if they are in contact with insulation, with seals around them to prevent hot air from escaping into attic.

It's important that you stop air leakage around windows and doors and air movement between the conditioned and unconditioned spaces in your house. If you are tearing right back to studs, use closed cell spray foam and make sure there's a perfect seal on walls and between the living space and attic.

There are other things you can do:

-- Replace old windows with double glazed, low-e glass -- especially on the north and west sides of your home.

-- Add skylights to increase natural daylight and reduce need for artificial light.

-- Install low-flow fixtures and reduce your water use, reduce air conditioner use by using exterior awnings or strategic planting to shade your home.

-- Always use low-VOC products.

-- Use materials with recycled content or from rapidly renewable sources.

-- Most important, choose materials with long life spans, such as a metal roof over asphalt shingles or BluWood over regular timber.

-- If you've got a bigger budget, add geothermal solar panels and grey water reclamation systems. Any of those will pay you back over time.

What's really important is that we learn that buildings are not disposable. We need to start building with the future in mind. I want my house to outlast me. I want my sustainable house to leave a lasting impact, but not a big environmental footprint.


Catch Mike in his new series, Holmes Inspection, airing Thursdays at 8 p.m. ET/PT on HGTV. For more information, visit www.hgtv.ca.

For more information on home renovations, visit makeitright.ca.


Mike Holmes
September 4

Renovation & Design

ARI MARANTZ: Repair leaking roof before the snow flies

Question: Our house is a split-level built in the early 60s, with an open-beam ceiling over two-thirds of the house. Ice damming and leakage into the house has been a problem during winter since we acquired the house three years ago. Snow will melt even at -10 C, as the roof slope faces south. The only way to prevent this has been to keep the open beam part of the house clear of snow. We recently removed some soffits and plywood to look in along the underside of the roofing material. As we suspected, the insulation was pushed right up against the underside of the roofing plywood. There were no insulation stops as far as we could see by moving the insulation back with a stick. The open beam is 30-feet long so wouldn't be impossible to work one-by-twos between the insulation and plywood, then turn them on edge to create ventilation channels to the ridge vent. Is there an alternative to lowering all the ceilings in the house or building up the roof with two-by fours-on edge?

Could we add rigid insulation to the roof using two-by-four strapping laid flat and then cover the roof with metal roofing? We hope this would provide more separation of the roofing material from the warmth of the inside of the home. Of course, with metal, there would be no leakage inside the house even if some snow melts on sunny February days. Would we cover the insulation with Tyvec-type wrap or use roofing felt? We look forward to your advice even though it is a winter problem. Now is the time to look after roofing concerns as not much can be done at 20 below.

Thank you,

-- Bruce Williams


ANSWER: This may seem like a funny time of the year to be talking about ice damming and winter roof leakage issues, but is actually the ideal season to explore this issue. You have hit the nail on the head when you have said it is difficult to do this type of repair in the middle of a freezing cold winter. I will provide a couple of possible solutions and hopefully answer your questions.

Your problem with ice damming and leakage in an older home with a vaulted ceiling is quite common. In my experience, it has become a particularly large issue with homes as old as yours, mainly in the last decade. I am not sure why many of these homes experienced little leakage for many years, even with ongoing ice damming, and suddenly the problems become serious. Perhaps, when the roofing is replaced for the second or third time something is disturbed, or simply the older plaster and interior components have developed cracks, openings, or enough minor moisture damage to become problematic.

You are correct the main cause of this problem is warm air leakage into a poorly vented roof system, often with minimal insulation.

There are two particular approaches to dealing with a vaulted roof. The first is to maximize the insulation level while maintaining a vented air space above the insulation, normally a minimum of five centimetres. The idea is that the vented airspace will provide enough outside air to cool the underside of the roof sheathing to prevent melting of the snow, and thus minimize ice damming. Unfortunately, this approach rarely works over the long term, unless you have very large roof joists, and high-density insulation. Most homes like yours have fibreglass batts or wood shavings packed into this space, neither of which is good at restricting air intrusion. In some cases, this type of insulation will only slow down the movement of air, just enough for it to cool past the dew point, causing condensation within the insulation or on the underside of the roof sheathing. This can often be the largest source of leakage with this style of roof, when the frozen condensation melts and runs back inside the house.

A better and more modern approach is to ignore ventilation altogether, and insulate with material that eliminates air and heat intrusion into the cavity below the roof sheathing. This can be accomplished from the exterior with rigid extruded polystyrene insulation, as you suggest, but the thickness will have to be substantial and the current insulation inside the cavity may need to be removed.

The most successful remediation requires removal of the leaky fibreglass batts and replacement with insulation that has a reasonable air/vapour barrier rating. Dense pack cellulose may be the most cost effective and environmentally friendly material for this purpose but it'll will only work if there is enough thickness to restrict air movement. That may not be possible in many older roof systems such as yours.

A better approach is to fill the entire cavity with either extruded polystyrene sheets or high-density blown-in polyurethane foam.

Both of these materials have the quality of good resistance to air movement, have a high R-value, and are extremely moisture resistant. While blown-in foam may be the most effective choice due to the ease of installation and complete coverage capabilities, it is the more costly. Often, a combination of rigid insulation, sealed along the top and edges with several centimetres of blown-in polyurethane is the most economical choice. It will be more labour intensive to insulate with this combination method, but the cost savings in material may make up for the higher wages required.

Either way, the existing roofing and sheathing will have to be removed to access the cavity, so repairs may only be practical when the roofing is near the end of its life.

Metal roofing may be a good option for longevity, but the vented air space that you suggest, alone, will do little to stop air intrusion from the house, which may be as much a cause of the leakage as the ice damming.

No matter what your choice of insulation material, the current view of most building scientists is that stopping air leakage into the roof system will cure the problems of condensation and ice damming much better than traditional insulation and ventilation methods.


Ari Marantz is the owner of Trained Eye Home Inspection Ltd. and the president of the Canadian Association of Home & Property Inspectors - Manitoba (www.cahpi.mb.ca). Questions can be emailed to the address below. Ari can be reached at (204) 291-5358 or check out his website at www.trainedeye.ca.

trainedeye@iname.com
Ari Marantz / Ask the Inspector
September 4

Renovation & Design

Don't curb their enthusiasm

Deborah Goodfellow
September 4

Browse Homes

Browse by Building Type