
Renovation & Design
Renovation & Design
Toxics among common scents
SEATTLE -- The fumes that waft from top-selling air fresheners and laundry products contain dozens of chemicals, including several classified as toxic or hazardous, says a University of Washington study published last week.None of the chemicals was listed on product labels, nor does the federal government require companies to disclose ingredients in fragrances, said study author Anne Steinemann.
"I was surprised by both the number and the potential toxicity of the chemicals that were found," said Steinemann, a professor of civil and environmental engineering and public affairs.
The health effects of the chemicals are unclear, but Steinemann launched her analysis after years of fielding complaints from people who said air fresheners and other household products made them dizzy, left them short of breath or caused headaches, seizures or asthma attacks.
"After you hear about a hundred of these stories, you realize there's something going on," she said.
The report is the latest in a string of unsavory news reports about consumer products, from the presence of lead in children's toys to the discovery of hormone-disrupting compounds in plastics and baby lotions.
Steinemann's study focused on six widely used products: dryer sheets, fabric softener, laundry detergent, a liquid spray air freshener, a plug-in air freshener, and a solid disc deodorizer used in commercial-airplane toilets. A contract laboratory sealed each product inside a container, then used two types of instruments to identify chemicals emitted into the air.
Collectively, the six products gave off nearly 100 volatile organic compounds (VOCs), including acetone -- the eye-stinging ingredient in nail-polish remover and paint thinner. (VOCs are compounds that vaporize easily, like paint and gasoline fumes. Many VOCs are known to be harmful.)
The study didn't report the levels of individual chemicals, but all six of the products emitted at least one substance the federal government classifies as toxic or hazardous.
Among them are three chemicals the Environmental Protection Agency considers "hazardous air pollutants" with no safe exposure levels: acetaldehyde and 1,4-dioxane, both likely human carcinogens; and methyl chloride, which has been linked to liver, kidney and nervous-system damage in animals.
A spokeswoman for the Fragrance Materials Association of the United States, an industry group, said all ingredients are tested for safety and the results reviewed by independent scientists.
"We are certain that, when used in compliance with standards, these fragrance ingredients are safe and can be used ... with confidence," Cathy Cook said in a written statement.
For most healthy adults, slight exposure to toxic or hazardous chemicals is probably not much of a health concern, said Lance Wallace, a retired EPA scientist who is collaborating with Steinemann. But up to 30 percent of people are sensitive to perfumes and other fragrances, he pointed out.
-- Seattle Times
Renovation & Design
Many causes for plumbing odour
Q: We purchased a five-year-old, three bathroom, cab-over home two years ago and noticed an unpleasant odour in one of the bathrooms. This odour appears to be worse in winter. We checked the floor for mildew, etc., when we had the bathroom floor tiled this winter and there were no problems. The toilet does not have a slow leak.After doing the "sniff test" we determined the smell was definitely coming from the main floor bathtub drain. My husband took out the plug and cleaned a lot of guck out of the drain and I attempted to remove any residual odour by using a "green" vinegar-baking soda-hot water solution. The smell stopped for about one day and now it is back. The lower level bathroom, with a bathtub, and master en-suite in the cab-over, with a shower, are not affected.
What could be causing this odour and what suggestions can you give us to eradicate the stench?
-- Harv & Pat Rosenbaum, e-mail
A. In many cases, the origin of seemingly mysterious odours in homes can be very difficult to pinpoint. Fortunately, plumbing odours are usually much easier to diagnose, as there are a limited number of possibilities. I will discuss these and try to help you identify the source of the problem.
The first possibility for the drain odour, and easiest to remedy, is debris in the drain, itself. This could be a combination of hair, soap, and various hair products that get stuck to the sides of the plastic drain pipes or in the trap underneath the tub. Correctly, you have taken the first step to address this problem with your environmentally friendly drain cleaning method. Unfortunately, while your solution may have temporarily eliminated some of the debris, it may not have cleared the drain of excess hair, which can still allow build-up of new soap and continued odours. While not as green as the vinegar and baking soda mixture, use of commercial drain cleaners may be more effective in removal of excess hair in the drains, allowing proper drainage of soapy water from the tub.
The second location of possible build-up of similar materials may be more insidious. All bathtubs have an overflow drain near the top of the tub that is rarely needed, unless the tub is overfilled. It is common for some people to fill the tub with too much water, so that a significant amount is drained through the overflow, once they enter the tub and displace some water. If this water is full of soap, bath oil, or bubble bath, it may also be causing a build-up within the overflow waste piping. This piping is connected to the drain piping below the tub, so an odour could easily be detected through the drain at the bottom of the tub, if this were the situation. The same "sniff test" you did on the tub drain should be done at the opening in the cover to the overflow, which is located below the tub spout. If the smell is stronger in this area than at the drain, the cover should be carefully removed and drain cleaner or a pipe cleaner used to clear this area, as well.
If the first two checks do not yield the results you seek. In that case, there is likely only one other possibility for the source of the odours. The problem, which I suspect is the true culprit, is improper venting for the tub drain. This may be much more difficult to determine, but proper repairs will yield a permanent solution.
To explain the problem of improper venting, without getting too technical, we must understand one basic principal of modern plumbing drains. Sufficient quantity of air must enter the top of the plumbing drain system, through the vents, to allow for proper drainage. Also, the drains must be configured according to specific guidelines, addressed in the plumbing codes, to allow for proper venting. If the venting is missing or the pipes improperly designed or installed, the drains many not function properly.
Sometimes, lack of proper venting can cause drains to run too slowly, which may lead to easy blockages or slow draining. In other cases, improper venting may cause drainage to be too fast, which can allow the water in the P-traps under bathroom fixtures to be siphoned out. In that situation, the traps may not be effective in achieving their primary function, to prevent sewer gas intrusion into the home from the drain system. The water in the bottom of the trap, which is located directly below the drain in your bathtub, must remain in place to prevent gasses from escaping from the larger drains, below. This gas can be quite strong smelling and noxious to occupants. I would suspect that this is the true cause of your problem and figuring out where the mistake has been made is the next step to eliminating the smell.
Improper venting issues can be due to either blockage of the vent pipes as they exit the home through the roof or improper pipe design or installation. Determination of either of these defects may be well beyond the capabilities of the average homeowner. Evaluation by a licensed plumber, which may involve walking on the roof or entering the attic and basement, may be the only way to see where the source of the venting defect is. If simple cleaning of the bathtub drains and overflow doesn't help, listen for gurgling noises after the water is fully drained, following a bath, which will be a sure sign to call the plumber.
Ari Marantz is the owner of Trained Eye Home Inspection Ltd. and the president of the Canadian Association of Home & Property Inspectors - Manitoba (www.cahpi.mb.ca). Questions can be e-mailed or sent to: Ask The Inspector, P.O. Box 69021, #110-2025 Corydon Ave., Winnipeg, MB. R3P 2G9. Ari can be reached at (204) 291-5358 or check out his website at www.trainedeye.ca.
Renovation & Design
Technology makes green innovations in the home
NEW YORK -- A decade of quantum technological leaps mean today's designers have in their hands a virtually bottomless toy box of new materials and methods.Take the award-winning installation Lightshowers put on by DuPont Corian at this year's International Contemporary Furniture Fair. Egg-like polished rocks and smooth slabs of Corian were underlit, with nature sounds generated from a hypersonic speaker; when a person crossed the sound wave's path, it essentially "woke" the sound.
Or look at Vetrazzo, a Richmond, Calif., countertop maker that turns a good portion of the state's recyclables -- old traffic lights, curbside trash, windows, even dishware factory rejects -- into chic countertops.
The technology boom echoes an earlier era: The icons of early 20th century Modernism -- Breuer, Le Corbusier, van der Rohe, Gray, the Eames, and others -- eagerly adapted machine-age materials like tubular steel and moulded plywood into furniture that was new, daring and still accessible.
Now advances are not just industrial -- they're green. Eco-friendly paints and adhesives, water-driven machinery, precision lasers, even organic powder coatings for steel are all relatively new technologies borne of the industry's desire to balance style and stewardship.
With computers, designs are generated, presented and communicated digitally for what the industry calls "rapid prototyping and manufacturing." What it means is that software helps the designer draw, say, a chair, then it creates a 3D prototype in a few hours, which can then be produced with minimal waste in a variety of customizations, a process that used to take months.
Emmanuel Plat, president of ConranUSA, is excited about the technology used by a Swedish design firm called Front.
"An artist uses a special pen to sketch her design in the air -- she can't even see what she's drawing," he said. "A motion capture camera records her strokes, then the image is prototyped -- the process is really remarkable."
But does the "wow factor" translate into useful furniture? Max Shangle, chair of the furniture design program at Kendall College of Art and Design in Grand Rapids, Mich., says products made with revolutionary technology must still resonate with the consumer.
"The question isn't, 'Can we make it?' but 'Should we make it?' At the end of the day, we have to produce things that appeal to and satisfy the consumer," he said. "Using a radical new material isn't enough."
In his book, The Design of Everyday Things, Donald Norman chides those who put artistry or gadgetry before good design. "Well designed objects are easy to understand," he writes.
For that, consider the LED lights that now may line the perimeter of a sofa, a room, even a swimming pool.
On the creative horizon, Don Goeman, EVP of Research, Design and Development at Herman Miller, sees organic LEDs, as well as programmable lighting scenes, "and smart surfaces that are changeable and customizable."
Says Shangle, "The potential to change the landscape of product offerings in the home furnishings marketplace is limitless."
That makes the new generation of modern home furnishings just as exciting as the first.
-- The Associated Press

Renovation & Design
Make sure basement reno is a space you'll love to be in
A common phenomenon in houses of the super-rich is creating extravagant basement additions. Never mind using your cellar as a wine store. Now it's all about digging two, three or even four underground levels for home gyms, swimming pools, media rooms, playrooms, squash courts and additional laundry, storage and bathrooms.
 The key to a successful basement remodelling project is to make sure the feel is in keeping with the rest of the home. By taking the time to plan your course, your basement remodelling project will be a space you will love to spend time in.
It is important to be sensible about the budget of a basement reno because it won't typically bring the kind of return at resale that a kitchen or bathroom renovation will.
Before renovating consider whether mould has been a problem; if so it must be treated with a microbial agent and then removed. There are special mould inhibitor paints available that yield excellent results in preventing a re-occurrence, with a single application.
If moisture in the crawl space is a problem, try this inexpensive do-it-yourself trick; lay down 6-mil polyethylene plastic over every single square foot of the crawlspace. Overlap the seams by no less than 1 or 2 feet. Bring the plastic about 1 foot up the crawl space walls. Tape all seams down.
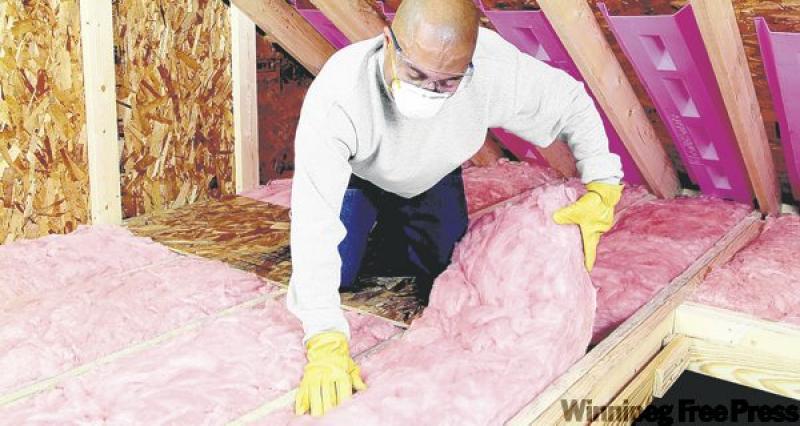
Insulated walls create a warm, cosy space that can help reduce whole-house energy costs by up to 30 per cent. Also note, basements below ground level, even unfinished ones, are naturally insulated, holding in warmth in the winter and being cooler in the summer.
When it comes to older homes, furnaces and water heaters are often in the centre of the basement, which hinders circulation. Rather than trying to work around these utilities, it may be advisable to move them.
Typically, basement ceilings are low, creating a "cave" feeling. To offset this, use indirect lighting that splashes large pools of light on the ceiling. This will open up the space and make rooms appear higher. A mixture of lighting types will offer flexibility to create a variety of lighting moods. Tip: Mirrors, mounted on the walls, can also amplify and reinforce lighting effects.
For the ceiling, consider installing plasterboard, or if you have enough clearance acoustic or suspended tiles are another option. For floor coverings a sub-floor is recommended rather than installing a product such as carpet, tile or laminate directly on the concrete floor.
in bedrooms or habitable space in the basement. An egress window is a window that is required in specific locations in a dwelling and must meet specific size requirements. It is intended to provide an emergency means of exiting a dwelling.
Locate a smoke detector and fire extinguisher in a central area close to bedrooms or in a bedroom hall or corridor. Whether or not a bedroom is part of the basement design, at least one smoke detector should be mounted in the basement.
As home theatres gain popularity, more and more home owners are creating theatre rooms from previously unused basement space. If possible, avoid square rooms and long narrow rectangular rooms because deep bass sound waves misbehave or "pile up" in square or extra-long rooms.
If part of your basement renovation design includes a bathroom, time and costs can be cut if bathroom fixtures are located near existing plumbing. This means designing the bathroom floor plan close to the main waste-vent stack and house drain. Tip: it is easier and less complicated to arrange bathroom fixtures along a line on one wall.
When designing the basement entrance, have something inviting to view as you enter such as; a fireplace, bar or family portrait. Resist building a bathroom to accommodate the rough-in nobody wants to stare at a toilet as they glide down the stairs into your newly renovated basement!
Solutions, is compiled from various sources; rona.ca, property.timesonline.co.uk, gidesigns.net, handycanadian.com, weyoungrenovations.com, axiomaudio.com, basementsbyballantyne.ca, homeandgarden.canoe.ca, renovationdesigngroup.com, renovationexperts.com, servicemagic.com, canada.com, homesafetysolutionsinc.com, homerenovations.about.com. Thanks to all who contributed! Similar information may be found elsewhere.
Solutions sleuth Reena Nerbas is a home economist and speaks professionally on the topic of household challenges; she is also the author of two national bestsellers, Household Solutions 1 with Substitutions and Household Solutions 2 with Kitchen Secrets. She can be heard on radio and television programs across Canada.
Visit me online at: www.householdsolutions.org


Renovation & Design
Location is everything in hanging a floral basket
Travelling around Montreal during the nice weather I can't help but notice a lot of basket cases. I'm not referring to inebriated bar patrons, but rather to plants hanging in baskets.Some hang from city lamp posts, others in front of retail stores, and plenty where the restaurants and bars spill out onto the sidewalks. Then, there are the ones we hang around our homes, whether it's from a corner of a balcony or as part of the ornamentation of a deck.
One of the most popular sales items at garden centres in the early summer are arrangements of annuals stuffed into all sorts of hanging baskets. They cascade delightfully over the edges and appear as solid balls of blooms.
Some are wonderful, particularly just after they've been purchased. Others can end up looking really dreadful. Success or failure hinges on care and where you hang them.
Location is everything for a hanging basket.
First, the plants in the arrangement have to be suitable for the sun exposure, otherwise too much or too little light will affect the growth.
Second, being hung on a windy corner is bound to affect the way the basket performs. Either the plants will be rattled and blown beyond their capacity to manage or they will dry out every few hours in the heat. If you must hang one in this sort of location, use tough plants, like succulents or those with woolly leaves and strong stems. And be ready to water them morning and afternoon.
What the container is made of also plays a role.
Plants hanging in plastic pots will resist the drying effects of the wind and sun much better than those in clay pots.
The more decorative hanging baskets often take advantage of the benefits of coir. This rope-like fibre makes excellent liners for wire baskets. The whole arrangement is lightweight, holds the planting mix securely, and resists the effects of wind and sun. A similar arrangement can be created using sphagnum moss as a liner.
Probably the biggest problem for a hanging basket is getting enough water. With the drying effects of the sun and wind working to suck the moisture out of the planting mix, and the mass of plant foliage transpiring moisture at a high rate, everything conspires against the basket.
Watering the basket once or twice a day is one option.
Another problem to watch for is what I call "water creep." If the surface of the planting mix is dry and the edges have shrunk in a bit, any water that you pour on will run off to the edges and run down the sides and out the bottom. Not much will get soaked into the root ball. The only way to avoid this is to water into the centre of the container very slowly, watching the water soak into the root ball, and keep adding more water until you feel the weight of the whole basket increase.
The planting mix can also be part of the problem. If you bought the basket already planted, you're stuck with whatever mixture the grower used. If it contains a lot of peat (quite likely), it will dry quickly and be tough to re-wet. This means slow and careful watering is needed.
If you make your own planting mixture, make sure it has plenty of absorbent materials, like one part each of compost and potting soil, and two parts each of coir (or peat), perlite and vermiculite.
One last trick to keep your baskets moist is to cover the surface of the planting mix with a mulch, like shredded bark.
-- Canwest News Service
Renovation & Design
Spray foam wrong choice for structural repairs
QUESTION: We are going to do some work in our basement this summer and would very much appreciate your help and advice. Our house is more than 100 years old, with an old stone foundation. It sits on the Red River-Assiniboine River delta system, Winnipeg, which contains lots of underground streams. Over the years, the basement walls and foundation have deteriorated and crumbled. Based on the amount of rainfall we receive, it can be very wet. With a lot of rainfall, it expands and if it is very dry, it contracts, so the foundation moves. The basement is very cold, especially during the minus 35 days.We are planning to take everything out of the basement to re-do the foundation. One contractor is proposing to use polyurethane or icynene to fill up the holes and then rebuild the rest of it with new material.
Our concern is whether this polyurethane product is safe? What about the side-effects? I do not want to put anything into our bodies that we will regret later, especially our toddlers.
-- Henry Bissoon, e-mail
ANSWER: While you should have significant concerns over using polyurethane or icynene spray foam to repair your foundation, the focus or your worries are way off base. Both of these materials are now widely used for insulation and air sealing in homes and commercial buildings but are not designed for any kind of structural repairs.
The first thing to address is the advice given by the contractor that recommended this material as suitable for foundation repairs. I have heard of some bad ideas, but this one is right up there with the worst ones. I would send the person who suggested this packing and look for a real foundation contractor or mason to do the repairs. My reasoning behind this is that both of these materials can be very effective in providing high quality, moisture and air resistant insulation, but have no structural properties. Replacing deteriorated mortar with foam insulation will do nothing to improve the strength of the old foundation walls, which may continue to move and deteriorate over time. I don't even know if this would stop the majority of the moisture that is leaking into your basement, which should be your primary concern if you plan to finish the basement.
Old stone foundations like yours continue to perform well after many decades, even with considerable deterioration to the mortar that holds the stones together. The first problem normally to address is the seepage that occurs as the old joints deteriorate and turn to sand. If this seepage is minor, improvements to grading and drainage around the home and repairs to mortar joints in the interior of the foundation may be enough to hold the water at bay. If this has been neglected for many years, not only will the water be an issue, but movement in the individual stones may occur. If this movement goes on for some time, as you have experienced, structural damage to the home is inevitable. The only recourse, in that case, is major foundation repairs.
Foundation repairs on stone or rubble foundations, other than minor repointing or parging above grade or inside basements, are not in the scope of expertise of the home handyman. These repairs typically require major excavation, usually by hand, around the perimeter of the home right down to the base of the foundation. Once the exterior of the foundation is exposed, loose mortar can be removed and the foundation repointed. This may have to be done from both the interior and exterior of the foundation, if there is enough damage to the mortar joints. After complete, new damp proofing or membranes and drainage tile system can be installed outside the foundation, if no further structural repairs are required. If there is significant movement in the stones they may have to be removed and reset, or replaced with poured concrete, after the house floor structure is temporarily supported.
As you can see, this type of repair is not one to be taken lightly, or attempted with makeshift ideas using improper materials. Your concern over the composition of the blown-in foam insulation is a moot point, as these products should never be used for this purpose, anyway. What should be more of a health concern for the occupants of your home are the effects of excessive moisture intrusion into the basement.
The good news is that proper foundation repairs will solve both the problems of structural damage to the home and problems related with water leakage. This will not be a low-cost repair but will be money well spent, rather than blown away with the useless installation of foam insulation in place of proper mortar.
Ari Marantz is the owner of Trained Eye Home Inspection Ltd. and the president of the Canadian Association of Home & Property Inspectors - Manitoba (www.cahpi.mb.ca). Questions can be e-mailed or sent to: Ask The Inspector, P.O. Box 69021, #110-2025 Corydon Ave., Winnipeg, MB. R3P 2G9. Ari can be reached at (204) 291-5358 or check out his website at www.trainedeye.ca.