
Renovation & Design
Renovation & Design
Sometimes, the simplest repair is best
If you have a concrete patio or walk that contains one or more curling or bowed wooden dividers, pay close attention to this easy repair.We have been watching the ends of our divider boards curl for years. One day we realized that the buckled wood was a trip hazard and someone might be hurt. How do we make the repair: Glue, bolts, what?
Suddenly it occurred to us that if we could force the wood back into place we could then wedge in a shim shingle and it just might hold. So, here is what we did:
First we drove a wood chisel between concrete and the bowed end of the divider. This created a pressure point between the concrete and the divider.
We were then able to use a wooden mallet to drive the top of the curved end of the wooden divider flush with the top of the concrete. We had to gently tap the chisel from time to time to ensure the continued pressure needed to prevent the divider from popping up.
With the divider down and wedged in place it was time to make the repair permanent. We drove cedar shim shingles between the divider and the concrete. We actually used three shingles to provide the "wedge" force needed.
Next, we carefully removed the chisel by wiggling it back and forth parallel with the gap and then replaced the hole left by the chisel with additional shims.
Finally, we used a razor knife to cut and remove the excess shims.
This whole process took about three minutes and was simple to repeat in four additional locations throughout our yard. All is safe now.
We needlessly agonized over this repair for a very long time because we thought that we had to completely replace the dividers. When we decided to try the wedge idea it was like a light bulb going off.
As it turns out, most repairs that we do are just as simple. For example, to find a toilet leak simply add a few drops of food coloring to the tank. The food colouring will travel toward the leak (along with the leaking water) and the food colouring will leave a trail similar to a lightning bolt that will point directly to the leak. Or, what about using toothpaste to fill a nail hole or using glued toothpicks to repair a loose screw hole?
So no point in delaying -- an easy fix can be as effective as a difficult one.
-- The Associated Press
Renovation & Design
Canadian unity through coast-to-coast tips
As we get ready to celebrate the anniversary of our great country, we can also feel united with these useful tips sent in by people across the nation.Canada Day Trivia: What does the word Canada mean?
1. Tackle chap-stick on fabrics by dabbing waterless hand cleaner onto the area. Rub gently and wash as usual. Hang to dry. For chap-stick stains that have gone through the washer and dryer; soak the clothes in hot water and Oxy Clean or soak each garment separately in half-cup Arm and Hammer washing soda and enough hot water to cover the clothes for 30 minutes. Wash as usual. Air dry. Repeat until stains are gone. Submitted by Dawne O.
2. Speaking of chap-stick. Rub chap-stick on paper cuts to stop the pain immediately and heal the cut. Submitted by Rick P.
3. Keep breading on meat while frying by adding half teaspoon of sugar to the batter. Submitted by Brian P.
4. To grab the full benefits of flax seed in recipes, grind the flax in a coffee grinder. Add ground flax to cereals, muffin and cake recipes. Flax is high in alpha linolenic acid which is a type of plant-derived Omega 3 fatty acid, similar to that found in salmon. Submitted by Angela R.
5. Prevent mosquitoes from breeding in your bird bath by adding a few drops of canola oil or any vegetable-based oil to the water. Doing this will create a light surface coating that won't harm birds but will stop mosquitoes from making more mosquitoes! Submitted by Jim D.
6. "Un-gum me you fool!" Remove sticky labels on jeans by wiping the area with rubbing alcohol and gently scraping with a plastic putty knife. Submitted by Tracia S.
7. About twenty years ago we had a serious infestation of silverfish. I don't remember where I learned this solution, but it worked. A mixture of powdered sugar and boric acid spread in a few places along the baseboards did the trick (take caution around children and pets). No fumigation necessary. I haven't seen a single silverfish since. Submitted by Flora.
8. Don't toss out the bread crusts that your family won't eat. Soak them in two-third cups buttermilk for 10 minutes. Squeeze out excess milk and add to meatloaf before baking. Moist and yummy! Submitted by Natalie L.
9. Shiny hair is possible with a bit of coconut oil. Rub oil onto your scalp once a week. Wash hair in the morning. Submitted by Leslie D.
10. For smooth skin use a version of the secret recipe that Cleopatra used. Into your bath water drop two cups of powdered milk. Submitted by Angel L.
11. On the topic of milk, Wendy from B.C. wrote, "Tackle a fresh milk spill in the back of a car. Sprinkle a box of baking soda over the offending odour and cover the area with newspaper, leave undisturbed for three days. Remove newspaper, vacuum up baking soda. Voila no more smell."
12. I use the powdered laundry detergent that is sold in plastic pails. It is such a struggle to get the lid off with each use, so now I just rest the lid on top of the pail. This allows moisture in, causing a problem with clumping. I decided to toss in a couple of packages of the silica gel that is sold with shoes. It keeps the laundry detergent dry and works amazingly well! Submitted by Veronica S.
13. Whenever I drop hair dye onto the carpet, I quickly pour the lotion from the home hair dye kit onto the area and dab it with a white cloth. The lotion is great at lifting the colour out of the carpet. Submitted by Hair Girl
14. Use ketchup at the bottom of your nearly-empty bottle. Add a little water or vinegar and shake, then use the liquid to flavour soups, stews or salad dressings. Submitted by Martha S.
Canada Day Trivia: Speaking of penny pinching, everyone will soon be walking much lighter, as the penny approaches its 100th birthday, there's a growing movement to kill the coin and, according to documents obtained by CanWest News Service it's clearly an issue on the radar of the government and the Mint.
15. Got grout? Scrub with Listerine mouthwash and an old toothbrush; cleans stains, messes and general day to day grout gunk. Submitted by Olivia D.
You'll be the life of the party with this little trivia tid bit: The word Canada comes from a Wendat (Huron-Iroquoian) word, meaning village or settlement.
Solutions sleuth Reena Nerbas is a home economist and speaks professionally on the topic of household challenges; she is also the author of two national bestsellers, Household Solutions 1 with Substitutions and Household Solutions 2 with Kitchen Secrets. She can be heard on radio and television programs across Canada.
Renovation & Design
Thorough cleaning, bleach should resolve sewage odour
QUESTION -- I had a leak in a sewer line in a crawl space under my house. That leak has been repaired and I thought I cleaned up thoroughly, but whenever I turn on my air system, we can smell sewage. How can I get rid of the smell?ANSWER -- Go back to the crawl space and make sure that you have cleaned all visible surface residue left by the leak. It is wise to dig down about a third of a metre or so in the area where the sewage ponded.
Once that's done, thoroughly soak the entire area with pure bleach to kill bacteria and the smell it leaves. Make sure to take proper precautions when using bleach and other cleaning materials in a closed space. Cover the bleached area with a 30-kilogram bag or two of powdered lime. You will also want to check for any damaged ducts in your air system, and you may want to consider having a contractor do a professional cleaning of the ducts. They have special machines designed for this purpose.
-- Associated Press
Renovation & Design
Security tips for empty house
It's the time of year when many of us are getting excited about heading out on our annual vacation.Too bad we can't bring the house along. Besides getting caught up with all the yard work before we leave, there's always a nagging worry about the security of our empty house.
The folks at the lock company Weiser have come up with some good ideas that might help protect your home and your belongings from the attention of thieves while you're away.
Leaving a car parked in the driveway gives the appearance that someone is home.
Good exterior lighting around your perimeter creates a psychological barrier.
Make sure all exterior doors have deadbolts with at least a one-inch throwbolt.
Keep your doors locked at all times. Half of all break-ins are through unlocked doors.
Going out of town? Give your neighbour a house key so she can check in.
Help the police help you. Make sure you keep your street address visible. When affixing numbers to your house, make sure they are at least four inches high, reflective and visible from the street.
Park your car outside? Always lock your vehicle and consider taking your garage door opener with you instead of leaving it in the car.
Been at the same house for a while? Replace your outside locks as you've probably given out your house key a lot through the years.
Backyard secure? Consider installing a fence and plant fast-growing bushes as extra barriers around the exterior of your home.
Start a Neighbourhood Watch program -- it's the most effective method of keeping your home safe.
Keep an extra key outside your house? Not a good idea. Burglars know all the hiding spots. Instead, leave a key with a trusted neighbour. Better yet, install a keyless entry system. For more information, check out weiserlock.ca.
-- Canwest News Service

Renovation & Design
Group effort
Decor items are much more interesting when they are displayed in groupings. One single vase is nice but a collection of three or more on an accent table shouts 'look at me! If your decor is somewhat underwhelming, consider doubling or tripling your accessories and knick-knacks for optimum visual impact.As an example, I have several different styles and sizes of candle holders that used to be scattered here and there throughout the house. When I decided to redo the display on the top of my piano, I was loath to find the right items to display. Then I thought about the candles and decided to make an entire display of them on the piano top. The outcome is pleasing and when they are all lit it doubles the impact of the display. As well, having all of the candles and holders on one surface adds importance to them whereas having them scattered here and there tends to make them disappear visually. Even though they are all different designs, shapes and sizes, displaying them as a grouping makes it OK to mix and match.
A good place to start this grouping practice is with family photos. Framed photos scattered here and there can seem more like clutter. To give them the importance they deserve, display them in a grouping in a place of prominence, whether that be on a table or on the wall. Even if the frames don't match you can still get away with a successful display as long as the frames are in the same visual realm. (For example, metal and wood frames will go together but you might leave the ceramic, baby photo frames with bunnies and kittens on it for another room.)
Hanging several smaller mirrors on a wall rather than one big mirror can be an unusual but effective focal point. Collect smaller, inexpensive or even antique framed mirrors and create a wonderful wall display over a sofa, at the head of the bed or even as the main mirror(s) in a powder room. Play with the layout by mixing square and round frames and by turning some of the square frames to hang in a diamond pattern. Get creative!
Painting, especially original works, can become more dramatic when leaned in a grouping of three or five on a mantel or wall shelf. This prompts people to stop and take stock of the artwork instead of walking past single paintings hung in a hallway or foyer. Mix large and small paintings for added drama and change the display on a rotation basis to keep it fresh and interesting.
Plants can add tons of texture and colour to your space but rather than one single plant in a big pot, try planting two or three compatible plants in a decorative planter. Group small potted plants in threes on a window ledge or table top for added interest.
One or two toss cushions look nice on a sofa but five or more will speak to comfort and abundance. Mix and match colours, shapes and patterns for huge impact on a plain sofa. Group them at each end or all in the middle of the sofa for a more interesting look. The same can be said for accent pillows on the bed. The more, the comfier.
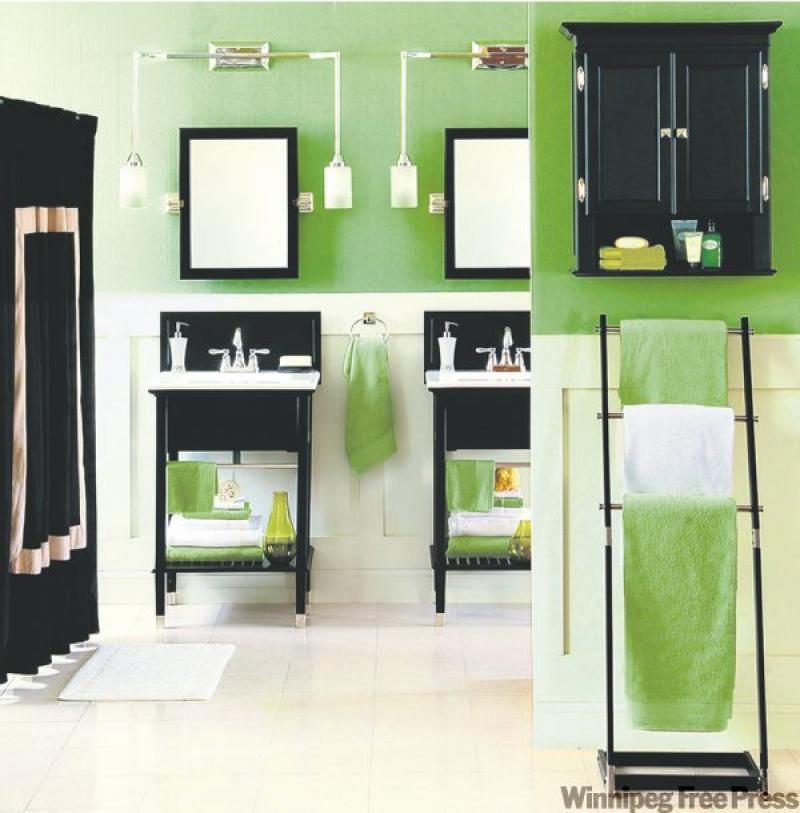
In the bathroom, display those lovely bath towels by rolling them up in a grouping in a decorative basket or on a storage shelf. A basket of soaps is another nice touch.
Inexpensive decorative storage sets for the dresser or vanity are another great way to create visual interest while providing countertop storage for utilitarian items. One storage box is OK but a set of them creates more impact.
To start, gather like things
If you have two or more of anything, you might be able to make a nice grouping out of them. For example, you may have wicker baskets or containers here and there throughout the house. If you put them together on a shelf or an open cupboard you suddenly have decorative display that can be used in the bathroom, kitchen, home office or even the bedroom. Perhaps you have a few vintage Campbell's Soup mugs in the cupboard. Put them on display on a shelf in the pantry along with your soup cans and suddenly you have a collection rather than old, loose mugs kicking around. Maybe you're a crafter like me and have handfuls of beads, river rocks and coloured sand in your tickle trunk. Place them in clear, decorative containers and group them on a ledge for an instant mini-focal point or use them as a centrepiece on a dining table.
Food as art
Dried, coloured beans and peas can be placed in decorative, clear containers and grouped as a display in the kitchen. Even coloured pasta works for this easy project. A handful of lemons or limes, displayed in a tall, clear vase, will make a great centrepiece as well. Pull out all of those fancy vinegars and oils from your coffers and make a decorative grouping of them in the kitchen to show off your gourmet skills.
Look around your space and see what your creative mind comes up with. Keep me posted!

Renovation & Design
Musty smell in basement is likely mould
QUESTION -- Our basement and rec room is quite cool, particularly in the summer months, and has a musty smell. We did have a little water seepage several months ago but this has now been corrected. Could you advise how to get rid of the musty smell and make the basement warmer?-- Bill Silverberg, e-mail
Answer -- As the cool spring weather appears to have finally broken, and the heat of summer appears to be upon us, it is an ideal time to address this question that has been in my archives for some time. The first thing that I would have said is required to address your concerns is the seepage, but you state that it has been corrected. The musty smell you are experiencing is directly related to the dampness in the basement and corrective measures to eliminate this will help get rid of the annoying odours, as well.
Basements are naturally cooler than the upper floors in homes primarily due to two major factors. Firstly, the basement in most homes is cooler than the rest of the home because there is a large area of concrete in the foundation and floor slab that is below grade and has no natural thermal break from the soil surrounding it. The soil is partially frozen in the winter and cooler than the air above in the summer. For this reason, the concrete will always be cooler than the walls & floor in the rest of your home and require more added heat to achieve the same surface temperature. If uninsulated, this bare concrete will always make the basement feel colder than elsewhere. Secondly, in the mostly closed environment in your home, warm air rises and conversely, heavier, cool air settles. Due to this simple principal of physics, it is much easier to heat the upper floors of the home than to the basement with a forced air system. In the summer your basement may feel cool partly because it is damp due to lack of air movement and proper dehumidification. Central air conditioning dehumidifies as it cools, so using your air conditioner as much as possible will help prevent the uncomfortable, clammy feeling in the summer.
If your basement is far cooler than the rest of the home, especially in the summer months, it is likely due to a combination of poor insulation on the foundation and ineffective air movement by the heating system. Since you were not specific in your question, I am assuming that you have forced air natural gas heating, which is in the majority of homes in our area. In the heating season your furnace draws air in through the return air ducting in your home, blows it over the warm heat exchanger, and circulates it through the home via ducts and registers located in various rooms. If the ducts are excessively long, not properly installed or connected, partially blocked, or missing, the system may not effectively heat the affected areas of the home. In many basements, the return air components of the heating system are missing and may have never been installed in the first place. Without return air ducting, air circulation will be less than optimal, which may lead to areas that have minimal heating or cooling. In a basement, ineffective heating can lead to condensation on the cool foundation walls, mould and mildew growth, and musty smells. One solution to both your problems may be to add more heating and return air registers in various locations in the basement to improve air flow. Also, running the furnace fan on continuously low speed will help air circulation in the home in both the heating and cooling seasons.
To directly address your question about the damp, musty smell in the basement, the only ways to minimize that is to reduce moisture in any way possible. The smell often described as "musty" by most people is the smell of mould and mildew. To successfully grow, mould needs two major components, moisture & a cellulose based food source. Most of the raw building materials in homes are cellulose based, so the food is no problem. For that reason, concentrating on reducing the available moisture is the way to go to reduce the damp smells. On top of improvements to the heating system, natural ventilation is very important this time of year. On warm, dry days, opening the basement windows can provide an excellent source of fresh air that will help remove damp air and improve comfort at the same time.
The final item to address is proper insulation in basements. Poorly or improperly insulated foundation walls may lead to considerable condensation behind the insulation. In the winter, this condensation can freeze and lead to considerable frost, which melts and can provide an excellent environment for mould growth due to the lack of air behind the wall to dry the moisture. If you see moisture damage or stains on any portion of the insulated perimeter walls in the basement, particularly the bottom of the sheathing or walls, more remediation is needed. The wall coverings and insulation may have to be removed to inspect the foundation walls & framing behind. This is the most likely area of mould growth and damp smells in insulated basements. If a small amount of mould is seen in the framing or foundation, it may be possible to clean it. If larger amounts are seen or extensive rot in the wooden framing, it must be removed and discarded.
Minimizing areas that trap humid air or provide a cold surface for that air to condense should be eliminated to make a basement dry and mould-free. Eliminating humidifiers, cold storage rooms, heavy carpets, and poorly sealed insulation on foundation walls will all help in this effort. Improvement to heating systems and regular use of central air conditioners will not only be a major step in this direction, but will also make the basement warmer and more comfortable to the occupants.
Ari Marantz is the owner of Trained Eye Home Inspection Ltd. and the president of the Canadian Association of Home & Property Inspectors - Manitoba (www.cahpi.mb.ca). Questions can be e-mailed or sent to: Ask The Inspector, P. O. Box 69021, #110-2025 Corydon Ave., Winnipeg, MB. R3P 2G9. Ari can be reached at (204) 291-5358 or check out his website at www.trainedeye.ca.
Renovation & Design
Sturdy Moen faucet extends season for outdoor shower
If you ever drop by my place for an evening visit, please don't walk around to the backyard without first yelling some kind of warning.If I've been working outside that day, and the air's any warmer than 5C, I'm probably back there having an outdoor shower. Nothing fancy, just a hose with warm water coming out, a bottle of shampoo, a bar of Irish Spring and a few trees and shrubs for privacy.
Five years ago, I installed a hot and cold faucet off my back veranda, and it's turned out to be one of my best plumbing features. And not just because it allows the backyard equivalent of skinny-dipping.
Having access to warm water outdoors also makes a lot of other things possible. I wash off my youngest kids out there after they've spent a day in the sand pile. It's much better than dragging the filthy little fellows through the house and into the bathroom.
The system also gives me easy access to a bucket of hot water for washing the van, cleaning dirty hands and humanely washing pets. I've only heard of a few other houses with hot-and-cold taps outdoors, but I bet that's about to change with a new type of faucet.
When I went shopping for an outdoor-friendly hot-and-cold tap 10 years ago, I didn't find many units that fit the bill. In the end, I settled for a side-mounted kitchen faucet with a swivelling spout and two handles. This traditional design has worked well, though there are two problems with it.
The first is the distinct possibility of physical damage. It's one thing to have a faucet spout in a protected location over your kitchen sink, but quite another when that tap lives outdoors at knee level. Collisions with overzealous tricycle drivers, or an impatient gardener yanking on a 30-metre garden hose connected to the thing, always make me wonder how much longer my faithful faucet will survive.
Then there's the issue of winter.
My outdoor shower season ends when overnight temperatures threaten to drop below freezing, even though there might be plenty of warm days to come. That's when I'm forced to shut off supply valves in the basement and drain my outdoor tap. But that's not necessary with a new kind of outdoor faucet.
The unit I've been experimenting with is made by Moen, and it's unique as far as I know. They call it the "single-handle hot/cold sill faucet" and it does two things better than the side-mounted kitchen faucet.
First is the toughness of the design. The single, pullout knob offers nothing that can get knocked off or bent. It's short, strong, sleek and damage-resistant. You'd have to hit the thing with a hammer to break it. Pull out the knob to turn the water on, then rotate it one way or the other to control the temperature.
The Moen hot/cold outdoor faucet also includes the kind of automatic drain-back feature you'll find on the best traditional cold-only outdoor taps. Whenever you shut it off, water drains completely, so there's nothing to freeze and no need to remember the seasonal draining ritual. If you happen to need a bucket of warm water for washing the car during a January thaw, simply turn the handle. Water flows year-round with Moen.
The design comes in two lengths to handle exterior walls ranging up to 30 centimetres thick. Drill a 40 mm-diameter hole through your exterior wall at a slight outward slope, anchor the faucet with screws and caulking, then make hot and cold pipe connections inside. That's it.
A hot and cold outdoor faucet is one of those things you'll find more practical than you would have guessed before living with one. And if you've never enjoyed a steaming outdoor shower on a crisp, moonlit night in spring, you're missing out on what might be the best and most indulgent advantage of all.
-- Canwest News Service
Renovation & Design
Rooms on the cheap
If life is like a box of chocolates then today's featured room will fit right in. The colour scheme in this delicious bedroom was inspired by a velvety dark chocolate topped with soft pink icing; a delectable combination in both cases.This room needed to be a space where both husband and wife felt comfortable in. This pink and brown colour scheme fit the bill as it has both masculine and feminine qualities.
This homeowner decided to work with some of what she all ready had. Dark brown antique furniture and blush-coloured walls were the starting point. Not wanting to repaint the room she chose to work with the soft pink wall colour and gained further inspiration for the rest of the room from a piece of chocolate topped with pink icing. The homeowner luckily had a soft, pink satin curtain panel that was hanging in another room at the time which would work well in the new scheme. The pink panel was a starting point for the window treatment but because it was not wide enough for a sufficient treatment she needed to find chocolate brown panels in a similar fabric to flank it. As well, she decided that the bedding should be brown (to keep the masculine feel) with soft pink bed sheets as accents. So, at this point she needed to find the bedding, curtain panels and sheets to help complete the space. These three items can easily run into the hundreds of dollars but our homeowner bade her time and kept her eyes open for deals. She also knew that she'd need some artwork and kept this in mind when shopping for decorating items.
This is a good place to remind you that patience can sometimes be a virtue. When you are in a hurry to finish a room, you'll run out and pay full price for items that, if you waited, might be found in other venues for a lot less money.
Budget savers
Case in point; our homeowner found a comforter/pillow sham set in a dark chocolate shimmery fabric for $20. The clearance store only had one queen set and one twin set so she bought both. She used the twin set to create the dark curtain panels she needed by simply removing the fleece backing and cutting the top piece of the bedspread in half and seaming the edges. At the same discount store, she found a mottled brown sheet set for her queen-sized bed for $8 and a suede accent pillow in dark brown for $3. She planned to use the sheets to create a bed skirt, which in the end, turned out great. At yet another discount shop she found a soft pink corduroy neck pillow for under $5.
The headboard needed to be recovered as well. It was fashioned from two panels of plywood which had previously been covered in another fabric. Our clever homeowner used the dark brown fleece backing from her curtain project to recover the headboard using a hot glue gun.
Artwork
Our crafty homeowner used clothing to create unique artwork for her bedroom walls. She happened upon a sale on summer dresses found some that were chocolate brown with pink accents for $3 each. She bought two dresses and used one to create two pieces of artwork by stretching the fabric over two stretcher frames. (The frames were found at a thrift shop for $1 each.). She has displayed the second dress on a dressing dummy she had and created a lovely vignette in one corner of the room. She found a brown and tan suede skirt in a retro pattern at a thrift store for $1 and stretched it over a stretcher frame (which she also got at the thrift store for $2) to create a unique piece of artwork for over the head of the bed.
This is another great place to remind you that artwork can be inexpensive yet still stunning. Keep your mind open to the possibilities.
Our homeowner found a set of pink flannel bed sheets at Winners for $40, which was a reasonable price and the room was pretty much complete.
This entire room was redecorated for just over $100, which these days, is no small feat. Shopping wisely and thinking creatively saved this homeowner tons of money.
The homeowner is happy with her creations and is comfortable in the fact that the artwork can be easily updated with new and different fabric on a whim as her tastes evolve. The chocolate brown bedding can be interchanged with different accent colours down the road as well without a huge investment.
Take your inspiration from things that you love, whether it be a piece of chocolate, a destination or a song. Life is full of wonderful options for the home.