
Renovation & Design



Renovation & Design
ASK THE INSPECTOR: Stop water leakage in foundation bolt holes
QUESTION: We have a 40-year-old bungalow. Over the past four years, one wall in the basement has been giving us a problem. If it rains, water runs out of the iron-rusted bolts, which I assume are the rods that attached the cement back steps to the house. It's only these four bolted areas that leak and we have tried countless remedies to plug these holes, but sooner or later they leak again. The water streams down the wall and heads to the sewer.
Who can I call to fix this and how huge and expensive will this project be? Thanks, Barb Potkonjak.
ANSWER: Any openings in a concrete foundation wall can allow moisture to enter, especially if they are below grade. Sealing the holes may be possible either internally or externally, but will depend largely on access. This time of year is ideal for this discussion, as many homeowners will see minor seepage as the snow melts and the ground thaws after the long winter.
The initial thing to determine is where these bolts, and the corresponding holes around them, are located relative to grade. You are probably correct these are used to secure your steps to the foundation, which are commonly used on older precast concrete steps and landings.
Often, these bolts are installed above grade below a doorway, which should cause little concern unless the steps have moved. Using a basement window, dryer vent, fresh-air intake duct or gas line as a reference point should help you determine if they are above or below the soil outside the foundation. If they are above grade, repairs should be easier than if they are lower.
It's quite likely water from heavy rains will be able to run down the walls of your home behind your steps and leak through the small holes in the foundation where the troublesome bolts are located, even if they are well above grade. This is much more likely if the steps have sunk or pulled away from the foundation even a small amount. Quite often, this occurs and leaves a fairly large gap between the precast steps and the foundation wall.
If this is what you find, filling or covering that gap may be all you need to stop the leakage. If the gap is small, filling it with an exterior-grade caulking at the top and down the sides of the steps should prevent rainwater from getting to the holes. If the gap is larger, filling it with flexible foam rods before caulking may be required. Otherwise, installation of a metal flashing that is sealed to the siding and fully covers the top of the gap may divert water away from the opening.
If you find the bolt holes are below grade, more expensive work may be required. Again, the condition of the steps should be checked initially. If they do not appear to have moved and are in the original location of installation, interior repairs may be possible. If the steps have sunken, pulled away from the home or are otherwise damaged, removal may be your next step.
Detaching the steps from the foundation by cutting or removing the bolts will allow access to the offending holes, then it should be quite simple to repair these openings from the outside. These could be filled with typical concrete patching compound. Once cured, waterproofing compound or small pieces of foundation membrane could be installed to prevent further leakage.
If the steps are precast and still in reasonable condition, they could be reset and supported with anchors installed above grade or other supports that don't require drilling a hole all the way through the foundation. If the steps are damaged, replacement with new concrete or treated wood alternatives will improve the situation.
In the unusual case where you find the steps are in good condition, do not appear to have pulled away from the foundation and there is no substantial gap along the foundation wall, interior repairs may be warranted. Filling holes or small cracks in foundation walls with injectable compounds is a common way to prevent periodic seepage. The most commonly used material is epoxy, but there are other sealants that may be equally effective.
There are several local companies that will come into your basement, drill or chisel the openings to make them more accessible and pump one of these compounds into the holes under pressure until they are filled. Once this material cures, it should seal and prevent further leakage through the gaps.
The only possible downside to this method is the bolts might continue to corrode and leakage could recur through the rusted-out bolts. If that happens, the bolts would have to be removed, but it would likely be preceded by the steps sinking or moving away from the home as the bolts deteriorated.
While many homeowners experience periodic leakage through their foundations due to cracks, deteriorated damp-proofing and weeping tiles, yours appears to be a much simpler problem. No matter what you discover about the location of the leaky bolt holes, filling and sealing these openings should solve the problem. Whether exterior work, which may include moving or replacing the steps, or interior repairs are needed, the nuisance of a leaking foundation should be eliminated once and for all.
Ari Marantz is the owner of Trained Eye Home Inspection Ltd. and president of the Canadian Association of Home & Property Inspectors-Manitoba. Questions can be emailed to the address below. Ari can be reached at 204-291-5358 or check his website at www.trainedeye.ca.
trainedeye@iname.com

Renovation & Design
SOLUTIONS: Use pantyhose for long-term onion storage
QUESTION: I would like to know what the best way is to store onions so that they will keep for a fairly long time. Thank you, Ruth (Shoal Lake, MB)
ANSWER: My favorite onion-storage solution includes a pair of clean pantyhose. Place an onion in the toe and tie a knot above the onion. Drop another onion into the leg of the pantyhose and tie a knot.
Continue filling both legs with onions. Hang the contraption inside of a pantry or cupboard (warn family members, they may be scared at first). Each time you need an onion, cut below the knot of the next onion. Storing onions in pantyhose keeps them properly ventilated and dry so that they last a long time.
Onions can also be chopped and put into freezable containers. Chopped onions may be stored in the refrigerator for 30 days or frozen for about six months. Extra tip: Do not store whole onions next to whole potatoes, they will both spoil. Always store onions in a cool, dry, well-ventilated place.
QUESTION: I've looked through two of your books but can't find the solution I need. I received a white polyester cotton blouse trimmed in heavy cotton lace. It looks like it's been hanging for a while and has yellowed. I tried lemon juice and cream of tartar but it didn't seem to do anything -- I just guessed at the measurements and the time it needed to soak.
Is there anything else I can try? I currently have it soaking in borax and water. I am desperate because I need it to sing in a choir and I don't like yellowed whites. Rosabelle (Winnipeg)
ANSWER: Well, the great news is the blouse is white, which makes cleaning this stain easier than most. If you have tried borax or washing soda and the stain has not budged, you will need to move onto a more drastic solution because sometimes stains are here to stay.
Assuming the blouse is 100-per-cent washable, use a product called Iron Out, found at home hardware stores such as Canadian Tire. Put the blouse into a pot filled with enough water to cover the fabric. Add one quarter cup of Iron Out. Boil the blouse for five minutes. Using tongs remove the fabric from the water; the stain should be a distant memory, if the stain has faded but still remains repeat the process.
QUESTION: What's your best advice for removing odour from hockey equipment and, most specifically, hockey gloves? The gloves are synthetic. We are unable to go a full season without the gloves becoming unbearable.
Also, what is your best advice for storing hockey equipment between games and practices to prevent odours from building? Thanks. Elliott (Winnipeg)
ANSWER: The easiest thing for you to do is move out or encourage family members to switch to chess. But since those are not options, let's talk cleaning.
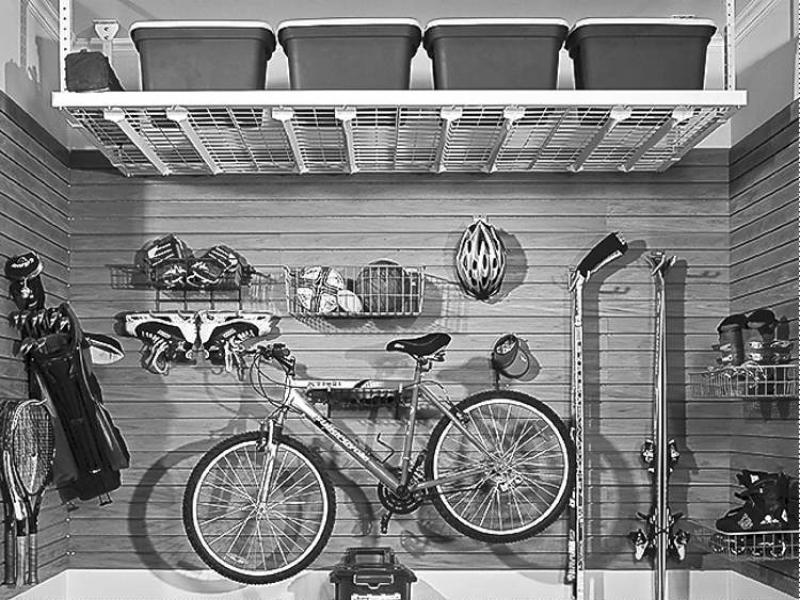
When it comes to storing hockey equipment, the first step is to make a hockey tree using old hockey sticks and nails. Hockey trees can also be purchased at sports stores. Whenever your hockey player returns home from a game or a practice, make sure he or she hangs all equipment on the tree which should be stored in a cold, ventilated area such as outside or in a garage. Freezing equipment between uses kills the bacteria that cause some of the odor.
Before washing equipment, check the care label instructions. I wash all hockey equipment, including gloves, in the washing machine and lay them out to dry. Hockey equipment can also be washed in the bathtub with hot water and detergent. You can even add one-half cup of vinegar, borax or washing soda to the washing machine to battle odors. Hockey gloves will not lose their shape and you will once again breathe easy.
When the season ends stuff skates, gloves and helmets with oodles of crumpled up newspaper to absorb odors.
I enjoy your questions and tips, keep them coming. Missed a column? Can't remember a solution? Need a speaker for an upcoming event? Check out my brand new website: reena.ca.


Renovation & Design
Sprucing up the house can be good exercise
For many years, I have been involved in the building and supplies business, mentoring people in home-repair services, home renovations and a home-services referral network -- not to mention many years in radio.
Most recently, I've been webcasting on the Internet, teaching the listening and viewing audience about the how-to, what-to, where-to, why-to, when-to and the who-to of home improvement.
One thing that popped up and met me head-on was my health and the fact I am not getting any younger.
Over the past half decade, I have been faced with a number of health challenges and now that I have reached 70, I want to improve my lifestyle, since I want to be able to continue writing articles such as this, doing my webcast and other initiatives where I can provide information to the public.
It all came together when a good friend from past radio days introduced me to a program that is changing my outlook on healthy living.
My wife and I were introduced to a health-clinic exercise club, and it has changed our lifestyle.
First, to become involved, we had to be referred by our doctor, who sent our files to the clinic so we could set up an interview to see what program would best suit our needs.
This is where it dawned on me that there are a lot of activities at home that allow us to not only get a job done, but provide a workout.
A few examples of the types of things I'm talking about are cleaning out the storage room, kitchen and closets, reorganizing the crawl space, rearranging the furniture, turning the mattresses, washing and or painting walls -- and yes, cutting the grass or shovelling snow.
The list goes on and on. Folks, I am not trying to sound like a "do-goody," but, you know, getting off the couch and into an exercise program such as a health clinic -- where your doctor is informed of your activities -- really adds a new dimension to your lifestyle.
Sometimes, it takes a major surgery or a health scare to make people realize that it is time to slow down and smell the roses.
So take it from me, folks, don't get in a rut. Look ahead, tackle those home-improvement tasks and get some good exercise at the same time.
Get into it folks, and live well, and remember: "It's Just That Easy!"
For more home-improvement information, to send Shell an email, or to watch Shell's AskShell webcast, go to www.AskShell.com.