
Renovation & Design
Renovation & Design
ASK THE INSPECTOR: Structural wood floors require proper installation
QUESTION: I read your column every week in the Winnipeg Free Press. Although I don't have a specific question regarding my current home, I do have a question about current new-home-construction methods, specifically with regard to structural wood floors (SWFs).
More and more builders are promoting the use of SWFs in basements. The benefits of HVAC ducting under the floor and less impact from ground movement are obvious, but I would like to know about the long-term integrity and any disadvantages of SWFs.
For example, are there any perceived long-term issues with respect to the structural members and HVAC ducting being exposed to the higher humidity that comes from the soil? Is pressure-treated lumber used throughout with galvanized or stainless-steel fasteners?
Also, are present construction techniques doing anything to restrict or manage radon-gas ingress? I suspect when it comes to radon gas, an SWF would provide almost no barrier to the gas ingress as opposed to the barrier supplied by a sealed concrete floor.
Looking forward to seeing your comments on this topic.
Darren Besler
ANSWER: I'm more than happy to oblige your excellently articulated request to find out more information about structural wood floors in homes.
Structural wood floors replaces the traditional concrete-slab basement floor, with a heated crawl space underneath. The benefit of this type of construction is to provide a more comfortable floor and prevent heaving and sloping caused by soil pressure, typical of concrete basement floors.
Most homes built with this system have deep concrete piers under the beams and perimeter foundation, rather than traditional footings. This, combined with engineered floor systems, can provide a perfectly straight and non-moving floor system that should not require telepost adjustments or other periodic repairs.
Because many of these systems incorporate engineered floor joists, often with manufactured or steel beams, they can span greater distances between vertical supports. This allows for easier installation of plumbing, mechanical and electrical components in the crawl space. It also makes it easier for contractors or other individuals to access some components that are often installed below the main-floor ceiling in a traditional home. This gives additional headroom to the lower level and makes some systems more accessible than in a basement with drywall-covered ceilings.
The downside of this type of construction is that crawl spaces tend to be cooler than the living space above, and are more prone to condensation and moisture issues, especially if the soil inside is not well-sealed.
To combat this, the crawl spaces should be deep enough to provide a gradual slope to the centre, while maintaining enough room for a person to crawl underneath the joists at the entire perimeter. If ombined with a well installed and sealed polyethylene air/vapour barrier over the entire floor area, there should be few moisture problems.
A sump pit is normally located at the lowest area in the crawl space, to further help drain any moisture that seeps into this area from surrounding soil. The sealed poly sheathing is also necessary to prevent soil gases from infiltrating the crawl space from beneath, which should address your concern about radon.
Maintaining a reasonable space between the covered dirt floor and the underside of the joists should prevent moisture damage to the joists from wet soil, but it must be combined with other items to be fully effective.
The floor joists in this style of construction are often supported by joist hangers or a ledger board attached directly to the concrete grade-beam foundation around the perimeter. This allows direct contact between the ends of the joists and the concrete, which may be below grade. This can cause wicking of moisture from the cool concrete to the joists or the ledger boards.
To combat this, the perimeter grade beam must be well-insulated and properly air-sealed to prevent excessive condensation and damage to the joists. I recently saw a newer home experiencing this problem, mainly because of a lack of insulation in this area.
To further compound the potential for moisture damage to wooden components in crawl spaces, many builders are using manufactured TGIs, or I-joists, in structural wood floor systems. These I-joists are high-quality materials, but they can be more prone to structural damage from high moisture levels. Because the centre web of the I-joists is normally only 10 to 11 millimetres thick, it doesn't take much moisture damage to weaken the joist.
This contrasts with traditional framing lumber that may retain it strength even with some visible surface rot. For this reason, some builders are using traditional spruce or fir joists and beams in the structural floor, while incorporating I-joists into the upper floors of the home. Exposed lumber attached to the grade beams, whether for ledgers or nailing purposes, should also be pressure-treated to prevent easy rotting.
Many homes have been built with these items fully addressed and have few problems with their structural wood floors. But there are also others that have experienced premature rot and moisture damage in their structural floors because adequate attention hasn't been paid to these critical components.
Ari Marantz is the owner of Trained Eye Home Inspection Ltd. and the president of the Canadian Association of Home & Property Inspectors -- Manitoba (www.cahpi.mb.ca). Questions can be emailed to the address below. Ari can be reached at 204-291-5358 or check out his website at www.trainedeye.ca .
trainedeye@iname.com

Renovation & Design
SOLUTIONS: Washing soda cleans up more than clothes
QUESTION: Can you tell me how much frozen whip I need when a recipe calls for 8, 16, or 24 oz? We buy it by the litre container and I never know how much to use when they call for ounces. Thank you. Bertha, Winnipeg
ANSWER: If I understand your question correctly, you are looking to find out how many cups of frozen whip cream you need to make 8, 16 and 24 ounces. One cup equals 8 ounces, 2 cups equals 16 ounces and 3 cups equal 24 ounces.
QUESTION: You saved the day for me a couple of years ago as to how to get badly burnt sugar off a pot. My question today: In a previous Winnipeg Free Press column, you answered a question to "Barbara" regarding how to find washing soda to clean her cutlery. What I don't understand is whether she was referring to stainless steel, or by chance to silver cutlery. I think stainless steel, but I sure don't want to make a mistake with my silver, which I absolutely have to de-tarnish in the next couple of weeks.
Second, just assuming your answer referred to stainless steel, do any of the products need to be mixed with water to create a soaking solution? If so, what proportions and for how long, please? My 40-year-old stainless steel cutlery, which was a graduation gift from my parents and which we still use every day, is not exactly black, but it's not as bright as it used to be. I look forward to hearing from you, and have a great holiday season! Joan, Winnipeg
ANSWER: Washing soda is a natural product (sodium carbonate) that is used to clean toilets, sinks, ovens, range hoods, exhaust fans, stainless steel pots and pans, garden tools, barbecue grills, silver and stainless steel cutlery, outdoor furniture, copper (removes lacquer), gold and concrete floors. It also whitens and brightens laundry. When cleaning a variety of household objects, it is important to rinse with vinegar following a washing-soda treatment.
To clean silver or stainless steel, test the following solution on an inconspicuous area first and do not use frequently. Place slightly crumpled aluminum foil in a plastic bucket or baking dish. Dissolve one quarter cup (60 ml) washing soda in 4 cups (1 litre) hot water. Place silver on foil and let stand for a few seconds until tarnish is gone. Remove silver, rinse and dry.
To deter future tarnish, you can polish quickly with silver polish. Replace foil as it loses its shine. Use rubber gloves to protect hands. Another, (less effective) option is to clean with non-gel toothpaste. Extra tip: Add white chalk to the drawer to reduce risk of tarnish.
Also, corrosion caused by food can be repaired by mixing 1 tbsp. (15 ml) hot vinegar, 2 cups (500 ml) water and 2 tsp. (10 ml) salt. Soak for 5 mins. and polish.
QUESTION: I recently bought a fleece throw with a Christmas motif. The label advised that I wash before using. I have seen this instruction before as well and am wondering why some textiles should be washed before using. Thanks. Anne, Winnipeg
ANSWER: What's more cosy than draping yourself with a brand-new fluffy blanket on a cold winter day in Manitoba? While many people skip the step of washing before use to ensure the blanket stays store-bought soft, here are a few reasons why laundering is recommended by manufacturers.
A variety of treatment chemicals are often used in the making of textiles. These chemicals have the potential to smell and leave resins on fabric. Some of the chemicals used are added as a measure to guard against stains, mercerizing, prevent wrinkles and disinfect new products. Since a fleece throw is likely to find itself in direct contact with your skin, it is a good idea to launder first.
Unwrap the holidays with storage ideas
-- Buy a few pant hangers from your local thrift store and use them to hang wrapping paper left over from gifts that you receive. The wrap will not tear or wrinkle, and if you hang the hangers in a spare closet, it will be easy to see what you have on hand.
-- Don't allow rolls of gift wrap to unravel and wrinkle. Secure the paper on the roll with fabric-coated hair elastics made for ponytails instead of regular rubber bands.
I enjoy your questions and tips; keep them coming. Missed a column? Can't remember a solution? Need a speaker for an upcoming event? Check out my brand-new blog/website: reena.ca



Renovation & Design
ASK THE INSPECTOR: Knee wall attic poses moisture problem
QUESTION: We moved into a 1922 River Heights home at the end of May 2009. We had an Energy Audit done on our home about a year later and are interested in upgrading our attic and knee wall spaces.
The home is 2 1/2 storeys and the knee wall surrounds three sides of the upper story. The two-by-four rafters are insulated with wool and Zonolite, which is held in place with fir boards. The attic side of the knee wall is insulated with pink fibreglass batts between the studs, and the floor of the knee wall is insulated with wool and Zonolite just to the top of the floor joists.
There are no soffits to allow air into this space. Part of the space has wood flooring that allows access for storage purposes. There is also a single-pane window in this space, with a screen that can be opened in the summer. In this space there are three exhaust fan vents that run to three separate rooftop exhaust vent hoods. The exhaust hoses are not insulated. There is also a small closet door to this space that is not insulated.
How should we insulate this space to improve our energy savings? Should we add more batt insulation to the back side of the existing wall insulation and also add more fiberglass batts to the existing floor insulation, along with insulating the door to the space? Also, should we change the exhaust fan hose to an insulated one with vapour barrier? Should we look at adding roof vents as well? We are a bit confused as to how we should proceed.
If we open the space to the outside, we should technically remove the insulation in the roof rafters. As this insulation contains Zonolite, this would be a costly endeavor, far exceeding the energy savings gained. At a minimum, I believe I should insulate the exhaust-fan hosing and perhaps add something to prevent backdrafts down the pipe into our home.
In addition, we are now getting ice dams and icicles along the south side of our roof along the eavestrough outside the knee wall area. This, I believe, is an indicator of heat loss through the roof from the knee wall area.
Any help would be appreciated. Thank you. Dave Mainprize
ANSWER: You appear to already be well on the way to understanding the issues of improperly insulated and vented knee wall attics in contributing to ice damming and other issues in your home. You appear to have a few remaining items to address before having a significant improvement in heat retention and prevention of moisture issues.
One of the biggest issues I see during inspections is related to improper insulation and ventilation in older 1 1/2- and 2 1/2-storey homes. As you've observed, one of the main problems is improper insulation of the area between the rafters in the small knee wall attic spaces. This is the primary area of concern in your home, as you already have some insulation in the proper locations -- the attic floor and knee walls.
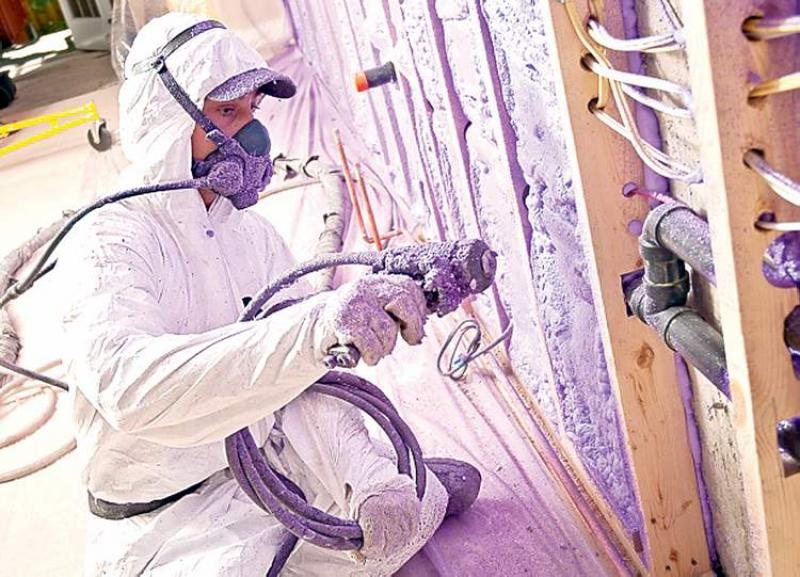
Removal of the old rock wool from between the rafters is normally a straightforward job, but yours is complicated by the presence of vermiculite, which may contain asbestos. While disturbing this type of insulation in a sealed attic is not recommended, you have little choice. Since this potentially hazardous material is already in the knee wall attic floor, and you do not have a well-sealed door, dealing with it is imperative.
It's probably better to leave this insulation in the knee wall attic than try to remove it. I suspect that there is a minimal amount of vermiculite in between the rafters in your knee wall attic, due to the typical method of installation.
This material was normally installed by pouring into cavities from large bags. These cavities are between ceiling joists in the bottom of attics, or between studs in walls. To access the area between the rafters in your knee wall attics, this material would have to have been poured in from the main attic, above the visible sloped ceilings in the upper floor rooms.
To get this material all the way into these cavities would have required the old insulation to be removed from between the rafters inside the knee wall attics and the sloped bedroom ceilings. It appears that this has not been done in your home, as there is still older rock wool present.
It's my guess that the vermiculite you are seeing may have been installed in the upper attic and is only a small amount that may have slid down the sloped ceilings through small gaps in the old insulation. If this is the case, there should be minimal amounts disturbed when you remove the old fir boards and rock wool from the rafters.
Regardless of the amount, you must take special precautions to prevent breathing in any of this insulation and protect the living area from contamination. Breathing protection should be a respirator rated for asbestos and your body should be covered from head to toe, preferably with disposable coveralls and gloves.
The first order of business is to properly insulate and seal the knee wall access hatch, probably with extruded polystyrene sheathing and weatherstripping. After insulating the exhaust-fan ducts and sealing the knee wall attic floor where these pipes come through, the boards and loose insulation can be removed from between the rafters. It may be most practical to leave the insulation that falls from this area on the attic floor, to prevent possible contamination of the home if you try to remove it. The old window may come in handy to dispose of the old fir boards without taking them through the house.
Once this is all out, covering the entire knee wall attic floor with a thick layer of new cellulose fibre insulation will be your best option. This should cover any loose vermiculite and prevent future friability of any asbestos fibres.
Adding more insulation to the knee walls themselves would help with heat loss, but may not be necessary and too difficult to accomplish in the small space. Installation of several roof vents, near the top of the knee wall attics, will finish the job, preventing moisture issues and further ice damming.
Ari Marantz is the owner of Trained Eye Home Inspection Ltd. and the president of the Canadian Association of Home & Property Inspectors - Manitoba (www.cahpi.mb.ca). Questions can be e-mailed to the address below. Ari can be reached at (204) 291-5358 or check out his website at www.trainedeye.ca.
trainedeye@iname.com
Renovation & Design
SOLUTIONS: Cleaning a treasured copper baby cup
QUESTION: How do I clean copper? I have a copper baby cup (back from the "coppercraft" days) my mom gave to me 26 years ago. She passed away 1 1/2 years ago at 51, so now I want to bring the cup out of hiding, clean it up and display it with her dinnerware that I now have in a china cabinet.
The copper is shiny, so I am guessing that it has a lacquer finish on it. The discoloring on it looks like fine black cracks. There are a few different spots, some about the size of a quarter and the rest about the size of the end of a pen. The handle of the cup is the worst; it looks like a cross between tarnish and these tiny, fine cracks. Would this be 'bronze disease' or something else?
I have another question: Do you have a foolproof way of killing weeds? Are there any solutions to killing weeds but not the cedars? We have tried a few different suggestions from people, but no success. We have a good-sized yard and many spots with landscaping mulch or bark or rocks and we constantly have weeds coming up, especially the area next to our back fence (along the alley). We also have landscaping fabric in some of these spots and the weeds are poking through the fabric.
We really don't want to spend our life weeding, I thought these landscaping materials were supposed to minimize or eliminate weeds. What are we doing wrong? Tracy, Winnipeg
ANSWER: With the copper piece being so special to you, it may be worth it to take it to a jeweller and have it professionally cleaned especially since you are not 100 per cent sure if the cup is lacquered.
If you choose to tackle this project yourself, there are several household cleaning methods available as well as suitable products such as Wright's Copper Polishing Cream. However, I've found that one of the best products for removing tarnish and oxidation (that green stuff you sometimes find on old copper) is cleaner made for cleaning ceramic cook tops. This gentle abrasive product cleans away dirt that's settled into engraving without damaging any finish or scratching the metal. To polish old copper:
1. Spread ceramic cook top cleaner over the metal.
2. Use a soft brush to clean around molding and engraving.
3. Let dry.
4. Buff away polish with a soft cloth, using the brush to clean away any polish that has caked around molding or engraved lines.
In terms of the weeds, constant upkeep is part of life and something that we cannot get away from all together. The secret? Attack early. Getting weeds out of the garden at the start of the season, when they're most vulnerable, is a smart strategy for two reasons: it keeps annual weeds from forming seed heads and it keeps perennial weeds from developing deeper roots.
Remember, the root should be completely removed, even to its root depth. If the roots are six inches deep, make sure you dig the roots up from that depth as well. This can be accomplished by loosening the soil around the weed roots and slowly removing the weed back and forth from the soil. If the ground is too hard, try soaking it a little to ease the root removal process. Some people will even use hot water from a kettle to poor on shallow rooted weeds (like spurge) to help loosen up the soil or even kill weeds on the spot!
Landscape fabric used must be high quality and overlap so that no weeds or seeds can sneak in between layers. Also, make sure that no weeds sit on top of the fabric when laying it down so that they don't plant themselves. To kill weeds spray 100 per cent pickling vinegar onto weeds, but keep in mind that vinegar will kill all greenery that it touches.
Make sure to bag and throw away your clippings when you dig up weeds. This helps prevent the seeds from spreading. Excellent fertilization is also a good defensive step against weeds. Using the right type of fertilizer that possesses the best combination of nitrogen and other important compounds four times a year will go a long way in improving the health of your yard. But don't be surprised if some stubborn weeds still persist in growing; that's the time when other more aggressive steps must be taken to achieve effective weed control.
Let's talk mulch; the particle size of the mulch will determine the depth of the application. Apply coarse-textured mulches, such as bark and wood chips, four inches deep for weed control. Apply fine-textured mulches, such as shredded leaves or dry grass clippings, about two inches deep. Keep all mulches several inches away from the stems of plants or the trunks of trees and shrubs to prevent disease.
Lastly, herbicides are chemicals used to kill weeds. They are generally the last resort for home gardeners. Herbicides have several disadvantages:
-- They are expensive.
-- They are difficult to apply with accuracy.
-- Drifting or leaching may occur and damage desirable plants.
-- Proper storage and handling may be a problem.
-- Many herbicides are labelled for specific crops and are not suitable for a garden with a wide variety of crops.
I enjoy your questions and tips, keep them coming. Missed a column? Can't remember a solution? Need a speaker for an upcoming event? Check out my brand new blog/website: reena.ca!