




Renovation & Design
Renovation & Design
ASK THE INSPECTOR: Concrete won't fix flooded cabin
QUESTION: I wonder if you could supply me with a quick answer to a footing question.
We bought a cabin 10 years ago. The cabin was originally built on posts and pads. In order to prevent pest intrusion, they constructed an exterior pony wall. Prior to the construction of the wall, they poured an exterior footing, probably enclosing the existing pads. The footing is two feet wide and about eight inches thick.
We have recently survived the extensive flooding that occurred on Lake Manitoba. The government is assisting financially and we are planning to lift the building next spring. We have already received one downward revision as to the new minimum height to which I must raise the cabin.
The advice I am seeking is whether I can pour over the existing footing with an additional six inches of concrete so I can raise the landscaping around the building by six inches. The existing footing is of sound construction except for one corner. Any tips would be greatly appreciated.
Fred Hartman
ANSWER: I imagine there are lots of cottage and homeowners like you who have been affected by this year's flooding along the shores of Lake Manitoba, but your cabin may be in better shape than others. If there is little water damage to the building, other than the old pony wall, then repairs may be fairly easy. The benefit of lifting the building is you can improve the foundation structure and hopefully the government financial assistance will be enough to allow you to do the job properly.
Many cottages in the Interlake region are built on a footing poured on grade, like yours. Some of these have short wooden pony walls or knee walls installed over the footings, while others may have a concrete or concrete-block grade beam in that location.
Many of these work relatively well in supporting the structure above, but others may be subject to major seasonal movement due to soil expansion and frost heaving. You should be proactive and have the soil evaluated by a geotechnical engineer before doing any major foundation repairs and levelling. The existing soil may have supported your cabin well for many years, but this may have changed due to the recent flooding.
It does not make sense to attempt any major structural repairs if the soil below and around the existing footing will no longer properly support your summer home without major movement. If the soil is found to be incompatible with the old footing design, alternative foundations methods, such as poured concrete piers, may be required.
If it is determined that the soil load-bearing capacity has not been significantly changed and your existing footing is still in decent condition, further repairs may be undertaken. Unfortunately, pouring another layer of concrete on top of the existing footing is a bad idea and will not solve your problem. You will not only have problems with proper bonding of the new concrete to the old, you may also have difficulty preventing moisture intrusion into the crawlspace if you raise the footing only as much as the surrounding soil.
A better alternative is to design and construct a new knee wall or grade beam that will be resistant to moisture damage and allow you to build up the existing grading as required.
The best option is to look at pouring a vertical grade beam of concrete in place of the existing support wall. That may sound odd, considering I just told you not to pour another layer on the footing, but the design of the new concrete wall is the key element.
A vertical grade beam, properly formed and poured in the centre of the existing footing, is a better way of raising your cabin because it can be properly secured and reinforced with rebar. Steel bolts or pins can be drilled into the centre of the existing footing and secured, which will extend upward into the concrete of the new grade beam. These can be tied to reinforcing steel bars used to make the grade beam stronger and prevent cracking. This will prevent the grade beam from moving laterally on the footing if excessive soil pressure or future flooding occurs.
This is also the best method for raising the cabin because the new concrete beam and footing could be covered with a waterproofing membrane after curing, which will prevent moisture in the crawlspace. This membrane will also allow you to raise the soil around the building to the required height without worrying about moisture damage to the new foundation.
If it's not practical or within your budget to pour a proper grade beam, one could alternatively be constructed out of pressure-treated wood or concrete block. While block has been used extensively in the past, I would recommend against it due to the added labour, cost and chance of movement due to the nature of the components.
A properly built and secured treated grade beam will be easier and less costly to build. This will have to be constructed of properly treated PWF lumber and plywood, and covered with proper damp-proofing material or waterproofing membrane to resist damage and leakage at the joints. This short wall will also have to be properly secured to the footing with fasteners strong enough to resist the added soil pressure from the raise in grade planned.
Finally, the top of this knee wall will have to be fastened to the floor of the existing cabin with steel strapping, or additional lateral framing installed, to prevent inward bowing in the future.
To provide you with the quick answer you requested: pouring a few centimetres of fresh concrete on top of the existing footing will not be sufficient to raise the grading around your cabin to meet the new government height requirements. Installation of a properly waterproofed and secured poured-concrete or pressure-treated grade beam is the best method to ensure your summer home is properly supported when raised.
Ari Marantz is the owner of Trained Eye Home Inspection Ltd. and the president of the Canadian Association of Home & Property Inspectors -- Manitoba (www.cahpi.mb.ca). Questions can be emailed to the address below. Ari can be reached at (204) 291-5358 or check out his website at www.trainedeye.ca
trainedeye@iname.com
Renovation & Design
SOLUTIONS: Stuck-up kitchen soap dispenser causes woe
QUESTION: I love your column and your solutions, sure hope you can help me. I have a built-in kitchen soap dispenser by my sink and it takes 40 pumps (yes 40) to get the soap to come out. My handyman suggested that the soap is too thick and should be watered down. I tried that and it works. But by the next time I go to use it, the soap has gone back down the tube and again takes 40 pumps to retrieve it. Do you have any solutions? The faucet and pump are only three years old. Thanks so much. Sue, Winnipeg
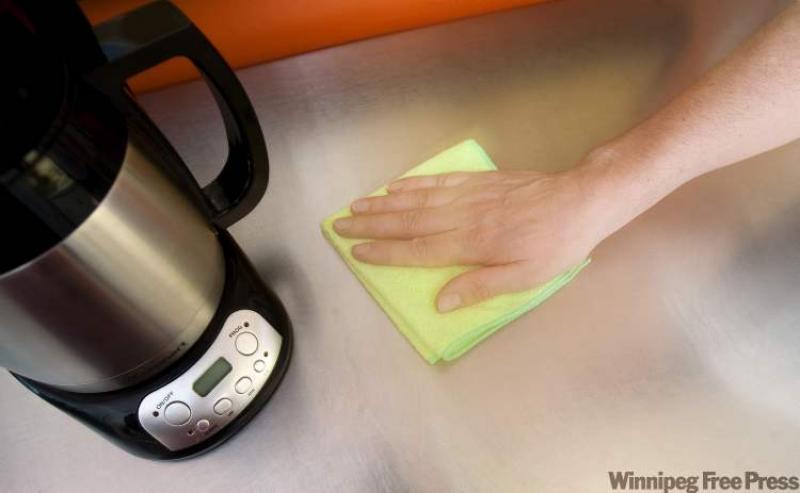
ANSWER: It sounds as though either the dispenser or the straw has a crack in it. If the dispenser is drawing air instead of soap it will take a long time for soap to dispense. Remove all parts of the dispenser and soak them overnight in hot water to clean the entire unit. Experiment with the soap dispenser by pumping plain water through the system. If everything works properly, add soap. If you find that the soap needs thinning, pour in glycerine rather than water, as water will make the substance too watery. Also consider dish soap in the dispenser rather than hand soap. If the unit continues to malfunction, consider ordering a replacement part as you may have a faulty soap pump on your hands.
QUESTION: I bought a self-cleaning oven and lay aluminum foil on the bottom of the stove which I wasn't supposed to do. The aluminum has stuck to the bottom and I don't know what I can use to remove the stuck on foil. Please help me. Can I still use the self-cleaning cycle to clean my oven? Thanks, Brenda the Sad Housewife
ANSWER: No need to be sad Brenda, we've all been there in one way or another. You found out the hard way that foil should never be placed onto the bottom of a self-clean oven. In my opinion the best solution for you is to do very little because there isn't any safe way to quickly remove the foil without damaging the porcelain finish of the oven. You can use a plastic scrub pad, some liquid dish soap and a plastic scraper to remove loose pieces; this is best done when the oven is warm (be careful not to burn yourself). When you are wiping out the oven periodically, use a plastic scrub pad and each time more will come off. The great news is that the self-cleaning oven feature will eventually remove the foil; but it may take several cleaning cycles and a bunch of patience.
QUESTION: I read your column in the Free Press every Saturday and I have picked up many useful tips. The lower part of my white shower curtain (fabric not plastic) is covered with mould stains. I washed it in hot water first, then in water with bleach and finally rubbed it with vinegar and soda. The stains are still there. What else can I do? Thank you for your help. Lise, Winnipeg
ANSWER: I agree with you that your first step is baking soda and vinegar. Remove the shower curtain from the rings and lay the curtain into the bathtub. Sprinkle a liberal amount of baking soda over mould. Next pour vinegar onto stain and let sit. After 20 minutes brush away stains with an old toothbrush. If the stains remain, drop the shower curtain into a large stainless steel pot and fill with water. Add 1 cup washing soda. Heat the water on the stove until it boils. Boil for 5 mins. Cool, and then wash the shower curtain in the washing machine as usual. Hang to dry. If the stains remain; pour three per cent hydrogen peroxide and salt onto stains and leave in sun for a day. Wash as usual. Repeat until clean.
Renovation & Design
Breakfast bar has benefits
Our on-the-go society doesn't leave much time during the week for sit-down meals. Incorporating a breakfast bar into your decorating plans may be a good solution for your busy family.
A comfy spot where one can catch a quick meal or snack between outings can be an asset to your kitchen and your life in general. A breakfast bar may help you offer your family quick, nutritious meals instead of rushing through the drive-thru before soccer practice or swimming lessons.
Adding a breakfast bar to your kitchen has additional benefits. It can add extra cooking prep space along with space for other activities, such as homework, and provide additional seating/serving space for gatherings.
If you have a kitchen island and are installing a new countertop, consider extending its width or length and use the overhang as a breakfast bar. Depending on the space available, you may be able to extend the countertop enough so bar stools can be tucked beneath when not in use. If not, attractive bar stools can sit beside the island in plain view.
If installing an entire new island countertop is not an option, you may be able to install a length of decorative shelving along the seating area of your current kitchen island, which can act as an eating surface. If this sounds doable, consider using contrasting colours and materials for the addition, as it may be difficult to exactly match the current island.
For example, you might install a length of wooden shelving with decorative wooden brackets then paint them a colour that will match the new bar stools. Add a few countertop accessories and linens in the same colour to finish the look. This might just be the opportunity you're looking for to add that vibrant red or orange splash of colour to the kitchen. The colour of the new install can be changed down the road with a fresh coat of paint.
If space is tight, you can install a drop-down shelf on the island and use folding chairs (like a director's chair for instance) that can be tucked away when not in use.
No island? No problem
If you don't have an island on which to add a breakfast bar, you can still add a decorative length of shelving along a wall in the kitchen and purchase co-ordinating bar stools. To make the look cohesive, install the shelf under a window or wall opening (like a pass-through). If this is not an option, then hang a large painting over the bar to create a visual vignette.
You might even want to create the look of a street café by installing a small awning over the seating area, with lively, striped material, and a chalkboard on which you can write fun café sayings or menus.
Another option would be to make a faux window using an empty window frame and replacing the glass with mirrored tile. Add a lace curtain for added appeal. A cute window box below the "window," filled with silk flowers, might also be a nice touch.
Use your imagination and have fun. It's a casual dining space, so a little whimsy is allowed.
All-in-one solution
You can purchase a portable cart that can act as an island with drop-down or fold-away breakfast-bar surfaces. These items can add much-needed prep and storage space as well as an eating surface. A portable unit is a good option if you're renting, as you can take it with you when you move. Places like Sears offer a few options.
If you don't want to install a shelf but like the idea of a casual dining area, you might consider using a piece of furniture, such as a sofa table, along one wall, with bar stools that will work with your particular piece.
The width and height of something like a sofa table is similar to that of a breakfast bar, so it won't take up too much space. Try to find backless bar stools that can be tucked beneath to save additional floor space if needed.
Bar stools
There are so many styles of bar stools available that it might be hard to make a final purchase decision. The styles range from modern to traditional and can be made of wood, metal and even acrylic. The price range is wide as well, so you'll need to consider your budget along with other requirements.
Bar stools come in two general heights: counter height, which ranges from 24 to 28 inches, and bar height, which are a little taller, ranging from 29 to 32 inches. You'll definitely want to take measurements before you go shopping to ensure the right fit.
If you're installing a breakfast bar, it might be wise to purchase the stools first -- then you have the option of determining the perfect height for your shelving, rather than trying to find stools that will fit the install.
Consider the style you need and also whether comfort is a factor. If you intend to sit on a bar stool for longer than it takes to eat a quick meal, then you may want to purchase stools with back support, a swivel option and soft seating. These will be at the higher end of the price range but can be worth the investment if the breakfast bar will be used daily.
Classic diner-style bar stools can look great in a retro kitchen. Check out antique shops and flea markets for the real thing or purchase a newer version of this old classic.
Foldaway stools, such as the director's chair mentioned above, can be a good choice if you don't have a lot of space. The style of a director's chair is generally the same, but you have the option of different fabrics and colours to suit your décor. You can also enhance the look by monogramming the seat back with a name or other moniker. These chairs are also great for additional seating when needed.
A breakfast bar can be your "fast food" solution for the home. Consider the benefits.
connieoliver@shaw.ca
Renovation & Design
Economy plan can come back to haunt you
QUESTION: I am in need of floor-covering advice for our basement. It will be installed directly onto the concrete. I am desperately trying to avoid using carpet there. A subfloor is cost-prohibitive. Do you have any suggestions?
Thank you. Lianne.
ANSWER: Installing floor covering in basements poses a different set of concerns than in other areas of the home. Normally appearance, ease of care, comfort, durability and cost are the major criteria in deciding on a floor covering. While all of these still to the basement, moisture issues pose an additional worry.
Many homeowners opt for basement carpeting that has a thick foam underlay because of the very rigid surface in a basement floor. This may have the foam bonded directly to the underside of the carpet, or separately installed prior to laying the carpet.
While this is often the most economical and simple option, it can cause problems. Because the foam underpad is typically composed of synthetic materials, it can be somewhat of an air/vapour barrier, causing the foam pad to trap moisture beneath the surface.
On a warm, dry surface like a typical plywood subfloor, this would not be an issue. But basement concrete floor slabs can be significantly colder than the rest of the air in the surrounding room, so condensation is a possibility.
If your basement has high relative humidity, on any given day the moisture in the air could condense when it hits the cold concrete surface. If this moisture is covered with a carpet and foam pad, it can become trapped, and mould growth or damp carpeting is likely.
There are normally two proper approaches to avoid the possibility of condensation and moisture issues.
The first method to prevent mould growth is to install floor coverings that "breathe" -- flooring that dries quickly if it becomes wet or if moisture is trapped underneath. But this can be difficult to accomplish without installation of a subfloor which, as you note, can be costly.
A subfloor that is slightly raised off the concrete creates an airspace that will promote drying. It can also have the added benefit of warming the surface of the floor covering by creating a thermal break between the concrete and the flooring. In my opinion, this is the best option as it will not only prevent moisture damage but provide a more comfortable floor to walk on.
The traditional method of installing a basement subfloor is to install "sleepers" or strapping on the floor out of narrow strips of wood. Cedar has often been used for this purpose because of its natural resistance to rot. The benefit of this labour-intensive method is that the wood strapping can be shimmed to accommodate the typically uneven surface of a basement floor slab, allowing a more level and even surface.
But all this comes at a cost -- it can take several hours to properly shim and install a traditional subfloor.
A more modern approach is to use modular subfloor products that have synthetic membranes bonded to the underside. These plastic membranes have dimples or ridges that allow only partial contact with the concrete floor. Air is allowed to flow below the synthetic surface, acting much like the sleepers in a traditional wooden subfloor. This airspace, combined with small vent cut-outs at the perimeter, prevents condensation by allowing damp, moist air to escape. Once installed, there are many choices of floor coverings.
If you decide that installation of a proper subfloor is not within your budget, there are a couple of more economical possibilities. Ceramic or stone tiles may be laid directly over a concrete floor if it is not overly cracked or heaved. This material will not provide much additional warmth, but will be very durable if installed properly.
The main drawback is that tiles are not only very hard, but also brittle. If there is any significant movement or heaving in the concrete, which is always a strong possibility, the tiles can crack.
Another option is laminate flooring, which is becoming a more commonly used product in basements. While it's not very moisture-resistant and would not be my first choice, the newer types have foam bonded directly to the underside of the laminate surface and may resist damage.
The good news is that this product is easily installed without fasteners or adhesives, and sections can be removed and replaced if it does become wet. I'd recommend buying extra sections in case this is required down the road.
While I understand your reluctance to install a subfloor due to the cost, I would strongly advise it. While installing carpet directly on a concrete basement floor is not a great idea, there are lots of other options if a proper subfloor is laid down.
Ari Marantz is the owner of Trained Eye Home Inspection Ltd. and the president of the Canadian Association of Home & Property Inspectors -- Manitoba (www.cahpi.mb.ca). Questions can be emailed to the address below. Ari can be reached at (204) 291-5358 or check out his website at www.trainedeye.ca.
trainedeye@iname.com
Renovation & Design
You'll feel better if your home can breathe
NOTHING says winter more for me than sitting by a roaring fire with my dog, Charlie. I have the urge to stay indoors and hibernate when winter rolls around -- it's the Canadian bear in me. And I know I'm not alone on this one.
Winter hibernation doesn't mean we should just curl up and sleep when the temperatures start to really drop. Most of us will want to stay inside and avoid working outside as much as possible -- even us contractors. But there are small things homeowners could be doing that will help maintain the home over the coming months. And it's these small things that help prevent bigger, more expensive problems down the road.
One key element in your home's safety and your family's health is the indoor air quality. Ask yourself: When was the last time you checked the furnace filter? Is snow covering the exhaust vents? Is the attic properly ventilated? Is there condensation forming on the windows? These are all questions related to a much larger system of your home -- its air circulation and ventilation.
A lot of people don't realize it, but a home's ventilation plays a huge role in its durability. Think of the HVAC system as your home's lungs -- clean, efficient airflow is essential to maintaining its health.
Proper airflow can help prevent mould, which causes extensive damage in a short amount of time. But even more important is the role ventilation plays in your family's health. When most of our day is spent indoors, air quality becomes an even more important issue for the people living in the home.
During the colder months, many of us are putting our HVAC systems to the test. But before we start demanding more from our furnaces, we need to know they're up to the task. Before you start to rely heavily on your furnace, make sure it's in optimum condition. Have it serviced by a licensed technician. Then keep it in good shape by cleaning or replacing the furnace air filters -- not just once, either, but each month of the cold season, when we need the heat the most.
The air vents throughout the entire house should also be clear of any obstructions, such as furniture or carpets, allowing for proper ventilation and for the heat to reach all areas of the house. That means both the hot-air supply registers and the cold-air return grilles. If these vents are blocked, you could be suffocating the HVAC system. Also, make sure to clean or vacuum the vents and fan grilles throughout the entire house, including bathrooms, hallways and the basement. It's a minor job, but it has major benefits.
For one, cleaning the vents keeps the air moving cyclically throughout the entire home, preventing any moisture buildup, which we know is a home's worst enemy. Two, it allows the furnace to do its job more efficiently and easily, increasing its longevity and decreasing energy costs. And three, it decreases the amount of dust and other airborne particles in the air we breathe. This is especially crucial when there are small children or elderly people in the home.
The vents outdoors need to be clear, as well. It doesn't take very long to go around the perimeter of a home and examine it to ensure there isn't any snow or ice blocking gas-appliance vents and exhaust vents. No matter how bad the weather outside, this is something you can do in just a few minutes, and it can literally save your life.
Our homes are always giving us clues that tell us if there are any problems we should fix. One of these clues is condensation on windows. Condensation tells us there's too much humidity in the home and not enough ventilation. Too much humidity causes damage to the house and its contents over time, and a number of health problems for its occupants, such as existing allergies.
Before you go ahead and bring in an HVAC contractor, you should first make sure your home's dehumidifier is turned on. While in the summer, a home's dehumidifier should be set to 50 RH, in the winter, it needs to be adjusted to about 30 RH.
The flip side to too much humidity in a home is not enough. The winter air is really dry, which can be uncomfortable for a lot of people. I use a humidifier, and if you're using one, too, you need to remember to clean it at least two or three times during the winter season.
Maintaining a home's ventilation and air circulation is important year round, but even more so in winter when we spend more time inside and seal off fresh outside air. So before you settle in for the long, cold months ahead, make sure your home can breathe. You'll feel better, too.
-- Postmedia News
Catch Mike in his new series, Holmes Inspection, airing Thursdays at 8 p.m. ET/PT on HGTV. For more information, visit www.hgtv.ca For more information on home renovations, visit
makeitright.ca
Renovation & Design
Solution removes coffee stains on carpet
QUESTION: I spilt coffee on my carpet, but did not notice it for several months. I have tried club soda, water and various spot removers. But I cannot get it out. It is certainly better than when I first saw it, but there is definitely a brown stain on the grey carpet. I am moving soon, so if you know of anything that will remove this stain, please let me know. Thanks. Rosemary, Winnipeg
ANSWER: Here is one of my favourite formulas from my first book and it was given to me by my aunt. I have changed the amounts somewhat and used this formula many times for pet, food and plant stains. In my experience no damage has ever occurred and the results have surpassed any of the commercial cleaning agents. However, use at your own risk. You may want to test a small area of carpet before applying the recipe. Some stains are impossible to remove, but coffee is not one of them. Best wishes.
Step 1: Mix together half a teaspoon of clear dish soap and one cup of warm water. Blot (do not scrub) onto stain and leave for five minutes. Pat area dry using a white towel.
Step 2: Mix together one-half cup hydrogen peroxide and two tablespoons of ammonia. Dip white towel in solution and blot onto stain. Cover the stain with clear plastic wrap and weigh down with heavy books. Make sure the books are not touching the carpet because if the book gets wet, the dye from the paper can seep onto the carpet. Leave for 12 hours.
Step 3: Blot dry.
Step 4: Blot with warm water and dry two-three times.
Step 5: Air dry.
Step 6: When dry, blot with white vinegar and leave.
The area should be a little wetter than damp, which means you may need to double the recipe if the stain is large.
QUESTION: My son was doing a project for school using play dough and modelling clay. On my kitchen counter he used the rolling pin to flatten everything out. Now I have a stain on the counter that I can't remove. It's almost like the finish is gone. I've tried rubbing alcohol and I've tried vinegar. Any suggestions? Lori (Gimli, Man.)
ANSWER: Not being sure of your countertop material, I will assume you are dealing with a laminate counter (common name brands, Arborite and Formica). Begin by mixing a paste of baking soda and water, leave for one hour and wipe. If the stain remains, purchase a commercial product specifically designed to renew laminate countertops. These are readily available at home hardware stores.
QUESTION: Could you please tell me if there is any way to restore the gold finish on several pieces of a silverware set that was accidentally placed into a bleach solution? At a wedding the community ladies were catering, a few pieces accidentally ended up in the bleach rinse solution. The bride told us the set was about 20 years old. Your help will be greatly appreciated. Thank you. Barb, Winnipeg
ANSWER: This sounds like surface damage only. Using non-bleach, non-gel toothpaste, gently scrub the cutlery to polish. Or wipe each piece with lemon juice and cream of tartar or jewelry cleaner. Or take the cutlery to a professional jeweller to clean.
Wonderful feedback from a caring Manitoban:
Hi Reena,
I have been following your column for years and have found it very helpful; however, I question your recent Fabulous Tips of the Week.
-- Using used facial tissue as extra stuffing for pillows, to me, is unsanitary.
-- Washing toothpicks and reusing them up to eight times, sounds gross to me. Why would you do that? Toothpicks are cheap.
-- Attaching clothes to the bottom of your slippers to polish your floors as you walk, on my floors would be dangerous as they are slippery enough as it is.
-- Sharing the family cleaning is a great idea, as kids should have their own jobs contributing to the family unit. I'm all for using household products for cleaning and using fewer chemicals. Cathy, Winnipeg
Please note that the tips under the heading Fabulous Tips of the Week were not meant to be taken seriously, just a little holiday humour.
Electrifying Tips of the Week:
-- Do not overload electrical outlets.
-- Check all extension cords to make sure that they are in great condition. If the chords feel warm after a period of use, replace chords with an approved Canadian Standards Association (CSA) product.
-- Use indoor lights for indoor use and outdoor lights for outdoor use.
-- Turn off lights when not at home or when sleeping.
-- Avoid overloading electrical outlets.
Reena Nerbas is the author of the national bestselling Household Solutions series. Her website is www.householdsolutions.org You can contact her at Box 429, Blumenort, Man., ROA 0C0.
Renovation & Design
Convert bedroom into a cosy reading nook
Dear Leanne:
I have a small bedroom -- 2.74 metres by 3.05 metres (nine feet by 10 feet) -- that I am converting into a reading room. I really want this space to be comfy and charming. It has a large south-facing window with lots of cheery sun. I already have a home office, so I want this room to be an escape for me. With the space being limited, I would love to hear your suggestions for decor.
ANSWER: Don't let small spaces deceive you -- they have the potential to be brimming with ambience. Think back to a quaint restaurant, B&B or powder room you have seen.
These memories will provide clues to what you can do with your space. Maybe you loved sitting in the sun at that table by the window. Perhaps you love the crackling of a fire on a cold winter day, or maybe you loved the paint colour or wallpaper design in the space. Take these cues to develop your perfect getaway.
As in all great design, form follows function. If the room doesn't perform in an efficient and effective manner, it won't matter how "comfy and charming" it looks.
The basic furnishings you need are:
-- A chaise lounge or a comfy chair and ottoman.
-- Cantilever shelving above or a bookcase that spans no more than three-quarters of the way up the wall. A wall of books from floor to ceiling can be so overwhelming it can look chaotic rather than relaxing. Another option is to convert any closets into a bookshelf, which will save floor space.
-- Add tactile decor items such as an area rug and a basket of blankets or throws.
-- If space and building codes permit, consider adding an electric fireplace to the space.
-- A floor lamp will be an effective addition, as it takes less floor space than a lamp on a table.
-- If you have room, consider an ottoman rather than a side table, and place a tray on it to support a cup of tea or a glass of wine.
* At the very least, add side panels to your windows for effect -- however, functioning drapery will be both practical and visually effective.
Do not be afraid to use bold colours in this small space. Once you have selected your furniture and rug, use their colour palette to inspire the tones you imagine enveloping you while you curl up with a good read.
Dear Leanne:
We have just finished refinishing our kitchen cabinets and would like to give our drawers and cabinets more organization. What do you recommend to retro-fit these units? The front panels are solid wood, but the drawers are MDF. We would appreciate any suggestion you can offer.
ANSWER: An organized kitchen will be highly appreciated as a complement to your new look. Kitchen organization has come a long way since the standard cutlery tray insert. With so many options, you will be able to have a place for everything, and once you use them every day you'll wonder how you ever did without them.
Many custom kitchen designs include specialty centres such as waste and compost collection, knife storage, efficient storage of plates, dishes, pots and lids, spice and condiment holders -- to name just a few. For every item that is needed, there is a gadget that will help to keep you organized.
IKEA has a great assortment of storage items you may want to look at. Their Rationell series has some interesting items, such as an all-wooden knife drawer that keeps all of your carving and chopping utensils sharp and safely stored.
Measuring 50.1 centimetres by 15.3 cm by 5.0 cm, the unit has a slot for each knife, so you quickly identify the tool you need at a glance. The pullout waste-sorting system can easily be added to an existing cupboard. It measures 25 cm wide by 42 cm deep by 25 cm high and efficiently holds a variety of sorting bins that are also available at IKEA.
Additional items in the Rationell series include revolving corner carousels, spice jar drawer inserts and plastic-bag dispensers. Other creative ideas from this series are the stacking plate holder and the pot-lid organizer.
If your kitchen has a shortage of upper cabinetry but plenty of deep lower drawer space, consider moving your plates down to these lower storage drawers with specialized plate holders. Available in two sizes, these holders allow you to stack the plates horizontally as you would in your upper cupboard and the holders secure the plates safely when the drawer is opened or closed. The pot-lid holder can store up to six lids, allowing you to stack the open pots inside each other.
This is only one series that can be effective in organizing your kitchen. Check out the products available at specialty kitchen design studios.
-- Postmedia News
Leanne Brownoff is an Edmonton interior design consultant who welcomes your questions at
leannebrownoffshaw.ca
Renovation & Design
Cool implements to create perfect pies
MAKING your own pie for the holidays is one of the best gifts you can give your table, family and friends.
Retailers are offering lots of cool implements to help you create your own stellar versions of this seasonal favourite, so let the baking begin.
A flaky, not-overworked dough is key to a delicious pie. Oxo's Good Grips stainless-steel-bladed dough blender is easy to hold and manoeuvre. (www.oxo.com, $9.99)
Place the dough in one of Kitchen Krafts' round plastic pouches that are the exact diameter of a pie plate -- you just roll until the dough slab moves to the perimeter of the bag. No messy board flouring or guessing at crust sizes. (www.kitchenkrafts.com, $9.95)
To end up with nice, smooth dough, many bakers like a silicone roller that doesn't stick. Head Chefs has them -- with handles and without -- in various colours, including olive and red. If you have young helpers in the kitchen, there are junior versions too, in yellow, blueberry, pink, lime and apricot. (www.headchefs.com, Sil-Pin rolling pins, $29.99 and $39.99; kids, $12.99)
Pop your pie dough in an attractive baking pan you can take right to the table. French ceramic bakeware maker Emile Henry has pretty fluted-edge pans in blue, apricot and green. (www.kitchenconservatory.com, $39.95; check www.homegoods.com for off-price versions)
Pfaltzgraff's Winterberry pie pan has a pretty seasonal pattern, and includes a steam releaser in the form of a cheerful little cardinal. (www.pfaltzgraff.com, $40)
Decorate the top of your pie crust with one of the pattern makers from Kitchen Maven; choose from apples, hearts, lattice or Christmas trees. You can purchase individually or get the set. The e-tailer also has a handy stainless-steel pie slice divider, so when the pie's ready to serve, you can portion it out fairly. (www.kitchenmaven.com, set of patterns $24.99; divider, $37.99)
What's better than a big piece of pie? Lots of little ones! Babycakes Pie-Pop Maker is a Foreman-grill style cooker for making bite-size pie pops -- make savoury ones for a cocktail soiree, or sweet for a kid's party. (www.surlatable.com, $29.95)
Williams-Sonoma has a similar gadget, the Breville Pie Maker, that makes four mini pies in about eight minutes. These wee pastries make tasty thank-you gift options for all the helpers in your life.
The retailer also has some delightful little pastry cutters in shapes for both fall entertaining (leaves, pine cones and turkeys) and Christmas (snowflakes, trees and reindeer). Add a package of "Perfect Pie Crust," to which only butter and water must be added, and you have a good host gift.
Pie bakers often worry about a burnt crust edge; luckily, there's a handy shield available that you place along the rim of your pie as it finishes cooking. (www.williams-sonoma.com, pastry cutters, four for $19.95; pie crust mix, $10; pie maker $99.95; crust shield, $8)
Taking dessert to a dinner party? Pies can be tricky to transport, but you can tote yours safely and stylishly in one of Vonny's sturdy round zippered pie carriers. Each features a colourful stripe, floral or dot design and a non-skid interior. (www.vonny.com, $64)
Sur la Table has a clever collapsible carrier that can hold two pies, or a tall one like meringue, and has a non-slip ring inside. (www.surlatable.com, $29.95)
If you'd like to forgo the plastic, get Amish Wares' pie-carrying basket. It'll hold two pies and is crafted of hand-woven wood. (www.amishwares.com, $43.95)
Like the best pies, it has homemade charm that's hard to resist.
-- The Associated Press
Renovation & Design
More than just pretty petals
Each year, the Perennial Plant Association, a professional trade association based in Hilliard, Ohio, picks what it calls the Perennial of the Year.
Formed in 1984, the association today has more than 1,300 members worldwide, ranging from garden designers and landscape architects to horticultural educators, nursery owners, even a few home gardeners.
But only certain members can take part in the process of selecting the Perennial of the Year.
These members are usually people whose full-time job it is to either grow, sell or design with perennials.
The primary goal of the PPA is to improve the perennial plant industry by "providing education to enhance the production, promotion and utilization of perennial plants."
The first plant to be named Perennial of the Year was Phlox stolonifera, chosen in 1990. There have been 21 other perennials named since.
The selection process happens around this time every year.
Four perennials are selected by a committee from a comprehensive list of nominations made by the general membership.
As you can imagine, there are thousands of cultivars to chose from out there. Selecting four as candidates for the star-perennial status can't be an easy task. I suspect nominating movies for an Oscar is a lot easier.
Apart from sheer popularity, all four nominated plants must possess the following key characteristics: suitable for a wide range of climate types, low maintenance, easily propagated (seed or vegetative propagation) and exhibits multiple seasonal interest.
Next, a vote is taken to choose one of the nominees as the winning Perennial of the Year.
They don't send up white smoke when the result is known, but news of the selection does travel quickly far and wide, being reported in trade journals and magazines. The chosen plant is often prominently featured on the cover of nursery catalogues.
The winning plant always gets fantastic media coverage. Does all the attention it gets translate into sales? Mostly, it does.
Home gardeners are surprisingly conscious of highly rated perennials, and they know if they populate their herbaceous border with Perennials of the Year, they're virtually guaranteed success, as the plants are all foolproof performers.
John Schroeder, owner of Heritage Perennials in Abbotsford, B.C., and past board member of the Perennial Plant Association, says there is always a "sales bump" corresponding to the Perennial of the Year pick, but some "bumps" are bigger than others.
"For example, Amsonia was the POTY for 2011 and our sales barely registered. The more popular the perennial, the greater the sales bump. Even though Amsonia is an excellent garden plant, it's just not sexy or well known."
The Perennial of the Year for 2012 is Brunnera macrophylla "Jack Frost", one of my all-time favourites.
It has large, silvery white leaves accented with green veins. It grows about 30-37 cm (12-15 inches) high and produces beautiful blue forget-me-not-like flowers in spring.
" 'Jack Frost' is an excellent choice," says Schroeder. "It's one of the best new perennials of the last 10 years. It looks great in the garden from spring to fall, tolerates shade and does well in dry as well as regular soils. It's a real winner."
Gary Lewis, of Phoenix Perennials in Richmond, B.C., is currently a board member of the PPA.
"From a retail perspective, the POTY program definitely helps sales," he says. "Some gardeners are aware of the program and will seek out the plants.
"But even in subsequent years it definitely adds to the confidence in the perennial on the part of the consumer -- they feel like they are making the right decision."
Looking over the total list of 23 perennials the PPA has chosen since 1990, including "Jack Frost", I see many other personal favourites -- ones I have had in my garden for years because they are such flawless performers.
Heuchera "Palace Purple", the 1991 selection, has been long pushed out of the limelight by more exciting cultivars, but like a Beatles hit, it never loses its charm.
Most gardeners have the mounding yellow flowers of Coreopsis verticillata "Moonbeam" in some sunny corner and perhaps the pale pink flowers of Astilbe "Sprite" adding structure and colour in a semi-shaded spot.
Rudbeckia fulgida "Goldsturm" set a standard of excellence for reliability few plants can match, and Phlox "David" is still regarded as the most mildew-resistant of phloxes.
I have never had much luck with echinacea, but I have to concede that "Magnus" is a winner and was thoroughly deserving as Perennial of the Year for 1998.
Others that have been flawless performers in my garden include Hakonechloa macra "Aureola", Helleborus hybridus and Calamagrostis acutiflora "Karl Foerster".
It's well worth taking time to familiarize yourself with the complete list of Perennials of the Year.
Some of them, such as Geranium "Rozanne" and Scabiosa "Butterfly Blue" work just as well in containers as in the garden, and ones such as the Japanese painted fern, Athyrium niponicum "Pictum", are just worth having because they are such a classy specimen.
-- Postmedia News
Here's the complete list of Perennials of the Year since 1990
2012 Brunnera "Jack Frost"
2011 Amonsia hubrichtii
2010 Baptisia australis
2009 Hakonechloa macra "Aureola"
2008 Geranium "Rozanne"
2007 Nepeta "Walker's Low"
2006 Dianthus gratianopolitanus "Feuerhexe"
2005 Helleborus x hybridus
2004 Athyrium niponicum "Pictum"
2003 Leucanthemum "Becky"
2002 Phlox "David"
2001 Calamagrostis x acutiflora "Karl Foerster"
2000 Scabiosa columbaria "Butterfly Blue"
1999 Rudbeckia fulgida var. sullivantii "Goldsturm"
1998 Echinacea purpurea "Magnus"
1997 Salvia "Mainacht" (May Night)
1996 Penstemon digitalis "Husker Red"
1995 Perovskia atriplicifolia
1994 Astilbe "Sprite"
1993 Veronica "Sunny Border Blue"
1992 Coreopsis verticillata "Moonbeam"
1991 Heuchera micrantha "Palace Purple"
1990 Phlox stolonifera
Renovation & Design
Watch where you pile that snow
It's is very common to see shrubs and small trees planted near sidewalks and driveways in Winnipeg, and each spring I see a great deal from the effects of piling snow on these smaller woody plants through the winter.
Some of that snow has granules of rock salt, and piling snow on these plants can seriously affect their health. Physical breakage from the weight of snow is the more visible and obvious effect, but the accumulated salt in the soil around these plants can cause long-term damage.
Salt accumulation increases the alkalinity of the soil, creating toxic effects in many susceptible plants. Yellowing of leaves in the early summer is the earliest sign, along with bright green leaf veins and sometimes brown blotches in between the veins.
And shrubs are not the only plants that suffer from salt intrusion -- dead grass is usually visible in the same areas where salt-laden snow has been piled. Arborists call this condition 'chlorosis'.
Broken branches can be pruned off, but it's more important to ameliorate the salted soil. Thoroughly hose down the shrubs and grass area where snow has accumulated to dilute the toxic effects of the salt. Fertilize the affected area with a tree-and-shrub garden fertilizer along with powdered or granular iron chelate.
In situations where shrubs have been badly damaged, I tell clients to remove them completely and re-think their planting options. Annuals may be a better choice. Perhaps you can add interlocking pavers adjacent to the sidewalk and driveway hard surfaces.
Michael Allen is a consulting urban forester and certified I.S.A. arborist and owner of Viburnum Tree Experts. He makes house and garden visits to assess tree and shrub problems. He can be contacted by calling 831-6503 or by e-mail at viburnumtrees@shaw.ca. You can also mail questions to Michael Allen, c/o Newsroom, Winnipeg Free Press, 1355 Mountain Ave., Winnipeg, MB, R2X 3B6. His website is
www.treeexperts.mb.ca