
Renovation & Design

Advertisement

Renovation & Design

ASK THE INSPECTOR: Stick to your guns about isolating teleposts

QUESTION: I am having a house custom-built with a piled foundation and supporting teleposts on piles as well. I have asked the contractor to place isolation or slip joints around the teleposts to ensure the floor can move independently from the columns or teleposts. He feels this is totally unnecessary and just wants to poly-wrap the columns and set them in the concrete floor when it is poured. Can you offer your thoughts on this? Thanks, Richard Huska

ANSWER: It's refreshing to receive a question about a new home under construction, as the majority of the inquiries I receive are about older-home issues. Most people don't realize that new homes may have almost as many issues as older homes; they are just of a different nature. Your concern about your contractor's proposal for proper protection of your teleposts is well-founded.

I will assume that you've done considerable research on various topics of new-home construction to be concerned about a rather obscure item like this. This issue can arise not only with homes built on piles, but the majority that are still built on concrete footings, due to properties of our area's expansive clay soil and installation methods for concrete basement floors.

Anyone who has owned a new home in the Red River Valley knows that concrete-basement floor slabs will begin to crack and shift almost immediately after installation. Normally, the movement is in an upward direction and may vary from slightly annoying to severe. There are several variables that determine the extent of the heaving, but they may be difficult to pinpoint before or after construction.

The main issue with floor-slab movement is the effect it can have on the floor structure above. If basement walls are built with minimal space between them and the main floor joists above, severe heaving of the basement floor can push up and cause serious bumps in the floor. That's why properly built basement walls have gaps at the top or the bottom to allow for this movement.

The other issue with a heaving concrete slab is the effect it has on items embedded in the concrete. This primarily includes plumbing, sump-pump drains and teleposts. Most new homes have drains and stacks installed with slip-joints that move with the floor, but adjustable steel teleposts do not have that capability because they are load-bearing. If the steel posts are not properly separated from the concrete, they can be lifted up along with the concrete, creating serious structural problems. This can occur because the bottom of the posts can be lifted off the concrete footings (or, in your case, piles), which are designed to properly carry the load of the home above.

To avoid this serious issue from occurring, the steel posts have to be isolated from the wet concrete when it is poured. There's a possibility that wrapping the posts with simple polyethylene sheathing will prevent bonding of the concrete to the steel, but that is not always the case. The primary use of the poly, in this case, is to prevent wicking of moisture from the concrete into the bottom of the steel post to stop it from rusting. For the poly to act as a slip joint, the concrete would have to shrink sufficiently away from the posts, as it cures, to create a small space. There is no guarantee that this will occur, especially if the poly is not installed perfectly flat or if holes are poked in the thin plastic during the pour.

A better method to prevent the possibility of bonding between the concrete of the basement floor slab and the steel posts is to use a sturdier material. In the past, smooth plastic piping, such as PVC or ABS pipes, were used. Today, it's quite common to see good builders use a small piece of plastic drain tile piping for this purpose. This material is often ideal because it's corrugated for additional strength. It's also readily available, as it's already being used in the same area of the house. In some cases, the diameter of this pipe is quite a bit larger than the teleposts, but can be cut along its length and installed tighter to the posts without compromising its function.

This issue involves the grey area where building codes may not address an issue or may not be specific about material to be used. Installation of a proper slip joint is something that should be done by an experienced builder to prevent a potential problem, whether it's completely necessary or not. There's no additional work or expense to cut a few pieces of leftover weeping-tile pipe rather than poly for use on the teleposts. The only additional effort will be in sealing the larger gap around the teleposts after the concrete sets. This can easily be accomplished with a small amount of flexible caulking, to seal this small opening.

The only reason I can think of why your builder would not agree to your request, if for no other reason than to satisfy a knowledgeable customer like you, is arrogance. Stick to your guns and insist that the telepost isolation is done to this higher standard, especially since it requires very minimal extra effort and no added expense.

Ari Marantz is the owner of Trained Eye Home Inspection Ltd. and the president of the Canadian Association of Home & Property Inspectors-Manitoba (www.cahpi.mb.ca). Questions can be e-mailed to the address below. Ari can be reached at (204) 291-5358 or check out his website at www.trainedeye.ca.

trainedeye@iname.com

Ari Marantz
June 11

Renovation & Design

SOLUTIONS: Mouse in the house? Give it peanut butter

QUESTION: Do you have a "green" solution for repelling mice? We had mice problems last year and would rather repel them than kill them. We are rather low-income people. Linda, Winnipeg

ANSWER: Mice love peanut butter even more than cheese. Locate an 18-litre bucket with a lid. Cover the bucket and cut a 10-cm hole in the lid. Make a ramp so the mice can climb up and fall in. Spread peanut butter around the hole. Leave the bucket empty and, after they fall in, take them at least 10 kilometres from your home/camper before releasing them. You can also spread peanut butter on non-kill mouse traps. Or for inside, flatten an empty toilet paper roll; put peanut butter on one end, place the roll on the counter extending beyond the edge. Put a bucket on the floor underneath the counter, so the mouse will fall in.

Other mouse deterrents are the following fragrances: Irish Spring soap slivers, cotton balls sprayed with shaving cream and oil of peppermint and water sprayed around the home. Plant mint plants around the foundation of your home. If mice are getting into your home, block any holes with expandable foam or steel wool. If all that fails, get a cat.

QUESTION: My sister rented her home for the winter and the renter failed to remove a quart of milk from the fridge before she left. They have cleaned the fridge and there is still an odour (tried washing it with baking soda, vinegar, etc. and have had no luck. It still smells like sour milk). Can you help? Thanks. Lynette, Winnipeg

ANSWER: Begin by cleaning out the entire fridge once again with soap and water. Make sure you clean each area, including the backs of crisper drawers. Next, spray the fridge with straight vodka; this is an instant blast of pure odour reliever. Vodka carries no odour of its own but is amazing at zapping smells. If vodka is not an option, make a solution of one-quarter teaspoon dish soap, half-cup 3 per cent hydrogen peroxide and 2 tbsp. household ammonia. While wearing a mask, clean empty fridge thoroughly and leave for one hour with door closed. Rinse with clean water.

After the fridge is squeaky clean, fill with food and set one of the following on a shelf: A lime cut in half and squeezed into a little bowl, a bowl of vanilla or coffee grounds or water dampened charcoal. If the smell remains after a couple of days, stuff the entire fridge with crumpled-up newspaper. The ink in the paper is wonderful at absorbing odours.

Reena Nerbas
June 11

Renovation & Design

How to design an intimate dining room

Dear Marc: I have heard people say that lighting and colour will affect the overall look of the room. I prefer to have my dining room feel a little more intimate than the rest of the house. How would you suggest I achieve this goal? Kevin B.

Dear Kevin, Before starting your design project, take a close look at how the room will be used and what type of atmosphere you are trying to create. Are you trying to create a traditional dining-room setting where the space will only be used during special occasions? Or are you trying to create a versatile space that you may use every day? Your lighting choice will depend on your answer.

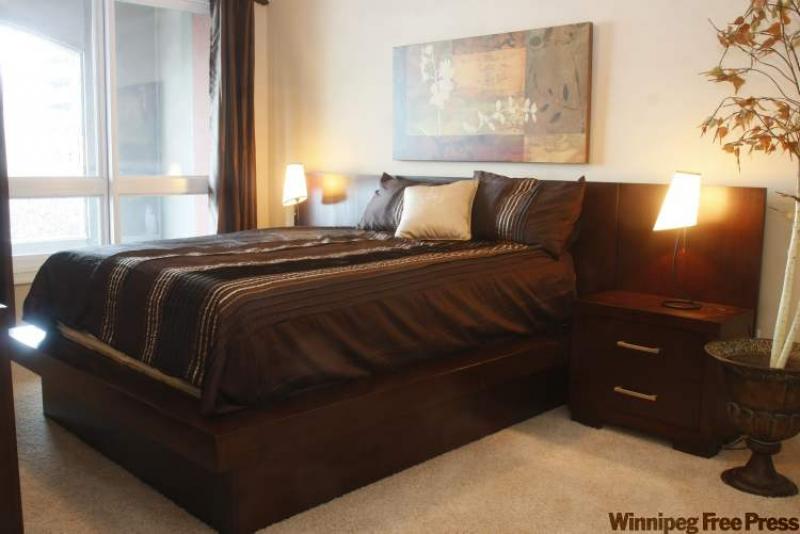
Since you want your space to be more intimate, the colour you choose for the walls will be very important. Different colours create different atmospheres. For instance, if you walk into a space with lots of taupe and brown, your general feeling will be of peace and serenity. On the other hand, if you walk into the same space with the walls painted a vibrant red and sunny yellow, the atmosphere will have been changed completely. The colours now create an atmosphere full of energy and passion. The best way to create an intimate colour scheme is to use warm colours. For those who don't have a clear understanding of colour theory, we'll break it down into simple terms.

In the world of design, we use a colour wheel, which features two different categories: cool and warm colours. Designers use these categories to create different moods in a space. In the warm spectrum of the colour wheel, we find yellow, orange and red. Any combination of these colours will also create warm colours. For example, mixing red and orange to create a red-orange colour will also be categorized as a warm colour.

We can also use cool colours to balance a room that's too warm. Cool colours are blue, violet and green. Again, colours resulting from a mixture of these will also qualify as cool colours. In this particular situation, we're trying to create a warm, intimate setting, therefore, we need to look at using a warm colour scheme.

Once you have your warm colour scheme, we can now look at how lighting will affect the way the eye perceives the colours on the wall. Have you ever bought paint in a store and loved it, but once you got home and painted your entire space, the colour didn't look quite the same? Well, that's because the amount of light exposure a colour receives will alter the overall look of the colour. Paint stores usually have fluorescent lighting, which is the harshest of all lighting. Most walls in our homes don't get that much light, so the paint will look different there.

The best way to find out if the colour suits the space is to take a paint sample home and paint a piece of cardboard. Then put the cardboard against the wall. Be sure to leave the cardboard in place for an entire day to see how the colour changes, depending on how much natural light is coming in the room at different times in the day.

You might love the colour in the morning and hate the way it looks in the evening with less natural light.

Designing a space is about finding out how the objects that surround us affect our feelings and moods.

-- Postmedia News

Marc Atiyolil is the editor-in-chief of Canadian Home Trends, Canada's Home Decor & Lifestyle Magazine. To submit a question for him, visit CanadianHomeTrends.ca.

Marc Atiyolil
June 11

Browse Homes

Browse by Building Type