Renovation & Design
Renovation & Design
SOLUTIONS: Use Iron Out to remove dishwasher stains
QUESTION: My dishwasher has developed a brownish stain on almost the entire interior, including the cutlery rack. It is a white interior and is only six years old. What can I do to get rid of this staining? The dishes come out clean. Hope that you have a solution. Marion, Winnipeg
ANSWER: There is a product on the market called Iron Out. Open your windows and run the powder through your empty dishwasher soap dispenser (the way you would run a normal cycle). Iron Out is available at stores all over Manitoba but be prepared, it does smell, and it is strong, so remember to ventilate.
QUESTION: I use bar hand soap, and always have a small one inch or so piece leftover. I wonder if you know of any way to melt or turn these leftovers into a larger bar, so it won't be wasted. A number of friends are looking for the same answer. Thank you, I enjoy your column. Gord, Winnipeg
ANSWER: When it comes to bar soap, get the biggest bang for your buck by saving your slivers. Drop the slivers into knee-length pantyhose and keep them near the bathtub. Scrub your body by wetting the nylon with water and lathering yourself with the nylon-encased soap slivers. You can also drop the soap slivers into a plastic squeeze bottle and then fill it with water. Keep the bottle beside the sink for washing hands and dishes. You can also pile wet soap slivers one on top of the other. Stick a pop-bottle cap onto the top soap sliver (to make the squished-together bar easier to hold). Allow the soap to dry and use it in the bathtub. To make your own hand soap, save slivers of soap bars and mix them in a bottle with glycerine, shake with warm water and use.
QUESTION: I was wondering if you would be able to help me. I suspect the eczema my son has been suffering from since birth may be sensitivity to detergents. I would like to use your homemade laundry soap recipe from your first book but with pure soap flakes we purchased from eco-pioneer instead of the grated soap bar. My question is this: Would this laundry soap recipe be safe to use in the soap dispenser of my HE front-loading washing machine? I am afraid I will clog up the dispenser or the machine. Tanya, Winnipeg
ANSWER: In my experience, you can use the homemade laundry detergent in your HE washing machine and you only need one-eighth cup per load. As well, there is a completely different alternative to laundry detergent called soap nuts. The soap nut (Sapindus Mukorossi) is the fruit of a tree that grows in India and Nepal. Soap nuts are all-natural and safe! While the seeds of the soap-nut fruit are used as detergent to replace washing powder, the outer shell of the soap nut contains saponins, which are good for treating skin problems.
In India, soap nuts are used in washing woolen and silk garments, as a fabric softener, as a treatment for eczema and allergies and as shampoo. Soap nuts are a 100-per-cent renewable resource, biodegradable and can be composted after final use. Soap nuts are often sold in a drawstring bag. The bag is tossed in with a wash load and reused several times. The soap nuts are taken out of the washing machine and not put into the dryer with your clothes.
In my opinion, this is the most environmentally friendly way to clean your fabrics. Soap nuts are available at householdsolutions.org
Best Tip of the Week:
Keep your sink from clogging by not pouring fat down the drain! Collect fat in a container such as a metal coffee tin and let it solidify. Scrape the fat into the garbage (not the compost pile). Wash and reuse the container. Kenya (La Broquerie, Man.)
Reena Nerbas is the author of the national bestselling Household Solutions series. Her website is www.householdsolutions.org You can contact her at Box 429, Blumenort, Man., ROA 0C0.
Renovation & Design
Window-walls a design opportunity, use it!
Dear Marc:
I have bought a new high-rise condo with an amazing view. My living room has a clear view of the skyline, and two of my four walls are windows. How do I design my living room with this wall of windows? -- Brenda
Dear Brenda:
Some are "wowed" by scenic mountain views, some by the vast fields of the Prairies, but my favourite view has always been a city skyline. There is something about being able to see the peaks of buildings, and how these peaks form an overall shape that amazes me. City skylines are like fingerprints, since each is unique.
Designing a space with a wonderful city skyline in mind can be a great adventure. The traditional rules of design still apply to this type of space, but some alterations are necessary. Here are a few things to keep in mind when designing this type of space:
1. The view seen from the space is a feature in the room. When choosing your colour scheme, furniture and accessories, it's important that you look at design elements that blend well with your view.
2. Unlike a traditional living room, your colour scheme will alter drastically from day to night. As two of your four walls are made of windows, the blue colour of the daytime sky will complement your wall and accent colours differently than the nighttime view.
When choosing your wall colour, I suggest you paint a small piece of cardboard with your chosen wall colour and hang it on the wall. Analyze how well the colours go with the different skyline colours and how these complement each other at different times in the day. You might love the look of the colour paired with the daytime skyline but hate the colour when paired with the nighttime skyline. The key is to experiment with different colours and see which works best with all the skyline-view variations.
3. Neutral vs. bold colours. A skyline is filled with vivid colours, from the blues of the sky to the greenery of trees in nearby parks. The rule of thumb is to choose a neutral wall colour when working with large walls of window. Many high-rise condos even go as far as to use white as their neutral colour. A neutral colour on your walls will accentuate the colours in your skyline view.
It has been said that when buying a high-rise condo, you pay for the view, therefore, when designing this space, ensure your view looks like a million dollars.
4. Designing a higher-end estate is about being eclectic. Each piece should be carefully chosen, with many being from your travels. Other accessories should come from boutiques, not big-box stores, so your condo doesn't look like every other home in the neighbourhood. Most pieces in the space should have a story and a personal sentiment attached to them.
I love this type of design, simply because it is centralized around the personalization of the space. The designer and homeowner work hard to make the view part of the space, while adding a personal look and feel.
Marc Atiyolil is the editor-in-chief of Canadian Home Trends, Canada's Home Decor & Lifestyle Magazine.
Renovation & Design
Remedy depends on extent of moisture damage
QUESTION: Please advise us on the following problem. Our ceramic tiles above the bathtub have been leaking and we are going to have to remove them and replace the wallboard. There is mould behind the tiles because there are black areas in the basement ceiling and main floor floorboards where the pipes come through.
What disinfectant should we use to kill the mould after we open up the wallboard? Is bleach safe to use and in what proportion to water? What precautions should we take when removing the wallboard?
Thank you for your attention to this matter.
Elizabeth & Stephen Bahr
ANSWER: Moisture damage in bathroom walls is one of the main things I check for when inspecting the interiors of homes because of the high cost of repairs associated with this very common defect. This issue can be quite insidious as evidence of a major problem may be hidden from view to the average homeowner.
I am consistently telling my clients during pre-purchase home inspections to repair or replace the silicone caulking around tubs and showers and maintain grout in tile walls. While these may seem like minor repairs and hardly worth the effort to identify, they can be instrumental in preventing the issue you are facing.
Ceramic tiles are an excellent product for preventing moisture damage to the area above your tub, but they are only as effective as the condition of these two items. Mortar between the tiles will last for many years but once it becomes eroded or deteriorated, it can allow moisture to infiltrate the backing behind the tiles.
Even more important, silicone caulking at the joint between the tub and tile and in corners has a very limited life expectancy and should be removed and replaced every one or two years. If either of these two areas are neglected it may not be long before moisture damage behind the tile leads to major repairs to the entire shower area.
One reason this is such a common issue is the backing material used behind the tiles. Often, this is not moisture-resistant enough to last a long time in the wet environment of your bathroom. Many homes have simple plaster or gypsum drywall behind these areas that will easily absorb moisture from the shower. Even moisture-resistant drywall will have a limited life expectancy in this application.
More modern homes, or older bathrooms upgraded by knowledgeable contractors, should have more moisture-resistant backing for tiles. Cement-based sheathing or protective plastic membranes are often employed behind tiles to keep the substrate solid even if some moisture does penetrate the tile surface. After you remove the damaged material in your shower, ensure you are employing one of these better products to prevent a reoccurrence of your current situation.
Now that I've offered my advice on how to proceed with the new surface after replacement of your old shower area, I should answer your question. The repairs or treatment of the moisture damaged, mouldy or rotten material behind the tiles depends largely on the extent of the damage.
If you remove the tiles and wall covering behind them and find only stains on the studs, there may be little you need to do before redoing the bathroom. If you find large stains or blackened or soft sections to the wood framing then you will have to do more significant remediation.
The way to simply test the framing is to take a sharp tool such as a scratch awl or screwdriver and firmly push it on the surface of the wood. If the tool does not easily penetrate the surface, the wood should have minimal damage and maintain its structural integrity. If the sharp surface of the probe easily punctures the wood and sinks in more than a few millimetres, the wood will need to be replaced. There is no treatment that can prevent further deterioration to wood once significant rot has taken hold and only removal will do.
Your concern with mould in this area will likely be concentrated in two areas, the wall covering and the wood framing behind. Since you will have to remove and discard the wall coverings completely to do a proper assessment and repair, there is little issue there. Once this is removed from your home there will be little chance of any mould in this material being a problem after cleanup and repairs are complete.
If the wood is in good condition behind this area and you are still concerned about mould, I would not recommend using any bleach for treatment. Chlorine bleach is a toxic substance and if you mix potentially hazardous types of moulds with it you could create more dangerous toxins that have unknown effects. There are commercially produced liquid fungicides designed for this purpose that could be applied to the surface of the studs, which are available at home centres or other suppliers.
What you should understand is there are naturally occurring moulds everywhere in our environment, indoors and outdoors. Wood rot is a type of mould, but is not one known to cause health concerns to people. Finding a small amount of surface rot in wood framing behind a damaged bathroom wall or in the old floor boards below the tub is not cause for panic.
If the material is badly damaged, cut it out and replace it after tearing out the tiled walls. If the wood has a minor amount of surface staining or damage, it should not become a major issue and certainly not a health issue as long as the walls are properly repaired with the right materials and well maintained in the future.
Ari Marantz is the owner of Trained Eye Home Inspection Ltd. and president of the Canadian Association of Home & Property Inspectors - Manitoba (www.cahpi.mb.ca). Questions can be emailed to the address below. Ari can be reached at (204) 291-5358 or check out his website at www.trainedeye.ca
trainedeye@iname.com
Renovation & Design
Easy tips to get apartment deposit back
QUESTION: I'm moving out in a month from my apartment, and I have a very picky landlord. I would like to give him no reason to hold part of my deposit.
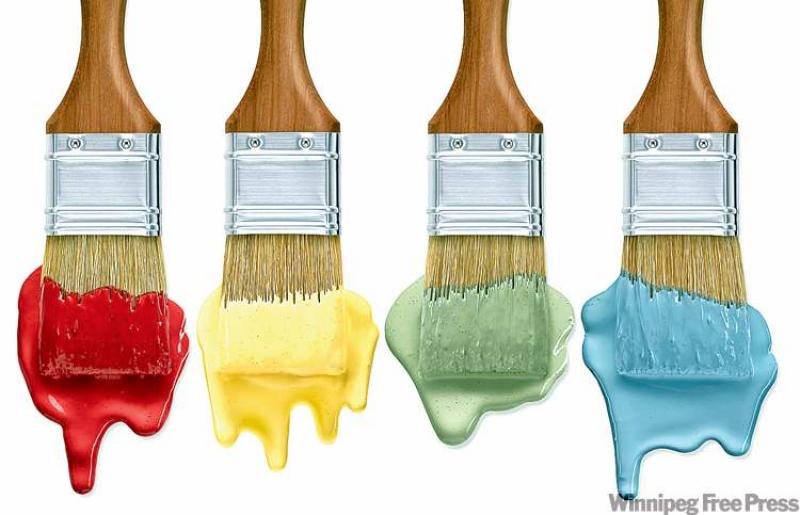
-- There are some PVC vertical blinds that were originally beige, and I spray-painted them yellow, orange, green and blue. What is my best move to bring them back to their original colour?
-- From moving in three years ago, some furniture left black marks on the beige walls; can I easily get rid of them without looking for matched paint?
-- On the hardwood floor there is one limited spot where it is scratched with small white lines, can I improve the look of it? I'm afraid to sand just a small spot like that.
-- Leftover from a Halloween decoration, there is a "tape mark" on the ceiling; can I get rid of it? Thanks a lot for all your fabulous tips. Nathalie, Winnipeg
ANSWER: Let's see if we can get your entire deposit back with the following solutions. Using a spray paint, lightly spray the blinds to cover the previous paint colours. Several thin coats are better than one big fat thick coat of paint. Purchase good quality paint so that it does not run, and is thick enough to cover up the blue hue.
For wall scuff marks, dampen a Mr. Clean Magic Eraser and erase all black lines. Or if you happen to have borax on hand, combine half cup borax with two tablespoons of dish soap and scrub wall. Rinse with water.
To cover up scratches on hardwood floors, you can purchase touch-up kits. However, what I would do instead is reach into your cupboard and pull out a jar of smooth peanut butter. Spread peanut butter onto areas. Let sit for one hour and wipe off all excess. Or colour in with matching crayon or permanent marker.
While you are waiting for the peanut butter on the floor to dry, take the jar and smear some on the ceiling to get rid of adhesive tape (or use WD-40). Wipe with dish soap and water. Or heat area with hair dryer and scrape with a plastic putty knife. Happy moving!
QUESTION: How do you clean a brass mailbox? Thanks. Lovie, Winnipeg
ANSWER: You can either clean your mailbox with a product called Brasso, specifically designed for cleaning brass. Or use WD-40, a product that is great for cleaning brass and most people have a can on hand. Scrub with an abrasive cloth. If the mailbox still needs help, colour match spray paint and paint outdoors on a calm day.
Feedback from caring Manitoban:
Dear Reena,
You have some wonderful solutions to household problems. In reply to the lady who had a blue ring around her toilet, I had the same problem when I moved into my home in Russell, Man. My toilets were brand new, and they developed a blue ring, which I could not remove. I simply lived with it for a number of years; but it always bothered me. Finally, one of my friends suggested this solution which works for me; and I have to repeat this procedure every six weeks or so.
I take two long narrow rags, which, when put end to end, will reach around the blue ring on the toilet. First I make the rags wet, then wring them out. Then get rid of the water in the toilet bowl. Now put the rags in place around the blue ring. Then saturate them with Javex. Leave them there for as long as it takes to make the blue ring disappear. For me it's between 20 minutes and a half-hour. Hope this helps Maureen, and anyone else who has this problem.
Fabulous baking soda tips:
Baking soda is a leavening agent used in baked goods like cookies or quick breads but that's not all...
-- This tip was sent to me by a grandmother who found her grandson dumping baking soda all over her bathroom. Forget the expensive cleaners that leave you coughing and gasping for air. Sprinkle baking soda on bathroom sink, counter and in bathtub. Scrub, rinse and smile.
-- Wash your hair with baking soda a few times a month. This leaves hair thoroughly clean and gets rid of product buildup caused by styling products.
-- Flush one cup of baking soda down the toilet once a week to keep the septic tank clear.
Reena Nerbas is the author of the national bestselling Household Solutions series. Her website is www.householdsolutions.org You can contact her at Box 429, Blumenort, Man., ROA 0C0.