


Renovation & Design
Renovation & Design
Take care with pressure-treated wood
OTTAWA -- Arsenic isn't an element that enjoys a good public relations image. That's why the American and Canadian lumber industries voluntarily halted consumer sales of all pressure-treated wood containing arsenic-bearing chemicals four years ago.Trouble is, the new, arsenic-free, pressure-treated lumber also presents hidden hazards that too few people realize. If you're planning to build an outdoor project this spring, you need to understand crucial details for your work to endure. And don't assume that every builder understands the seriousness of this issue.
Safety rules for handling and building with the new breeds of lumber read the same as for old wood, despite the freedom from arsenic. According to Environment Canada, avoid using the new pressure-treated lumber where direct food contact is possible.
Keep it away from animal food storage bins, water troughs and compost bins.
Wear gloves and long sleeves when working with pressure-treated lumber, and put on a dust mask when cutting it. Wash your hands after working with the product, and especially before eating, drinking or smoking.
Launder work clothes separately before reuse, and never burn pressure-treated wood scraps. Of all the safety rules -- new pressure-treated or old -- the no-burn requirement is the most important.
Besides rules for safe handling of pressure-treated lumber, there's a structural issue, and it has to do with a chemical interaction that's not obvious.
A substance called alkaline copper quat (ACQ) is one of the most common wood preservative compounds that keeps new kinds of pressure-treated lumber from rotting.
ACQ relies on copper to be effective, not arsenic, and this is where structural problems can occur if you're not careful. When the copper in pressure-treated wood gets wet and comes in contact with certain kinds of metal nails, screws and joist hangers, it accelerates the corrosion of these fasteners.
The first signs of trouble show up as rapid staining of the wood surrounding these fasteners, often within just a few weeks of construction. And within a few years, the choice of inappropriate fasteners will cause premature deck failure as nails and screws are reduced to crumbly iron oxide.
Hot-dipped galvanized nails and screws offer the minimum level of corrosion protection required by today's modern lumber. Stainless steel is even better, though there's a problem. It's not always easy to know the makeup of fasteners just by looking at them. In fact, you can't tell what you've got just by sight.
At a minimum, the safest approach is to use fasteners specifically labelled for use with ACQ lumber. You should also make a distinction between two kinds of joints in your outdoor projects: joints that remain accessible after construction, and those that you can't ever get at once the project is complete. Inaccessible joints should be fastened with the more costly, reliable stainless-steel screws or nails. You can afford to use less expensive, hot-dipped fasteners on joints where additional nails or screws can be installed years later, if the first fasteners fail.
Aluminum flashing is another area you need to consider when using pressure-treated wood. Aluminum is especially vulnerable to corrosion when in contact with copper-rich lumber. That's why it's essential to use copper flashing anywhere near pressure-treated wood.
Handle today's pressure-treated lumber properly and it'll deliver excellent results for a long, long time.
Steve Maxwell is technical editor of Canadian Home Workshop magazine.
-- Canwest News Service
Renovation & Design
Make the most of home spa experience
With Mother's Day just around the corner, it's time to turn your home into spa central for the woman who does so much!1. Perhaps the most important part of the home spa experience is being sure you have uninterrupted quiet time. When creating the perfect spa experience, soothing music is an easy and thoughtful beginning. After that it is time for the perfect bath or shower followed by a few easy spa recipes using products from behind your cupboard doors.
2. You'll be surprised at how lighting can create a stress-relieving mood. Lighting the room with candles will fill the area with a soothing scent and offer a very relaxing atmosphere.
3. Installing a luxury bathroom is one way to pamper your family. And you don't need a big budget to bring the spa into your bathroom. A Jacuzzi tub or a steam shower are wonderful additions to any bathroom; however, you can give your bathroom a spa feel even with a more subtle redesign. Elegant designer taps, heated towel rails, new lighting and soft towels are all inexpensive ways to make your bathroom an oasis in the home.
4. Anyone who has never seen a steam shower may be unaware of the large differences in steam shower quality. Some steam showers are sturdy and have well-built electronics while others are flimsy with poor electronics. Before purchasing a steam shower, shake the unit. This easy step will help determine if the unit is flimsy or solid and well constructed. Tip: The door of the steam shower should be made with high strength tempered safety glass. A well-sealed steam shower reduces steam and water leakages dramatically.
5. If you are planning to purchase a new tub, begin by deciding where the tub will be positioned. Tip: Easiest to install are five-foot models that slide into your existing tub alcove. On the other hand, corner tubs maximize floor space.
6. Make sure your water heater is large enough to fill about two-thirds of your tub with warm water. Whirlpool tubs vary in size, holding 25 to 150 gallons of water.
7. When purchasing a tub, pay attention to the details: Look for protected jets and sensors that cut the motor if the water is low, so the motor won't burn out. Built-in grab bars and slip-resistant floors add safety. Units with internal water heaters maintain a consistent temperature.
8. Determine if you want a self-cleaning tub system. Since whirlpool tubs recirculate water, their systems need frequent cleaning. Some air-jet systems automatically purge bacteria-causing residue after each use.
9. Water temperature is one of the important things to be aware of when preparing a home bath spa. Each degree of water will have different effects on your body. You should never take a bath that is more than 40-43 C. For a hot 10- to 25-minute bath, you should use the temperature of 38-40 C. For a herbal bath, the temperature of 38 C is best. These baths should be from about 15 to 30 minutes.
10. Bubble Nut Bath Recipe: In a bowl, combine one-half cup honey, one-quarter cup gentle liquid soap, 1 tbsp. almond or vanilla extract and 1 tbsp. glycerine. Shake and add to bath. Or combine 1 tbsp. shampoo with one-eighth cup safflower oil and pour under running water. Tip: While you are at it, why not sprinkle a handful of rose petals onto the water?
11. Create your own Fruit Smoothie Hair Mask: In a blender, combine one-quarter banana, half-cup avocado, one-quarter cup cantaloupe, 2 tsp. wheat germ and 1 tbsp. yogurt. Leave in hair for 10 minutes. Rinse.
12. I Can't Believe It's Not Butter Face Mask Recipe: Combine 1 tbsp. regular yogurt and 1 tsp. soft honey. Apply to face 7 minutes. Pat and rinse face with hot cloth.
13. Pinky Toe Milk Bath: In a pot, heat 5 cups of water and 2 cups of milk. Remove from heat; add 3-5 drops peppermint essential oil. Soak feet for 15 minutes at the hottest temperature that feels comfortable. Rinse, dry and apply lotion.
14. Super Soft Sugar Baby Lotion: Combine 2 parts cooking oil with 1 tbsp. salt and 1 tbsp. sugar. Spread on hands and leave for 5 minutes, rinse in lukewarm water.
15. Before a home spa manicure or pedicure, file nails and soak them in a bowl of warm water and 1-2 tbsp. of lemon juice or olive oil to soften hands and cuticles. Let soak approximately 5-10 minutes. Tip: The final touch, purchase rhinestones from a beauty salon and apply to toe nails after the pedicure.
Solutions is compiled from various sources: divapor.com, ehow.com, ezinearticles.com, essortment.com, stretcher.com, beauty.about.com, lifetoolsforwomen.com, stress.about.com. Thank-you to all who contributed! Similar information may be found elsewhere.
Solutions sleuth Reena Nerbas is a home economist and speaks professionally on the topic of household challenges; she is also the author of two national bestsellers, Household Solutions 1 with Substitutions and Household Solutions 2 with Kitchen Secrets. She can be heard on radio and television programs across Canada.
Visit me online at: www.householdsolutions.org
Renovation & Design
Deck finishing is much more than just stain
Every summer, I hear from homeowners looking for advice about finishing their new wooden deck. And every summer, I wish I could've talked to these folks a few months earlier. That's because finishing a deck really isn't about finishing a deck. It's also about critical design and construction details required to create a deck that stays beautiful for a long time.This goal can't be achieved as an afterthought while standing in a hardware store aisle deciding which deck stain to buy. No, to achieve a durable deck you must start at the beginning with sound construction strategies and a field-tested finishing approach.
The first thing to understand is that achieving a durable deck finish doesn't happen easily. The effects of water, sunshine and gritty foot traffic makes the deck-finishing challenge difficult. That's why so many new decks look grey and lifeless after a year or two.
All deck finishes are especially vulnerable on 90-degree edges. Everywhere that a sharp corner exists, the potential for early finish failure is high. In fact, it's guaranteed. That's because finishing liquids become very thinly spread on corners as you brush them on. This is also why it pays to get rid of sharp corners during construction.
The first and most obvious involves easing corners and edges using a router spinning with something called a roundover or chamfer bit. As the name suggests, this tool converts sharp corners into gently curved or angled edges. If you're building your deck, simply include a router in the tools you gather for the job. If you're hiring a pro, ask for rounded or chamferred details, ignoring the very probable comments about "not normally doing it this way."
Another construction feature that makes finishes fail too soon is the traditional practice of fastening deck boards from the top down with screws. Every place a screw head divets the surface of outdoor wood, it creates a brand-new corner where the finish will invariably be weak and prone to early decay. This is one reason I like hidden deck board fasteners. The other reason is superior appearance. The smooth, hole-free surface looks so much better, even without considering how much longer it's going to stay that way.
Every newly-built wooden deck seems to call out for finishing. That's why so many homeowners are too quick to get busy with a brush, setting themselves up for premature finish failure. The fact is, many deck finishing products fail quickly, even when applied over a properly prepared surface. Then there's the issue of hidden wood moisture and its effect on finishes.
Before you build any deck, be sure you're using nails, screws and bolts that are hot-dipped galvanized or stainless steel. Too many decks are built with shiny, corrosion-prone electroplated fasteners that are destined to stain the surrounding wood and fail prematurely.
For critical information on specific deck finishing products and strategies that have proven themselves in the field, send me an e-mail at deckfinishing@stevemaxwell.ca.
Steve Maxwell is technical editor of Canadian Home Workshop magazine.
-- Canwest News Service
Renovation & Design
Don't panic: stuff underneath old carpet just varnish
QUESTION -- I'm refinishing the stairs in my turn-of-the-century home, and when I pulled off the carpet I found this black stuff underneath. I don't think it's paint. What could it be?
ANSWER -- This could be one of two things. It could be shellac, which would be easily removed using alcohol. But the black substance is probably a varnish that was popular to use on wood in the era when your house was built. This varnish is thin and doesn't penetrate the wood, and will be easily cleaned with a mild paint remover.
--Associated Press
Renovation & Design
Expressing thanks for a great home show
Spring has officially begun. The 34th annual Home Expressions Show presented by Star Building Materials welcomed the spring season at the Winnipeg Convention Centre April 3 to 6.The show was a great success. Guests at Home Expressions were embraced with the newest design elements for their indoor and outdoor living spaces. They also enjoyed the diversity of the show.
Everything you need and want for your home was under one roof. There was a vast display of high-quality products exhibited throughout the three floors of the convention centre.
Your home should reflect your style and personality. We were thrilled to welcome CBC's Steven Chris. Their expertise in home d ©cor and the hottest trends were well-received by Winnipeg.
Designers Row was a must see, with spectacular rooms by some of the city's best decorators and designers. A new attraction to this year's show was the "Ask a Decorator" booth, presented by the Canadian Decorators' Association.
Canadian home repair guru Shell Busey, sponsored by Canstar, was on hand to guide us through all the trials and tribulations of renovations. If you have a question about home repair, Shell has the answer.
Manitoba's Reena Nerbas taught us how to make household solutions easy. She has tested disasters all over the home and yard. When you have a stain or odour, Reena has a solution.
Advance Electronics showcased the ultimate in "Get Wired" technology, with the newest and brightest innovations in home electronics.
The Winnipeg Free Press Lifestyle Stage presented hourly presentations throughout the show with industry experts sharing their trade secrets. We would like to thank the following presenters for their contribution -- Ed Neufeld from CWD Window and Doors, Heather Hlady and Moray Merchant from Concierge One, CJOB's Geoff Currier, Glen Rossong from the Candle Company, Jeff Bishop from the Sound Exchange, Wow Hospitality Concepts - 529, Mike Millard of Southern Comfort Mechanical, Lloyd Mah of City of Winnipeg Inspections, The Bay Downtown and For Space Sake.
A show of this size takes an army of resources behind the scenes. A huge thank you to the following companies for their support -- Concierge One, Jim Flood and his crew, Ridgeline Construction, Central Display, the Winnipeg Convention Centre, Winnipeg AV, Tom Powell Design Studio, The Sign Source and our media partners who were involved with the Media Decorators Challenge: the Winnipeg Free Press, Hot 103 and CJOB.
Thank you to Skillcraft, Wicker World and Krevco for generously providing the Grand Prize. All funds raised from the Grand prize raffle went to Variety -- The Children's Charity.
We would like to thank Variety for providing us with the volunteer Show Ambassadors. As well, we would like to acknowledge the following companies for their gracious prize donations -- CBC, the Winnipeg Free Press and the Delta Hotel for donating the trip to Toronto to see Steven and Chris's live television show, The Penthouse Furniture, and a shopping spree at Mattress Depot and JS Furniture.
We look forward to seeing you at our 2009 shows. The Kitchen Bath and Renovation Show will be held in January, 2009 and Home Expressions will take place in March, 2009.
For further information, please check out our websites at www.homebuilders.mb.ca and www.homeexpressions.ca. This column is provided by the Manitoba Home Builders' Association
Renovation & Design
Give the planet a break
VANCOUVER -- A colleague suggested to me that eco-friendly backyard tips would be a smart choice for a column. There's just one problem: those tips don't exist.They're like eco-friendly European holidays, eco-friendly cars, or eco-friendly Christmas gifts -- when consumption of resources and expense of energy goes into them, they're of dubious friendliness to the ecology.
I don't claim to be an eco-friendly designer, and, believe me, I'll be glad when "green is the new black" has gone the way of "trip the light fandango" and other overripe slogans. But I do believe in a few fundamental principles that, taken together, comprise something I'd prefer to call "conscious" design. They are: plan well, build for longevity and make informed decisions about what you buy and where it came from.
So, as summer approaches and the outdoor-living trend gains traction, it's timely to consider these ideals and some simple choices that can help us reduce impact on the world around us. I have three suggestions for you.
Vacation in your yard
Outside of design, travel is my passion, so it's with gritted teeth that I write this. It's hard to argue that the best solution for you this summer is staying in the back-40 when you could be jetting away to a Greek island or Indonesian beach.
I'll save you the rap about how air travel is a major contributor to global warming. (I'd only be cribbing it off Wikipedia, anyway.) But I think the base principle is a worthy one. When I say "backyard," I mean it in the sense of Epicurus, who felt that the final, satisfied life was one spent in the garden, with your friends and the food you've grown.
Your home and yard can be an oasis if you observe simplicity and elegance in designing and appointing them. And when you're content, you find that you don't need much else. Likewise, if your home is a space of ease and repose, you're less inclined to comb the globe looking to relax.
Eco-friendly fences, decks
As the weather warms, a lot of you will no doubt be out there pounding planks in your yards. One way to make sure that ecology is more than a passing concern is to use FSC-certified lumber or composite lumber.
A word on each: the Forest Stewardship Council (FSC) is an outfit that monitors international sustainable forestry standards. A wood product marked with the FSC stamp is a product that comes from, as they say on their website, "responsibly managed forests and verified recycled sources." For outdoor applications, cedar is your best bet because it contains natural pesticides and it endures the elements with ease.
Composite lumber is a combination of post-industrial wood products and recycled polyurethane. The ecological benefit is that you can deck your yard in something that would otherwise be waste. The Virginia-based company Trex, for example, manufactures decking from recycled shopping bags and sawdust. It's much better than it sounds: their decking lasts ages, it's anti-skid, and, because it's already coloured, you don't have to stain it.
Native plants
If you're like me, when you walk into a nursery, your senses are assaulted by the beautiful, exotic plants. One key to making sure that you walk away with the right ones is choosing plants that are indigenous to your geography and ones that thrive naturally in it.
Selecting plants this way means that you won't ever have to over-fertilize or over-water them.
The other option? Integrate edible plants in your outdoor scheme -- there's nothing more satisfying than a meal picked fresh from your own garden or rooftop terrace.
I'll admit, the above is an incomplete list, but it's a start. If we keep a notion of durability and responsibility alongside our often quixotic notions of sustainability, we'll all be better off. And, in the end, that means we might be somewhere near OK.
-- Canwest News Service
Renovation & Design
A very long shelf life
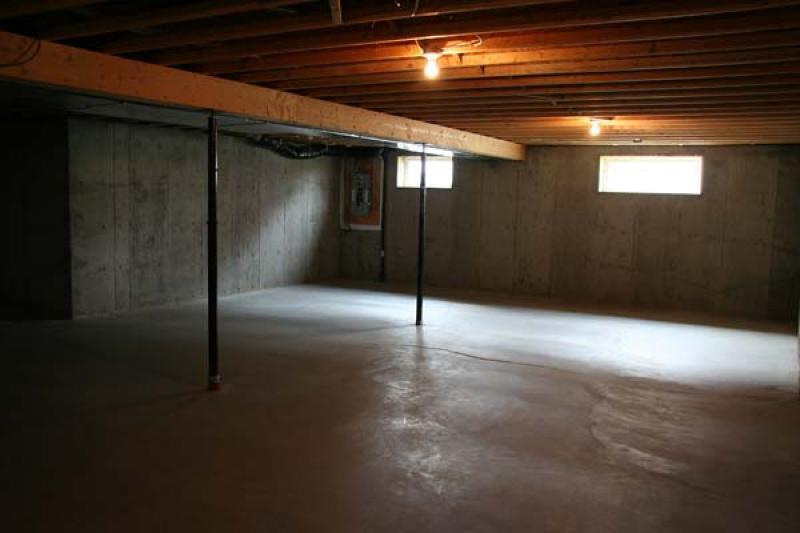
Dear Debbie -- I could not have come this far in my brand-new home without your decorative TV guidance. However, I have an issue with our basement. My husband is a successfully retired firefighter and has collected a million die-cast models of fire trucks and cars over 30 years. He wants to develop our brand-new basement with shelves or something to display his collection, however where does one begin? Glass unit wall, oak wall, who knows? Thank you so much for your time.-- Elise
Dear Elise -- You aren't alone! So many of us are juggling with collections of every kind, and there's an art to finding a place for it all so that it can be enjoyed without taking over your home. However, the good news is that today you'll find a huge inventory of display shelving and cabinetry from which to choose. Cube shelving is great, it's versatile as you can stagger or stack your display. Paint the wall a contrast colour that will become the background for all the objects in the cubes. Floating shelves are popular; they are supported from the back of the shelf, which gives a lovely clean line. You can build shelves with planks of wood; add a moulded lip to the front like a plate rail so that items won't slip off. Glass or Plexiglas cases are a modern touch. These look particularly good with built-in lighting to show off your display.
For your basement, I'd do one big feature wall of all your husband's trucks and make it look like a gallery. Either light it from behind with mini-lights, or arrange pot lights in the ceiling so that this beloved collection can be viewed in all its glory.
Dear Debbie -- I'd like to know how to make a room that's full of antiques not look too dated. Our living room and dining room are filled with heavy, dark wood pieces that are excellent quality and have sentimental value as well. Hardwood floors in the living room are covered with a dark oriental carpet; the dining room has an off-white wood area rug. How does one contemporize these rooms without changing the furniture?
-- Janet
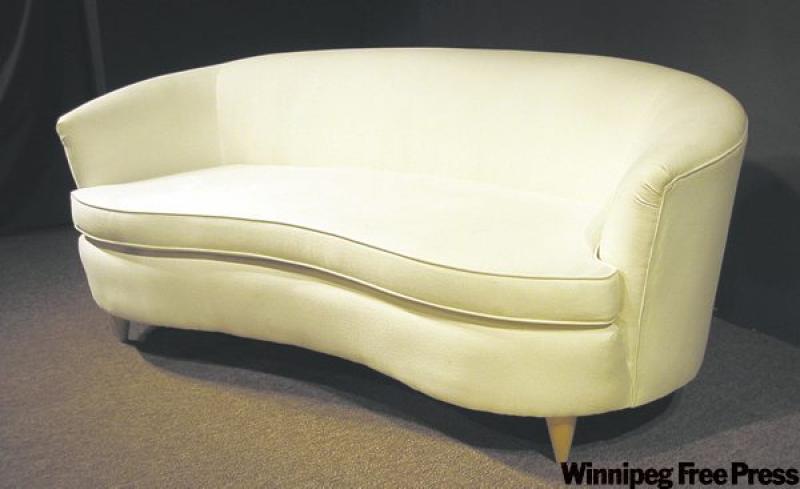
Dear Janet -- Here are three elements that you can manipulate any way you choose, regardless of the furnishings, that will give your rooms new life -- wall colour, upholstery fabrics and lighting. Start with your living room sofa and research the latest fabric trends. Oversized prints are in, or if you prefer, look for striped fabrics as they are timeless. The update comes with the colour and width of the stripe, go wide, three to five inches, in a combination of colours found in your carpet. I'm guessing jewel tones of blue and red. A light colour on the walls will also make an instant impression; try pale amethyst or any shade of blue is wonderful with dark wood. Finally, or perhaps this should be first on your list, update the lighting. A modern chandelier for the dining room, pot lights in the ceiling for both rooms to brighten the overall light, and one or two contemporary lamps for the living room won't clash with your antiques. Have some fun, mix it up, and you will love the new old look.
Debbie Travis' House to Home column is produced by Debbie Travis and Barbara Dingle. Please email your questions to house2home@debbietravis.com.
Renovation & Design
Leaky foundations best fixed from outside
Today we have two questions I have selected from the many I regularly get on everyone's favourite topic, especially this time of year, basement seepage.
I read your column on a regular basis, and I was hoping you'd be able to help me with my problem. My home was built in 1962, and has cement walls in the basement that are experiencing leaks in a few areas where the original wire ties stick out of the cement wall. I'm in the process of opening up all the walls in the basement to renovate, and wanted to check if there is anything I can do to repair the areas affected and also deal with the ones that don't currently leak from inside the home.
Thanks very much for your help.
Regards,
--Roger Bouchard, e-mail
I experience occasional moisture in the basement, precisely along the joint between wall and the floor. I noticed the problem only along one wall, but it might be along other walls as well. I took the drywall and insulation down on the problem wall and it confirmed that there are no cracks on the wall and the problem is located within 20 to 30 centimetres of the floor. Also worth mentioning, the eaves were clogged for some time and last spring it was raining a lot. We are just doing roof and eaves replacement which will fix that problem, but I feel that still something needs to be done with the walls. The floor, which has a crack, has some moisture coming through it as well. My options are to do excavation from the outside and fix it by replacing the weeping tiles or an internal repair by removing part of the floor next to the wall, digging a trench beside the footing, and embedding weeping tile there directed to the sump pit.
Which one will solve the problem better?
--Mario Paskvalin, e-mail
Answer -- One of the most difficult problems to diagnose in homes is the exact location of moisture intrusion, especially in basements with partially finished walls. I am glad to see that both or you have decided to remove the wall coverings from the foundation areas in question before proceeding with any foundation repairs, which may be quite costly. Visual access to the inside of the concrete foundations is critical to pinpoint the areas of leakage and decide upon proper repairs.
As stated in the second inquiry, you have not seen any visible cracks that would account for the water leakage. Logically, you have then surmised that the water must be coming through the crack between the floor slab and the foundation wall but you may not be correct. Your description of the evidence of moisture being visible only at the bottom of the foundation may have other causes. As in Mr. Bouchard's home, you may have one or more rusted form ties that have disintegrated, leaving small holes in the foundation wall. The older snap ties, as they are also called, are typically installed in fairly straight rows along the length of the foundation wall. They often will rust and leak one after the other, forming a fairly regular pattern of moisture on the walls. Look for water stains, rust stains and efflourescence underneath these small holes, which may give some indication of the problem area.
Another very common factor in basement leakage, which is more typical with the leakage patterns you are seeing, is deterioration of the damp-proofing on the exterior of the foundation. This thin bitumen or asphalt- based coating will often wear out after several decades, allowing the concrete to absorb moisture from the surrounding soil. If this moisture exceeds the retention capabilities of the concrete, moisture will seep through, often detected first by flaking or spalling surface concrete on the inside. If this is evident on your foundation, after removal of wall coverings and insulation, it is just as likely a culprit as the crack at the floor slab edge. The interesting thing is that the most successful repair method for both causes of leakage is the same, which I will address later on.
As for patching the leaking form ties seen in the first question, this may depend on the extent of the leakage and deterioration of the small, metal wires inside the foundation wall. If there is only minor seepage or drip stains, patching the inside of these indentations with hydraulic cement may help, considerably. This patching material should be installed after chipping or grinding off the rusted metal and any loose concrete. If the seepage is more extensive and a visible hole is seen where the rusted wire used to be, then further repairs may be required. Often, these holes can be plugged by injecting epoxy from the interior of the foundation. If properly installed, the epoxy, along with improved grading water management outside the foundation, should provide a fairly permanent repair.
If the deterioration on the interior of the foundation is more extensive, the area around several form ties excessively worn, or several cracks seen that have evidence of leakage, exterior repairs may be required. Most exterior excavation repairs will include patching cracks and openings in the concrete, reinstallation of the damp proofing on the exterior and at the joint with the footing, and replacement of older, blocked weeping tile with modern plastic drainage piping. To answer both of your questions, this will be the best method for repairs of a leaking foundation, but may not be necessary if there is only minor seepage through a couple of rusted ties or small cracks. Internal weeping tile installation is not a good solution, in my opinion, as the messy and costly installation may affect the structural integrity of the basement floor slab and does nothing to stop further deterioration of the outside of the foundation walls.
Ari Marantz is the owner of Trained Eye Home Inspection Ltd. and the President of the Canadian Association of Home Property Inspectors - Manitoba (www.cahpi.mb.ca). Questions can be e-mailed or sent to: Ask The Inspector, P. O. Box 69021, #110-2025 Corydon Ave., Winnipeg, MB. R3P 2G9. Ari can be reached at (204) 291-5358 or check out his website at www.trainedeye.ca
trainedeye@iname.com
Renovation & Design
Green from the ground up
In today's ballistically hot housing market, it's all too easy to find an infill lot, erect a good-looking home (at least, from the outside) and run off having made a quick profit.That's not Cal Dueck's building philosophy -- not by a long shot.
"This is our fourth infill project in this general area (north Fort Garry)," says Dueck, owner/operator of Dueck Homes. "When we build a home, we want to build it right from the ground up. That's why we use insulated concrete forms (know as an ICF or Arxx foundation)."
Dueck says the reason behind using insulated concrete form technology is simple: in his opinion, it's the most efficient system on the market today.
"The walls come in at an insulation value of R50 -- that makes for cheaper heating and cooling as the insulated concrete stays at a temperature of about 10 degrees Celsius year-round. An example of that property is that we had the heat turned off at the end of February (when it was very cold out)," he says. "It wasn't until a few hours later that we realized the furnace wasn't on. It was that comfortable inside."
Two other properties make ICF construction a sound choice, adds Dueck: superior soundproofing and being quicker to build with.
"It might be a bit more expensive up front, but you save money in the long run in terms of labour and heating and cooling costs. There's also one more benefit that comes from building with insulated concrete forms -- the insulation from the ICF structure takes on the temperature of the home. That makes for a much warmer basement -- plus, you can drywall right over top of the Arxx -- there's no need to insulate."
To increase the home's energy efficiency and "green" features -- the two-storey, three-bedroom design measures in at 1,680 square feet -- Dueck also chose to go in a non-traditional direction heating-wise.
"We went with an electric furnace -- it's always 100 per cent efficient and is better than a natural gas furnace because nothing is wasted," he explains. "That makes it cheaper in the long run. It's also much more environment friendly than a gas furnace. This is a PowerSmart home that also has a 45 gallon PowerSmart hot water tank as well as an HRV system and energy-efficient lighting."
Which brings Dueck to another key point: 1139 Edderton's interior design is almost entirely green in nature.
"Our main goal is to build an efficient, environmentally-friendly home," he says. "The Arxx foundation and walls saves a lot of lumber and insulation, and we source all the concrete we use from Manitoba. Engineered joists and a silent floor system also saves wood."
The green features don't end there. Flooring throughout the main level is comprised of rich-looking, durable bamboo, and Dueck Homes crafts all the railings, mouldings, baseboards and trim themselves. Each bathroom has been outfitted with six-litre water-saving toilets and all the windows are (extra large) double pane "E" argon models by All Weather Windows.
To help retain the heat, the attic is also well-insulated -- to an R value of 50, no less.
"When we build a home, we're looking to achieve a good balance of efficiency and style," Dueck says. "So we invest more in the basics that matter."
That philosophy is apparent on the main floor where there is no lacking for style. A bright, open-concept maple island kitchen with corner pantry, desk and track lighting make for a great spot to create tasty meals, while an equally open living room with the aforementioned bamboo floors and room to burn can be easily configured to suit virtually any taste.
A main-floor master bedroom (with four-piece ensuite) and laundry room make for privacy and utility, while the two bedrooms upstairs -- plus 10-foot ceilings -- make for a design that's bright, functional and, most importantly, efficient.
"We do the whole thing from the foundation up," says Myron Martens, Dueck's second in command. "We're here from start to finish -- we start with the foundation and footings and then build up; we also do the interior design and layout, but assign the technical jobs like electrical to subtrades. We really take pride in the homes we build, and there's a real feeling of accomplishment when we see the finished project."
Dueck says all the features combine to make for a very efficient -- and attractive -- home.
"When you take the time to think things out, you cannot only come up with a design that fits in with an area, but that has green features that make it both functional and stylish," he says. "I'd have to say we're very pleased with how things turned out."
lewys@mts.net
Renovation & Design
Taking the stress out of moving
Moving is considered to be one of the top five most stressful events in a person's life. It only ranks behind things like death, divorce and job loss.Certainly moving can be a stressful thing at any point in your life. Now imagine that you are 80 years old and moving out of a house that you have lived in for the last 50 years. Where do you even begin?
That's where Trudy Forsyth comes in. Forsyth is a project manager for Transitions, a Winnipeg-based company that refers to itself as a "move facilitator." The company offers a full-service package to help people move out of their homes and into a new one.
"People are just so overwhelmed, they don't know where to start," explains Forsyth. "They are so appreciative when we come in and do it all."
Doing it all is just what Transitions offers its clients. The company covers just about everything associated with a move -- from packing and getting rid of unwanted items to hanging pictures and arranging for cable installation at the new house.
Their main client base tends to be people in their late 70s and 80s who are moving out of their home and into a retirement home, Forsyth notes. And it's often their adult children who call in the Transitions team to help with the move.
"With more people living away from their parents, there is a real need for help," says Forsyth, who regularly gets calls from people living in places like Calgary, Ottawa and Toronto to move their parents. "For others, the children may live here but they are very busy."
There's also the emotional aspect of moving someone out of the family home, which they may have lived in for decades.
"It's easier sometimes for us to go in and help them downsize rather than family members," Forsyth points out.
So what does the Transition team actually do? The first step is an assessment of exactly what needs to be done. For many people who are moving out of their house and into a retirement complex that usually includes a purge or downsizing of items.
"We have a saying that they should only take what they need, love and want," says Forsyth. "I always encourage downsizing or decluttering."
Once they decide what items they want to take, Forsyth drafts a floor plan of the new residence and sketches out exactly what will go where. Then they oversee the packing and book the movers. They may also help with arrangements to sell the house and get rid of any unwanted items by holding a contents sale or donating items to charity.
"What we do is get everything ready to move, but we don't do the physical move ourselves," Forsyth explains.
On the other end of the move, the Transition team ensures that the new house is all set up to move right in and start living. That means making the beds, placing the furniture and hanging the pictures on the walls. Forsyth encourages her clients to go out with friends during the morning of the move when everything is being done.
"When they walk in it's much easier to have everything in place," she says. "It's just like home, but in a different place."
Forsyth will also work with clients to take care of address changes, take utility readings and get cable and phone lines set up. She'll also arrange for the cleaning of the old residence.
"They don't have to worry about a thing," she points out. "We try to make it as less stressful as possible."
According to Forsyth, the average move costs about $3,200. That's for the whole package -- from packing everything up and taking care of things in the old house to moving someone into their new place and setting things up there. The cost does vary depending on how much stuff someone has and how much of it they plan to take with them in their move. That, of course affects, timing -- how long it will take to pack and unpack and how long it will take the movers to move everything in and out.
Company president Dawn Rennie created Transitions back in 1999 to help the seniors' market with moving. And after almost a decade in business, the company is still going strong.
"There is definitely more demand out there for this kind of service," says Rennie. "With the demographics of an aging population, it's constantly growing."
With the Winnipeg market well in hand, Rennie has decided to broaden her market. Seeing opportunities to expand her business, she has moved to Calgary to develop Transitions in that booming market. She has also sold the rights to open a Transitions office in Brandon, which is already open for business. And her growth plans don't stop there.
"I am looking at further expansion for throughout Saskatchewan and Alberta," Rennie notes.
While seniors are the majority of their clients, Forsyth says they have done moves for other people. In fact, she recently worked with a couple in their 30's who both had very busy jobs and just didn't have time to move themselves. They hired Forsyth, left everything and went on vacation. When they returned, Forsyth had moved them out of one house and into a new one.
Now that's the way to reduce moving day stress!