
Renovation & Design

Renovation & Design
SOLUTIONS: Use caution when removing stuck battery
QUESTION: Have you any suggestions regarding how to deal with a battery stuck in the shaft of a metal flashlight? The battery must have leaked and become glued to the metal.
Also, I need to take you to the garden where we recently felled a mature willow tree that was endangering power and telephone lines and obstructing our view of the garden. Some of the logs from the large-size bole will make useful stools for outdoor use. How can the cut ends be preserved? Friends have suggested shellac followed by a coat of varnish. My wife and I would appreciate a second opinion, realizing that our inquiry removes you from the household environment where you reign supreme. Best wishes, John, Winnipeg
ANSWER: Interesting questions! In terms of the flashlight: If the flashlight is a cheap one, you are best off replacing it as you do not want to touch battery acid. If you would like to attempt to remove the batteries, wear rubber gloves and goggles. Spray WD-40 in both ends, let it sit for a few minutes. Push the batteries out with a flathead screwdriver.
Once the batteries are out, use a stiff-bristle brush (like a baby bottle brush) and WD-40 to thoroughly clean the interior of the flashlight, springs and contacts. When a leaky battery has corroded the inside of a flashlight, scrape it off with a plastic or wooden stick. Then use a damp paper towel to wipe up as much residue as possible. Next, use fine sandpaper or an emery board to remove any remaining corrosion on the contacts of the flashlight.
To avoid this problem, always remove batteries when you don't plan to use the flashlight for several months.
No need to feel stumped about the tree logs. Different woods need different treatments, but here are a few tricks that should work for most. You can put three stout feet under each stump to keep them five to eight centimetres off the ground to let air circulate. Or float half bricks underneath each log. Or use pond liner pieces and cut circles and put the stumps on top of them. This will help prevent bugs from chewing. Note: The exterior bark will peel over time, which causes wood to look great in a new way.
Sand the tops of each log until they are really smooth. Treat each stool with many coats of great-quality deck sealant to prevent them from becoming infected by fungus spores. Lastly, apply a product called Sporax to protect stumps from infection. If you varnish or oil them with linseed oil and keep them inside, they can last a long time.
QUESTION: My problem is that we have far too many box elder bugs in our yard and they can always find a way into the house. What can I use to kill these bugs outside before they get into the house? Seems as though there has been a new hatch lately and there are thousands of baby bugs crawling over the south side of the house. Please help. Donna (Flin Flon)
ANSWER: The good news is box elder bugs are not potentially dangerous like mosquitoes, houseflies or wasps. The not-so-great news? You'll never see a box elder bug taking home a beauty pageant prize and they have been known to stain light-coloured surfaces, including draperies, with their feces, and if you should step on one, it stinks (yikes)!
If box elder bugs frequently invade your home, identify and seal up their entry points. Repair torn screens and close up cracks around doors and windows as well as attic or basement vents. Use caulk, weatherstripping, fine-mesh screen or expandable foam. Vacuuming them up and dumping them can eliminate most, and spraying them with a mixture of water and laundry detergent will kill them. Mix half cup (125 ml) of laundry detergent with one gallon (4.54 litres) water. With a hand sprayer or hose end attachment, spray the bugs with the solution. This strategy only affects the bugs that are sprayed directly (repeat treatments may be necessary).
Wash box elder bugs off exterior walls and tree trunks with a pressure hose.
If your infestation is caused by a nearby female box elder tree, the only way to eliminate the bugs is to eliminate the tree. If all else fails, spray with pesticide, i.e. Raid, or call in the professionals.
QUESTION: We are trying to eat healthier but keep hearing about simple sugars. Can you tell us what these are? J.B., Winnipeg
ANSWER: Simple sugars are the smallest of a group of chemicals known as carbohydrates.
Look at any food label and you may be fooled into thinking the product is sweet-free just because sugar is not listed. Be warned! Simple sugars have a variety of names; here is a list of just a few. Glucose is a major kind of simple sugar. Glucose is the basic source of energy for all living things. Glucose supplies the body with quick energy. It occurs naturally in some fruits and vegetables and is also produced in the body by breaking down other foods into glucose. Sucrose, commonly known as table sugar, beet sugar or cane sugar, occurs in many fruits and some vegetables. Fructose is known as fruit sugar. Most plants contain fructose, especially fruits and saps. Maltose is known as malt sugar and is found in grains. Lactose or milk sugar is the principal carbohydrate found in milk. Honey is a natural sweetener and often has simple sugars added to it in order to make it sweeter.
Feedback from Manitoban who cares:
Always enjoy your columns, especially since becoming the stay-at-home member of my marriage. I have gotten more then a few tips to help in my new role as homemaker, as my wife is still in the workforce.
I do have a concern regarding today's column, however. Dealing with a badly scorched pot, I believe the first part of your reply should have been to take the letter writer to task for leaving a simmering pot unattended "for five minutes' which became an additional 10!" It would be easy to make light of this but all too often this poorly thought-out move could become tragic. Most people have possibly done just this but again, this move at the least is ill-advised. This could have been an opportune time for you to point out the very severe consequences that an act like this could have resulted in.
Thankfully a scorched pot was the worst of what could have been a serious event. Sincerely, Bob
Fantastic tip of the week:
-- After trying wipes, lotions and potions for cleaning stainless steel appliances I believe some of them truly make it worse and leave a dirt-attracting film. Although I would like to use all chemical-free, biodegradable, I find sometimes I must use harsher but tried-and-true products. So, my method of cleaning my appliances, which I find effective, and does not leave residue, is as follows: I 'clean' my stainless steel with Fantastic, after which I wash it off with a wet cloth in sections, polishing it dry quickly with a clean tea towel. Although this sounds like a lot of work, it is very quick and delivers a factory-fresh result and, lasts weeks. Submitted by: Audrey
Reena Nerbas is the author of the national bestselling Household Solutions series. Her website is www.householdsolutions.org. You can contact her at Box 429, Blumenort, Man., ROA 0C0.
Renovation & Design
Get busy with those little fix-ups
Got a half-hour to kill?
Use it to spruce up your house. Some fairly effortless undertakings can make a big difference in the appearance of your home. Here are a few you can check off your to-do list this weekend.
Take a tour. It's easy to get too used to the little flaws in your home and stop noticing them. It's a good idea to periodically walk through your house and jot down the little fix-ups that need to be done.
Are the light bulbs burned out? The registers rusty? The floorboards scratched?
Don't let the task overwhelm you. You don't need to do everything at once. Keep your list handy and pick off a chore as you have time.
Revive your woodwork. Window frames, door casings and baseboards can become scarred over time, but hiding those little scratches and dings is easy.
I recently used Restor-A-Finish to freshen my woodwork. You just rub it on with fine steel wool, and it softens the old finish just enough to let the stain seep in to hide all those little blemishes. You can also use a wax touch-up stick, a crayon or even a nut meat.
Touch up the paint. Walls, like woodwork, take a beating. Little chips and scars appear over time, making your painted surfaces look dowdy.
Clean smudges. Look closely, and you'll notice lots of smudges on your walls and doors. A Mr. Clean Magic Eraser takes those off in a snap. So do spray cleaners.
Now, doesn't that look better? And you've only just begun.
-- Postmedia News
Renovation & Design
Landscape design takes careful planning
Dear Marc:
I have successfully designed my entire home with the use of advice from your column. Now I would like to work on what you would call "taking your indoor design outdoors." I have seen you talk about this on TV but I am not sure where to start. I would like to give my existing curb appeal a facelift. The front of the house looks horrible. The previous homeowner was an avid gardener and the flower beds are full of dead annual plants, which I don't have time to replant every year. Any suggestions?
Tina
Dear Tina:
If the curb appeal of your home doesn't reflect the prestigious designer space you are thriving to achieve, then the balance of the overall design is not in harmony. The goal is to have everything work together, so whether a guest is standing at the end of the driveway or sitting in the front room having a glass of wine, the design is consistent. Here are some tips to help you take your exterior from drab to fab.
Find inspiration indoors
In order to truly master this consistency, look at the existing indoor design of your home. What designer style does it reflect? Is your design low maintenance? If so, then the outdoor design should be the same. If you don't have time to dust a million accessories inside, you won't have time to replant a million annual plants outside every year. There are a number of different ways to create a low-maintenance landscape design.
Do your research
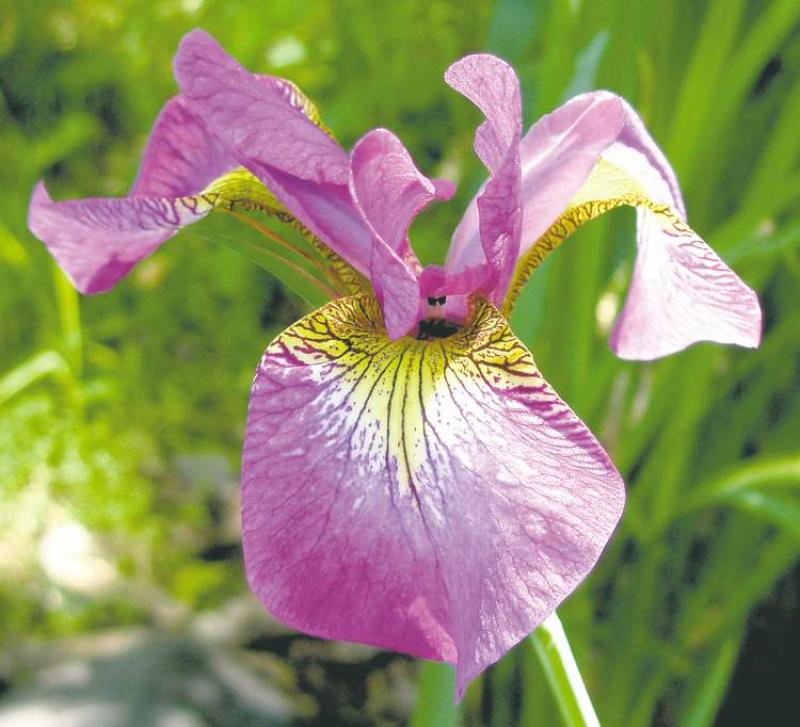
Visit your local greenhouse and inform yourself regarding perennial plants. Perennials as opposed to annual plants grow and produce flowers every year from the same roots, therefore the annual chore of replanting your landscape features is not necessary.
Create a colour scheme
While purchasing plants for your new landscape design, you will want to follow the same basic rules as interior design. Choose a colour scheme and draw up a landscape "floor plan." The key to a successful colour scheme is to have a primary colour, which is traditionally your greenery and accent it with a few different vibrant colours. While choosing the colour scheme of your landscape design, be sure to keep in consideration the colour scheme of the exterior finish of your home. If the exterior finish of the house is blue, then blue flowers as accents in a flower bed found in front of the house will be lost in the overall colour scheme.
Consider the seasons
The colour scheme of an outdoor landscape is a little more technical than one of an interior. The landscape's colour scheme will change from season to season as the plants grow and mature. You want to be sure your design doesn't look great in the summer and horrible in the fall. The design should gradient from one colour scheme to the next in a harmonious way from season to season. It is also very important the look of the end product is decided upon prior to purchasing new plants. Be sure to know the look of a plant for each season when selecting them for your landscape. If the design is not planned, you will end up with an "all over the place" look and possibly a few dead plants.
The look of your landscape will also change depending on the amount of natural light it receives during different parts of the day. Certain plants you'd love to integrate in your flower beds might not work depending on how much natural light they need to survive. To educate yourself on the plant's needs, look at the labels found on each plant. Each label will state the ideal exposure to natural light needed and the plant's mature height and width. The plant's height and width information will be used during the planning stages to ensure one plant won't overpower another plant.
Landscape design takes a lot of careful planning but when done successfully can increase your home's overall value. Take your indoor design outdoors and you'll be amazed at what you can accomplish.
Marc Atiyolil is a celebrity designer, the editor-in-chief of Home Trends Magazine, a design expert on CTV and the host of the Marc Atiyolil Show on www.MarcAtiyolil.com. Catch Season 2 every Thursday at 2 pm. To submit a question, visit www.MarcAtiyolil.com