
Renovation & Design
Renovation & Design
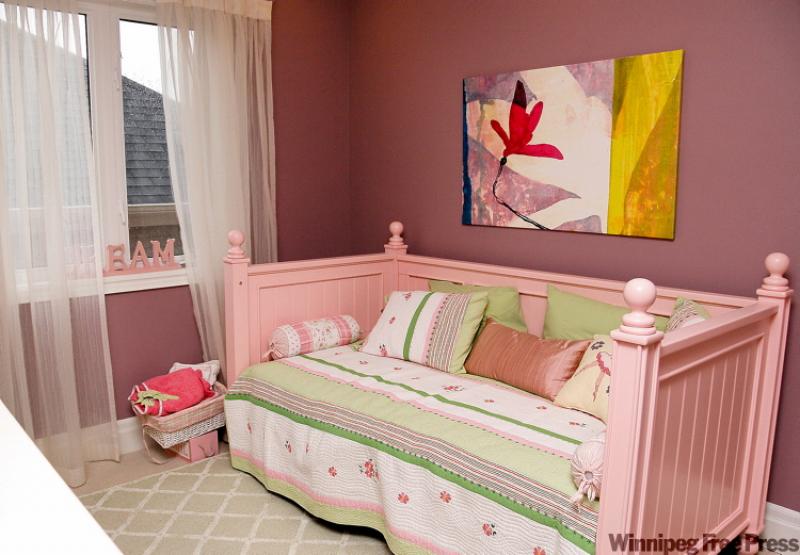
How to fit a round bed in a square room
Dear Leanne: We bought a round bed for our teenage daughter but are having problems placing it. We tried it in the centre of the room, but that didn't feel right and we couldn't place all her furniture back. Then we put it in a corner, but since it doesn't have a headboard, it felt as if it didn't fit. The same thing happened when we placed it against a wall. How do you make these beds work in square rooms?
ANSWER: Ah, the old 'how to fit a round peg in a square hole' dilemma. A bed without a head-or footboard has good points as well as its challenges.
On the one hand, you are free to orient the bed in any direction you choose. On the other hand, this ambiguity can make the bed feel imbalanced unless you create a purposeful placement for it.
Round beds are whimsical. They are not obtained for their 'practical functionality' but rather their uniqueness. That idea is what you will need to continue to make this room feel like the bed belongs.
Decide on a theme for the room. Does your daughter want it flowing with a fairy-tale feel or the sophistication of old Hollywood or a modern-contemporary feel? Each can be accomplished, but a theme needs to be determined to proceed to the next step.
Placing the bed in the centre of the room is likely going to be avoided; as you have noted, you cannot replace the furniture when it is in this configuration. Functionality wins out here. Your remaining options are to place the bed in a corner or against a wall.
Walk into the bedroom and evaluate your options. Place the bed as far from the entrance as possible -- for instance, the adjacent corner or the farther side wall. Avoid the need to walk directly into the bed.
Of course, your options will be also limited by the existing closet, ensuite bathroom and windows. In a corner arrangement, develop the corner to accommodate the roundness of the bed. This can be accomplished with fabric and a ceiling-mounted, bendable drapery track. By draping fabric behind the bed you create a headboard effect.
To create solid curved doors for such a unit is a little more of a challenge, as this requires a lamination and steam process to create a solid curved door.
However, attaching several solid surfaces together can also create an illusion of a curved surface.
The advantage to the hard unit is that you can use the corner for storage.
Leanne Brownoff is an Edmonton interior design consultant. Visit her at www.leannebrownoff.com.

Renovation & Design
The kitchen is key to prosperity
WITH Chinese New Year just behind us, you may want to start the year right by creating perfect 'qi' (energy flow) in your kitchen, says feng shui master Paul Ng.
Feng shui is a way to optimize the energy around us, Ng says. The kitchen is one of the three most important energy sources in your home, he says. The others are the entrance and the master bedroom. In feng shui, the kitchen is considered the heart of the home, symbolizing nourishment and wealth. The placement of the kitchen and its contents can influence a family's prosperity and health, Ng says.
Here's how the cycle works: Good, nutritious food yields good health. And a well-nourished person is more effective in his or her career and relationships. In turn, a more effective person is more likely to be prosperous.
"Time and time again, I've seen kitchens in the wrong spot -- especially the stove in the wrong orientation. That can cause a lot of money-losing," Ng says.
"The best location for a kitchen is in the health centre of the house, the activity centre of the house, or in the long-life centre of the house," Ng says.
These centres are based on the life cycle of the house, which shifts every 20 years. This is something that a feng shui master, like Ng, can calculate.
"It's all mathematical. People have thought it's psychological; it's got some kind of voodoo or something. It's nothing like that," he stresses. "The proper way to do feng shui is 100 per cent scientific.
"If you don't know the life cycle of your home, ideally, the kitchen should be on the east or south side of the house," he says.
And you shouldn't see your kitchen when entering your home. Because the kitchen represents prosperity, you want privacy, because you don't want to show people where you have money, he says. If the kitchen is in the wrong place, the owners can never save money, Ng warns. So relocating the kitchen is advised. If relocating the kitchen isn't an option, as long as the stove and/or sink aren't visible when entering the house, the situation isn't as bad, he says.
The layout of the kitchen is crucial.
"The stove -- by far the most important part of the kitchen -- represents the wealth generator, Ng says. "The burners on the stovetop should be used equally, because this represents obtaining money from multiple sources," he explains.
The only locations that should be considered for the stove are the east, south, or southeast walls, Ng says. The east represents wood, and the south represents fire; so these locations are considered a good source of energy, because they symbolically represent the ease of starting a fire for cooking. The worst places for the stove are the northwest, the north and the west walls, Ng says. When you're cooking, you should be facing either east or south.
Ideally, the stove (fire) and sink (water) should be at a right angle. They should never be adjacent, Ng says, because the proximity of fire and water can lead to conflict.
The stove and sink should only be side by side if they are one to 1.5 metres (three to four feet) apart. You don't want them too close together, because the water will extinguish the fire, Ng explains. If the stove and sink are side by side, it's recommended that a green plant be placed between the two. Jade and rubber plants are best for holding good energy, Ng says.
It's very important to add good energy to the kitchen, he stresses.
Good energies come from the proper food and flowers.
A basket filled with fruit in sight is a symbol of health and abundance. But make sure it's fresh, because rotting fruit represents the opposite type of energy.
Flowers in the kitchen are good -- but not too many, he cautions. Too many will cause congestion, which prevents the positive energy from flowing.
The size of the kitchen should be based on the size of the house, Ng says, adding that the optimal size of a kitchen is about one-quarter to one-fifth the size of the house.
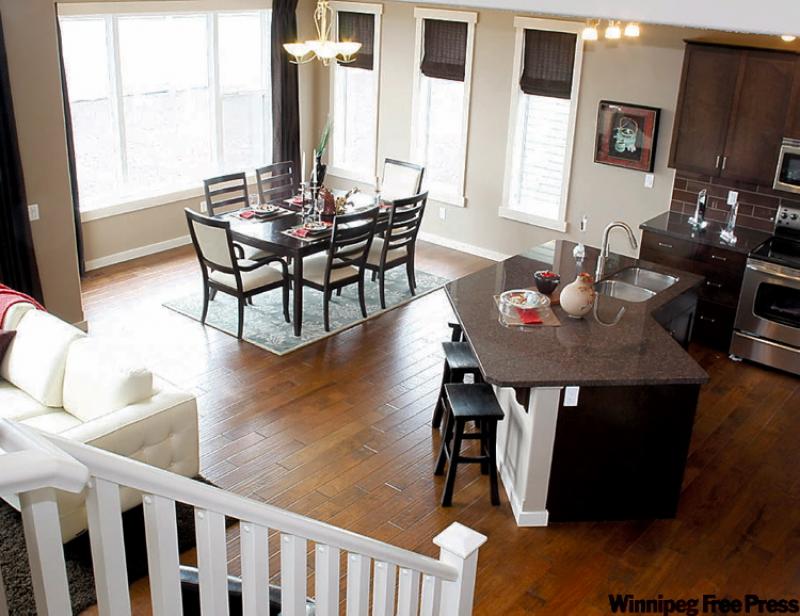
If the kitchen is too big, it will affect the energy balance of the home. The solution: Create a breakfast room or install an island, he suggests.
If a kitchen is too small in relation to the rest of the house, you can't generate the necessary energy for wealth or health. The ideal solution is to tear down a wall to create an open concept, he says. A less expensive solution is to hang a mirror in the kitchen to magnify the room.
The worst layout for a kitchen is angular, Ng says, because too many angles prevent energy from flowing smoothly.
Rectangular kitchens aren't ideal, either, he says, because the energy isn't balanced. The best kitchen is the square kitchen, Ng insists.
Fire and wood colours are ideal for kitchens, Ng says. That includes anything to do with red or green. But steer away from black and blue, he cautions, because they both represent water, which can affect your stove's ability to generate fire and, in turn, generate wealth.
Kitchens should always have a window, Ng says, because windows bring in sunlight, which brings in positive energy. Lighting is one of the most crucial features in a kitchen. It is very important for the money generator and the money centre to be bright, he says.
Warm or soft white lighting is best for a kitchen. Avoid cool white, because it creates a negative energy.
Ample natural lighting is best, and extra lighting under cabinets is optimal, Ng says.
In general, the biggest mistake people tend to make when it comes to their homes is having too many plants in them, Ng says. That's mistake No. 1. They are running a nursery instead of a home.
Mistake No. 2 is filling a small house with furniture that's too big -- especially in the kitchen.
And Ng says the No. 3 mistake people make is having too much junk in their houses, which blocks the flow of positive energy.
Keep ingredients that are seldom used in the cabinets to avoid clutter on countertops, he recommends. And keep your cabinets neat. Cluttered cabinets affect the qi of the kitchen, he says.
-- Canwest News Service


Renovation & Design
ASK THE INSPECTOR: Transitional area wasn't planned properly
QUESTION: I have a question in relation to our new log home construction in Grand Beach. The crawl space is a four-foot height, surrounded by pressure-treated plywood. The edge of the untreated plywood floor sheathing is exposed above the treated crawl space plywood at the exterior. Our plumber recommended covering the complete outside of the crawl space walls, including the plywood edge, with tar paper.
Do you agree with this recommendation? Do we need to cover this wall or can we just put caulking on the exposed plywood edge? In a few years we plan to cover this wall with stone.
Thank you for your help, Irene Boissonneault
ANSWER: While I had a small-town plumber give me good advice on how to insulate a crawl space on a cottage many years ago, they aren't usally regarded as the best source for building envelope recommendations. I'll comment on the "tar paper" suggestion and will offer my own take on your dilemma.
The exterior of the entire building on modern homes is often referred to as the "building envelope." This is not an accurate physical description, but illustrates the modern approach to insulation and air-sealing techniques, combined with moisture protection for the exterior. This may also include the treated-plywood sheathing on the skirting surrounding your crawl space, if the walls behind are insulated. Even if they are not insulated, care must be taken to properly protect the framing behind the plywood and the transition between the house floor and the crawlspace from moisture damage. While it may be part of the final integrated solution for protecting this area from moisture damage, building paper alone will not be sufficient.
The main problem with your situation, based on the picture you included with your question, is that this transitional area was not planned properly prior to completion.
In a normal situation, the edge of the interior floor sheathing will not be exposed at the exterior but will be covered with the exterior wall sheathing. This wall sheathing normally extends over this area by several centimetres to allow a proper overlapping of the exterior components of the wall. This should include the sheathing followed by building paper or Tyvec and then the siding. In that situation, installation of building paper or synthetic sheathing will help protect the transition area, but must also be covered with proper siding.
The difficulty in your home is that it's constructed using older techniques combined with some modern building components. Because the walls of your home are constructed with logs, there is no exterior sheathing and the logs act as the finished siding. In that situation, there is no need for building paper. This wall system is designed to shed rainwater naturally, which should drain off the bottom log, preventing it from entering the floor system.
Because the edge of your subfloor plywood is exposed, water running down the log walls may wick back toward this area and absorb into the edge of the plywood. Over time, this will cause the plywood to swell and rot. Attaching building paper to the surface of this sheathing will not stop rainwater from getting behind and causing this damage. Unfortunately, normal caulking will also not be sufficient to seal this exposed edge, and water damage is still a strong possibility.
The real solution to your problem is to install a proper metal flashing between the top of the floor sheathing and the walls above. This would have been relatively easy to install immediately after the subfloor was secured, but may be quite a bit more difficult now. It may not be too late to install the flashing now, but cutting or grooving a section of the wood walls may be required. If the flashing is installed above the floor sheathing and curved to deflect water over this area and away from the crawl space walls, it should sufficiently protect it from rot.
One other item that must be taken into consideration, before installation of the flashing, is the thickness of the proposed stone-wall covering on this area. If the stone is thick enough to extend beyond the log walls, that idea should be reconsidered. If the stone is simply a thin veneer, which will not protrude beyond the bottom log on the exterior walls, then only the depth of the flashing needs to be planned. Any flashing installed over the floor sheathing should extend beyond the proposed stone veneer on the crawl space walls to prevent water tracking behind this lower wall covering.
Depending on the type of stone veneer used, building paper, wire and mortar may also be required on the treated wood wall sheathing prior to installation. In that situation, the building paper should extend up over the exposed plywood edge.
Also, any mortar, wire or metal lath should be installed over this area, directly up to the underside of the newly installed metal flashing. This will protect this area properly and may only require installation of a bead of caulking above and/or below the flashing to prevent moisture intrusion and damage to the subfloor.
Ari Marantz is the owner of Trained Eye Home Inspection Ltd. and president of the Canadian Association of Home & Property Inspectors -- Manitoba (www.cahpi.mb.ca). Questions can be emailed to the address below. Ari can be reached at (204) 291-5358 or check out his website at www.trainedeye.ca.
trainedeye@iname.com
Renovation & Design
SOLUTIONS: Milk cartons aid in watering tomato plants
QUESTION: I would like to plant tomatoes in my garden and I know they love water but I have never planted them because I am very busy and often do not get into the garden regularly. Is there a way that I can grow tomatoes without having to make the effort to water them daily? Adrian, Winnipeg
ANSWER: You are right tomatoes are water-loving plants. Collect large milk cartons and open the pour spout so that the cartons are rectangle shape. Cut out the bottom of the cartons and poke holes around the carton walls. Place cartons between plants and pour water into the carton every five days. The cartons will slowly distribute water though the holes.
P.S. If you notice cutworms, protect plants by placing collars or used milk cartons around the plants.
QUESTION: I have some drinking glasses that have white buildup of some kind on them. Do you have any cleaning suggestions? Anita (Portage la Prairie)
ANSWER: If you are itching to get your etching under control determine whether the film is removable or permanently etched. How? Soak an etched glass in undiluted white vinegar for 15 minutes. Or, wash the glass with warm water and concentrated dishwasher detergent. Or run a dishwasher cycle of etched dishes with citric acid in the soap dispenser. If the film comes off, it is likely caused by hard water minerals, improper amounts of detergent, or unsuitable water temperature. If it's permanent etching, you can't make it clear again.
QUESTION: I read your column in the paper every week, I have a stainless steel Lagostina pot that I burnt apple sauce in (just apples no sugar). I have tried everything I can think of, but nothing is releasing the burn. It is burnt very badly on the inside bottom of the pan. I would like to hear from you if you have time. Jessie, Winnipeg
ANSWER: Sprinkle the area with enough washing soda to line the bottom of the pot, add water to fill the pot one-quarter full. Boil the contents for five minutes. Turn the element off and leave overnight. In the morning with the solution still in the pot scrub the bottom with 000 fine sandpaper (wear gloves). Wash as usual.
QUESTION: I absolutely love your first two books but have not purchased the third one yet. I also look forward to your column every week in the newspaper. I am wondering if you can please tell me, again, what your tip was in regards to using leftover pieces of bar soap. It was in a recent edition of the paper but I recycled it before I clipped the column. Thank you, Edie, Winnipeg
ANSWER: When it comes to bar soap, get the biggest bang for your buck by saving your slivers. Drop slivers into knee-length pantyhose and keep them in the bathtub. Scrub your body by wetting the nylon with water and lathering yourself with the nylon encased soap slivers. Or drop soap slivers into a plastic squeeze bottle, add water to fill. Keep the bottle beside the sink for washing hands and dishes. You can also pile wet soap slivers one on top of the other. Stick a pop bottle cap onto the top soap sliver (to make the squished together bar easier to hold). Allow the soap to dry and use in the bathtub.
QUESTION: How can I get Silly Putty off knit clothing? Pat (St. Andrews)
ANSWER: Spray the area with WD-40 (or rubbing alcohol) and wipe the putty away. Next apply dish soap and water onto the clothing. Blot and wash as usual.
QUESTION: Your column is a must read for me every week - thanks for the way you list the least toxic solutions first. I have two questions: What is the difference between recipes for bread made with a bread machine or without? How would I alter ordinary bread recipes to use a bread machine? Also, is there any practical way to make evaporated milk from store-bought milk? Lynn, Winnipeg
ANSWER: The difference between bread made in a machine and bread made by hand is mainly labour and time. To adapt a handmade recipe to a machine recipe, you will need to play with the recipe to perfect it by making one substitution at a time.
Generally, dough should feel smooth and soft, not tacky or moist, and definitely not dry or crumbly. It should be elastic and resilient, so that when you push your hand into it, it resumes its original shape. Find recipes that you have used in your machine and make sure that the recipe that you are using has the same amount of dry and wet ingredients as the one that you used in the machine.
To adapt bread machine recipes to manual recipes follow these steps: Dissolve the yeast and 1 tablespoon of sugar in warm water. Combine ingredients and mix until smooth and soft. Place bread in a greased loaf pan, and let rise until doubled. Bake between 325 and 350 degrees F (175 degrees C). Bake for 40 to 50 minutes, or until the crust is golden brown and the bottom of a loaf sounds hollow when tapped.
Save money by making your own homemade evaporated milk. Use 2 1/4 cups of regular milk to equal one cup of evaporated milk. Grease a medium-size pot and add milk. Turn stove onto medium and heat milk just until it steams. Allow the milk to continue to steam on low (not boiling or even simmering). If you need one cup of evaporated milk, steam the milk until one cup is left in the pot and the rest of the water has steamed out (approximately 1-3 hours). Stir occasionally. Measure to make sure that you have the correct amount of evaporated milk. Store in the fridge for up to five days.
Fabulous Tip of the Week
Recently my daughter drew a picture on my brand new dining room table with permanent marker. After nearly falling over, I asked myself, "What would Reena do?" I then applied a small amount of bleach free toothpaste to the area and the marker wiped right off! Janice, Winnipeg
I enjoy your questions and tips, keep them coming!
Check out my website! www.householdsolutions.org
Reena Nerbas is the author of the national bestselling Household Solutions series. Her website is www.householdsolutions.org. You can contact her at Box 429, Blumenort, Man., ROA 0C0.