Renovation & Design




Renovation & Design
ASK THE INSPECTOR: Spray away apartment noise
QUESTION: I own a triplex in an older part of town that is divided into three apartments, one on each floor. The building is a rock-solid 1950s-era wood frame construction, with a brick exterior, and is in excellent shape in almost every aspect. The problem is there is some noise leakage between the main and second-floor apartments. Although not severe, the recent tenants have asked if something could be done. The main-floor tenants don't like the footsteps above, while the top floor tenants don't like hearing the muffled TV and voices below.
The floor consists of two-by-10 joists with three-quarter-inch plywood underlay and hardwood on the top floor with a single layer of drywall on the ceiling below. There is a little ductwork for the forced air furnace weaving its way between a couple of the joists. I am willing to do a major overhaul on the ceiling, including ripping the drywall out if necessary, but was wondering if you had any suggestions on how best to soundproof that space.
I was thinking of first ripping out the drywall ceilings and then placing batt-type sound insulation between all the joists, replacing the drywall and adding a second layer of drywall with one-by-three strapping as a spacer.
Don Christie, Ottawa
ANSWER: Noise transferring through floors of multi-family dwellings is a common complaint of tenants or homeowners, particularly wood frame buildings like your triplex. You may never be able to stop all noise transfer between the suites, but you are on the right track with your idea of increasing the insulation between the floors to prevent sound transfer. I will comment on your suggested method of insulation and provide a few more suggestions for improving the situation.
There are two main items to keep in mind when attempting to stop sound from transferring between the suites in your rental home. You have unknowingly identified both of these in your question.
First, you will have to try to use insulation to reduce noise transfer by deflecting or absorbing the sound waves, much in the same way air is trapped by the insulation. Batt insulation, whether fibreglass or mineral fibre, is usually the most cost-effective type for this purpose, but may not be the most practical in your situation.
If you fill the entire cavities between the floor joists with these batts, there will be a considerable amount of air space in this material to prevent much of the sound transfer from items like voices or electronic equipment. Unfortunately, this may require considerable work in removing the entire ceiling on the main floor, which may not be fully necessary.
The other item to consider is noise transfer through vibration or solid material. This is likely the cause of most of the complaints from the tenants in the lower suite. The comment about footsteps being heard is due to vibration or floor movement in the joists or other components of the floor above. Since there is continuous solid material between the top of the hardwood floor through to the drywall below, sounds may transfer through this area between the suites. Insulating between the joists may do little to prevent that type of sound transfer.
Because of the previous concern, there may be an easier way to stop the sound transfer between different floors without removing all the ceilings. If you have sufficient height between the floor and ceiling on the main level of your triplex, you may be able to drop the existing ceiling and install soundproofing material without disturbing the old ceilings. This may be accomplished with metal T-bar ceilings, common in basements and commercial buildings.
This type of ceiling is normally installed several centimetres below the joists above, which will allow for installation of continuous batt insulation without direct ceiling connection to the floor system above. Also, acoustical ceiling tiles may be purchased that are designed to further deaden the sound above and below this area.
If there is not sufficient height to install a drop ceiling, securing a thin layer of rigid insulation over the existing drywall, followed by a new layer of drywall, may be considerably easier than doing it your suggested way. This will also bridge the entire floor system, including the bottom of the joists, preventing some vibration noise as well as that transferring through the hollow floor system. This will only require a loss of a few centimetres of ceiling height.
Finally, there may be an even easier way to approach this concern, but you may not be able to accomplish this yourself. There are companies that install specialized coatings to ceilings and walls, usually sprayed on, that help improve the acoustical resistance of these areas. While mostly used in commercial or industrial buildings, these coatings may be a quick way to achieve your goal.
If your tenants are only experiencing mild disturbances, it may be excessive to removal all the ceiling sheathing just to gain a bit of an improvement in solitude. Check the local listings and Internet for contractors in your area that may be able to spray away your noise problems, without the need for major renovations.
Ari Marantz is the owner of Trained Eye Home Inspection Ltd. and the President of the Canadian Association of Home & Property Inspectors - Manitoba (www.cahpi.mb.ca). Questions can be emailed to the address below. Ari can be reached at (204) 291-5358 or check out his website at www.trainedeye.ca.
trainedeye@iname.com
Renovation & Design
SOLUTIONS: What part of 'stainless' doesn't this steel get?
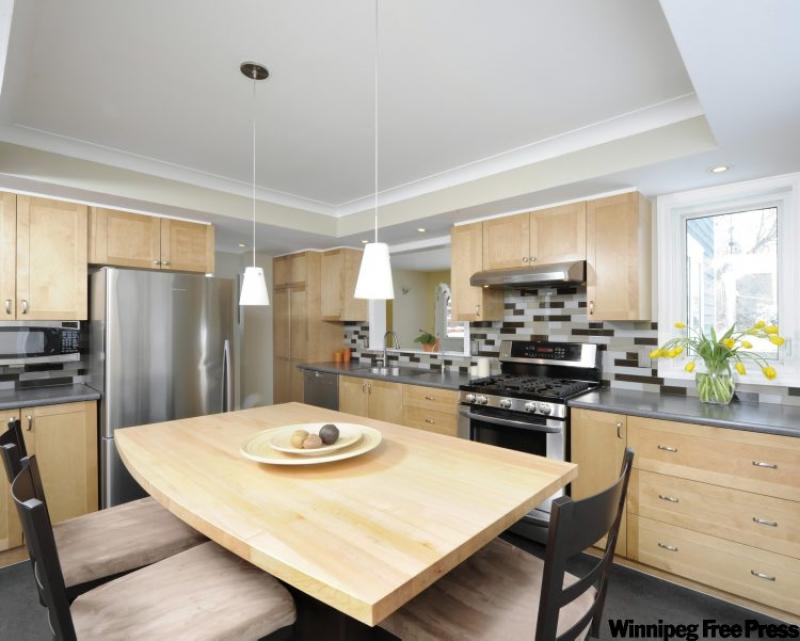
QUESTION: I purchased a brand new stainless steel fridge. I am having a hard time keeping it clean and free from scratches. I am planning to own this fridge for a long time, any advice on how to keep it looking good? Margaret (Austin, MB)
ANSWER: Stainless steel is a popular choice for home and commercial kitchens. Begin by cleaning with dish soap, water and a soft cloth (or vinegar and water). Glass cleaner is another option to remove smudges and fingerprints. Or use stainless steel cleaner but be careful. Some stainless steel cleaners contain chlorine which is damaging to the surface therefore always test on a small inconspicuous area before using on the front of your fridge. After cleaning, always dry stainless steel with a soft cloth and work along the grain.
If scratches do occur, the stainless steel cleaner sold with the appliance may help to repair. Other options that have had great success are Revere Copper Cleaner and Scratch B Gone (test on an inconspicuous area first).
QUESTION: I recently noticed that my 1970's "Gibbard" medium brown colored wood bedroom suite headboard is full of hand and fingerprints behind my pillow. I have tried furniture polish to remove the prints that are probably skin oil and hand lotion etc. but it is not budging.
I am reluctant to try harsh detergent since the finish is fairly glossy. I inherited the bedroom suite 7-8 years ago so that's how long the prints have probably been collecting. The prints are behind my pillow and I didn't notice them until I recently moved. Can you provide me with a safe product or solution to clean this surface please? Shelley, Winnipeg
ANSWER: Begin by sprinkling cornstarch onto your headboard and working it into the areas. Leave for an hour and buff. If the fingerprints remain, wash the headboard with Murphy's Oil Soap according to the directions. Follow-up with mineral, baby or olive oil. If stains remain you will need a more aggressive option such as refinishing the surface.
Extra tidbit: While cooking supper last week, a blob of oil leapt out of the pan and found its way onto my jeans. I quickly worked cornstarch onto the spot and the grease disappeared!
QUESTION: I recently purchased your book series which I often refer to but I have a question that is not addressed in the books. At a garage sale last fall I purchased a few terracotta pots. I would like to put the pots in my garden as decorative pieces but I want to grow moss along the sides of the pots to add character. How would I go about doing this? Hermina, Winnipeg
ANSWER: Blend together dried or purchased moss (or moss spores), 2 cups yoghurt (or buttermilk). Paint the combination onto the pot using a paintbrush. Put pots into a plastic bag to create a humid environment. Put the bag in a shady spot for about 9 or 10 days. Continue to water the containers regularly to keep the moss alive and growing.
QUESTION: I always read your articles for household solutions in my newspaper. I have a question regarding red ants in my kitchen. We have sprayed ant killer, but after one week these red ants show up again. My home is fully carpeted even in the kitchen. Please tell me any solutions to get rid of these red ants as we have toddlers at home. I would appreciate your help and time. Thank you. Amber, Winnipeg
ANSWER: There are some ants that don't just come and go in your home foraging for food, but actually establish a colony inside. These ants may infest food products. Spraying a residual repellent insecticide to control foraging workers may provide only short-term control. Non-repellent insecticides such as Phantom Liquid or Phantom Aerosol sprayed inside would be a better choice than repellent insecticides, because the ants don't know it is there, these non-repellents unknowingly are tracked back to the nest by the workers.
However, it is important to note that you have toddlers at your home therefore any solutions regarding poison or borax and icing sugar are out of the question. Keep bay leaves in your cupboards to repel ants. Sprinkle cinnamon in cracks wherever ants may be entering your home. One other option is to combine peppermint oil with rubbing alcohol and spray wherever you notice ants.
Fabulous Window Cleaning Tips of the Week!
* Dry windows outside in one direction then inside in the other direction. If you see a streak, you will know which side is the offender. * To clean window sills, pour diluted rubbing alcohol on a cloth and rub the entire surface. Then dust off the sill with a clean cloth.
* Never wash windows in direct sunlight, since it causes heavy streaking. Cloudy days or night time are usually best. Also, you might want to buy an extension for your squeegee if you have tall windows.
I enjoy your questions and tips, keep them coming!
Reena Nerbas is the author of the national bestselling Household Solutions series. Her website is www.householdsolutions.org. You can contact her at Box 429, Blumenort, Man., ROA 0C0.
Renovation & Design
Got stuff? Hold a party to get rid of it
You know what spring cleaning gets you? Stuff. Lots of stuff to get rid of. Sure, you can take the usual routes -- hold a garage sale, cart it off to Goodwill, take out a classified ad. Or you can entertain yourself in the process of purging.
We've cooked up a few fun ideas for lightening your load. You know what they say about all work and no play.
Host A Swap Party
Swap parties are a great excuse for socializing in the name of recycling. And while you're splurging on that third slab of brie, you can rationalize that you're sacrificing your bikini body to save the environment.
Swap parties work best if you choose a category -- purses, home accessories, sporting goods, CDs, whatever. Everyone brings one or more gently used items in that category and gets a chance to take home an equal number of their friends' things.
You can make up your own rules, but one method is to give each guest a ticket or token for every item he or she brings. Put the guests' names on their tickets.
Allow everyone an hour or so after arriving to peruse the goods. Then when the swap begins, have them put their tickets next to the items they'd like to have. If more than one person desires an item, put the tickets into a hat and draw one.
Real Simple magazine has swap party ideas on its website, realsimple. com. They're in the Holidays & Entertaining section, under Everyday Celebrations. Or just Google swap party. You'll find plenty of ideas.
Hold A Charity Auction
This is a variation on the swap party theme, except you sell your unwanted things to your friends and donate the proceeds to charity. It adds an element of competitive excitement as you and your BFF go paddle to paddle over that coveted Gucci belt.
In the interest of full disclosure, it should be reported that this idea was brazenly lifted from the letters section of Better Homes and Gardens magazine's March issue. It was just too good not to share.
We called the letter writer, Mary Howe of Jefferson, Ohio, for details. Howe said that at the auction her church group held, 10 or 12 women brought unwanted kitchen gadgets and sat around a table bidding on items.
Most of the bids started at, like, 25 cents, she said.
It was all very informal, Howe said. One person led the auction, someone else wrote down the winning bids, and everyone settled up when the auction was finished. At the end of the night, they'd raised more than $40 for a family in need.
Especially if you have a big crowd, you might want to run the sale more like a professional auction. Assign each guest a bidding number, and give that person a paddle with the number on it. Have someone record the winning bids for each number, and collect at the end of the evening.
Whatever doesn't sell goes back home with the owner or collect the unwanted items and give them to charity.
Exchange It
Who says gift exchanges are only for the holidays?
A white elephant gift exchange is a fun way to swap your stuff with your friends or family members. And without the attendant stresses of the Christmas season, a non-holiday gathering would be that much more enjoyable.
White elephant gift exchanges have become associated with joke gifts, but really, a white elephant is something of value that you no longer want or can't afford to keep. So in a real white elephant exchange, the gifts are used goods that others might want.
Rules and procedures vary, but here's one way to do it: Everyone brings one gift-wrapped item, and all the gifts are piled together. Have the participants draw numbers to indicate the order in which they'll choose gifts.
When your number comes up, you either pick a gift from the pile, open it and show it to everyone or you steal one that someone has already opened. If your gift is stolen, you get to either pick again or steal. (No, you don't get to steal back the gift that's just been taken from you, although you can reclaim it if you get the chance in a subsequent turn.)
Since No. 1 didn't have the opportunity to steal at the beginning, he or she gets the option of taking one last turn at the end of the game. Then the exchange is over.
To avoid a never-ending cycle of stealing, consider limiting the number of steals per turn or per person. And be sure to state the rules upfront.
Warning: This game works best with a group that has a healthy sense of humour and fair play. Good-natured wrangling and back stabbing are all part of the process, and if some participants don't understand it's all in good fun, things can get ugly.
Get Creative
There's nothing novel about turning castoffs into crafts. What is new are the avenues for doing so.
The Internet has opened a wealth of opportunities for creative types to share ideas and show off the fruits of their labour. Can't think of what to do with Grandma's old canning jars? A quick Google search for canning jar crafts will probably turn up more projects than you have jars.
One good local resource is Clever Nesting (clevernesting.com), a blog maintained by the creative duo of Devona Brazier and Colleen Penn. The two Akron, Ohio, residents share ideas, experiences and instructions for creating everything from Crock-Pot cosies to heart-shaped crayons. While the blog isn't specifically devoted to reusing items, the two clearly have a heart for recycling.
Some other good, online resources are the recycled-crafts sections of CraftGossip.com (recycledcrafts. craftgossip.com), CraftBits.com (craftbits.com/recycled-crafts), AllFreeCrafts.com (allfreecrafts.com/recycling-crafts/index.shtml), Make-Stuff (www.make-stuff.com/recycling) and FamilyFun (familyfun. go.com/crafts/crafts-by-material/recyclable-projects).
-- Canwest News Service
Renovation & Design
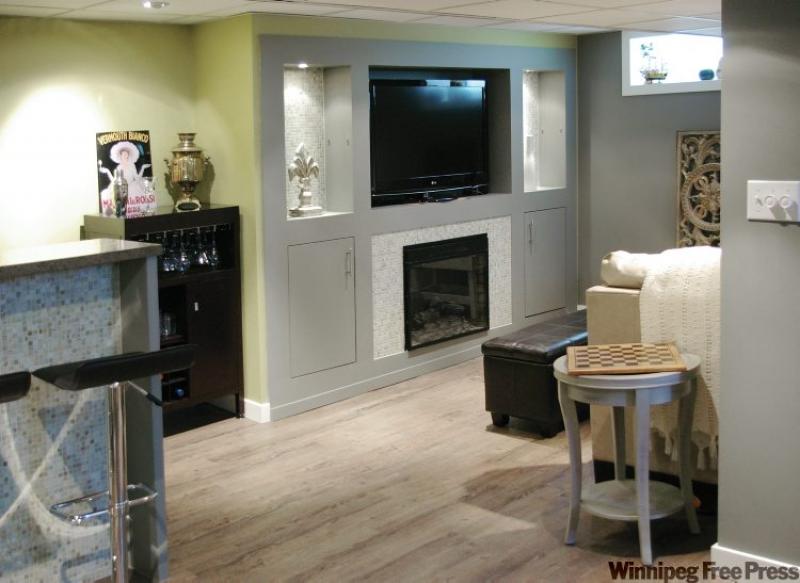
They're made for storing stuff but wall units can be clutter magnets
Dear Leanne: I have acquired a previously owned home and, although I love wood, there is more in this home than I know what to do with. Every bedroom has built-in wall units in a highly varnished honey oak.
This is a bit overpowering in the kids' rooms. First, these rooms aren't very big. Second, these open units invite a cluttered look as toys and books spill out of the spaces. What do you suggest to make these rooms look and feel organized and spacious?
A: I have a picture of chaos and clutter happening in these rooms. Wall units are intended to minimize this problem. However, in your home, the wall units seem to be the problem.
Remember that even though they are built in, you always have the option of removing them. Wall units would not be structural supports of themselves, so they are there for esthetic purposes only.
Built-in units in bedrooms were traditionally used in home designs in the 1980s and '90s, but they were intended to be functional. Sometimes these rooms did not have adequate closet space or a designated working area.
If you remove these units, keep in mind the function will be eliminated as well. If you do keep the units, I suggest you apply little cosmetic touches to them, so they do not become the main attraction when you enter the room.
When you are dealing with a smaller space, it is important to understand what can impact its size visually. By using a few tricks you can fool the eye to think a space is bigger than it is. The thing that makes smaller spaces feel smaller is excessive use of contrast.
Your wall units are doing this in two ways, through colour and busy decor. Minimize the colour effect by painting the wall units to blend into the background. In other words, paint them the same colour as your walls. This will reduce the contrast and you will see a difference immediately.
If you have swing-space and it is logical to do so, add doors to the front of the open units. Closing the world off to the contents inside the wall units will minimize your visual clutter.
If you have lots of cubicles, select a few random spaces to hold a single item. Step back from time to time to see how the display looks. If you can, incorporate colours and themes from the room onto the shelves; that way the shelving unit becomes part of the room's balanced decor and isn't fighting for attention.
Dear Leanne: I am deciding on the purchase of a new sofa and have found a modern, tufted style that I love but wonder if it will get dated quickly. I don't want to be stuck with something that is so trendy it only lasts a few years.
A: No worries; tufting has been, and will continue to be around for a long time. It may appear to be trendy since it is a popular design element that is finding its way into many items.
This look was in vogue in the 1920s and '30s. Art deco styles often incorporated tufting in furnishings -- a perfect example of easy sophistication. When contemporary or modern designs are mentioned, the image evoked is that of simple, minimalistic design.
The tufting detail on a long, sleek sofa, for example, provides visual interest while staying true to classic contemporary design.
Art deco design inspires us to live a tailored, sophisticated life. Think of glamorous Hollywood.
-- Canwest News Service