
Renovation & Design
Renovation & Design
Patching linoleum won't take long, and it works
Q: We have a cigarette burn on our almond coloured sheet linoleum. It is rather deep. I have tried to "shave" it clean and I have also tried bleaching, with the area with toothpaste. Any ideas?-- Celine, Lorette
If you have already tried to insert shavings of linoleum into the space and cover the area with clear nail polish, yet have not been successful, then you need to find another piece of linoleum from the same dye lot. If you do not have a spare piece, cut a little piece from behind the fridge or from the closet. To remove a little piece from another area, hold a putty knife blade perfectly perpendicular to the floor. Score the area and then heat it with a hairdryer and lift it up carefully using the putty knife.
Lay the patch over the area to be repaired making sure that the pattern lines up. Place masking tape across to make sure the scrap piece does not move. Use a sharp razor blade knife and cut along the pattern on the patch through the damaged piece right through to the sub.
Remove the masking tape, the patch piece and the burnt area using a hairdryer and putty knife. Scrape the sub floor underlay clean and apply a thin coat of adhesive allow that to dry for 30 minutes. Next apply the adhesive to the back of the patch and the sub floor. Position the patch into place and push it down firmly. Lay a piece of parchment or wax paper on the patch and pile it with books, leave overnight. In the morning apply a seam weld (from a hardware store) along the pattern joint to hide the repair.
I know that this sounds like a lot of work but if you buy really good adhesive glue and seam weld, the project won't take long and you will be happy with the results.
Q: My son had an old car that left grease stains on our cement car port and I have tried everything to clean it, do you have any suggestions?
-- Susan, Brandon
You can purchase products formulated for cleaning concrete. The following are other options, always wear eye and skin protection when using chemicals. Bleach, dilute as the directions indicate for cleaning. Let the solution sit on the stained area for several minutes, then scrub and rinse. Or TSP, dilute one cup in one gallon of hot water. Pour it on the area and let it sit for 15 minutes. Scrub with a stiff brush. Rinse off with hose and repeat if needed. Or muriatic acid although this is not a stain remover or cleaner. The acid actually etches away the concrete itself, and sometimes the stain as well. You will need to scrub and rinse this chemical also. Follow the directions carefully! Use muriatic acid only if you seal the driveway with masonry sealer afterwards. Remember that you will be altering the level of the surface if you remove a lot of material. If you use a pressure washer, make sure you have the right nozzle. A jet that is too concentrated can damage concrete. Use a nylon scrub brush.
Q: My friend heard you on the radio giving a window cleaner recipe; she tried it and loved it but can't find the recipe. Could you give me the correct measurements for the ingredients? I would appreciate this as I clean windows in a church building and I dread the streaks! Thank you.
-- Marlis, Winnipeg
The window cleaning recipe is a cinch to make. In a spray bottle combine 1 tsp. cheap shampoo or dish soap, one-quarter cup rubbing alcohol. Fill the remainder of the bottle with white vinegar. Spray onto windows and wipe with three-day old or older newspaper. Super cleaner!
Q: I am getting ready to store my tools for the winter. Any suggestions on how to keep rust from forming on the blades?
-- Darren, Selkirk
Begin by cleaning the tools and any already rusted areas with fine steel wool and light oil such as WD-40. If you do not have WD-40 on hand you can opt for cooking, mineral or baby oil. You can also sharpen your tools now, which means they will be ready when spring comes a-calling.
Q: I burnt popcorn in the microwave and the entire house smells (especially the kitchen). What can I do to combat the smell?
-- Larry, Winnipeg
Here are a few tricks to tackle this quandary: You can either heat lemon juice or vinegar in the microwave until it boils over and then wipe out the interior. Or combine into a bowl; vanilla and water and heat until it boils over or another option is to combine lemon slices, vinegar, vanilla, dish soap and water in a bowl and heat. Alternatively combine and heat baking soda and water. If the odour persists, store coffee grounds in a bowl in the microwave to absorb excess odours. All the best!
Reena Nerbas is the author of the national bestsellers, Household Solutions 1 with Substitutions, Household Solutions 2 with Kitchen Secrets and the soon to be released book Household Solutions 3 the Green Edition available on-line and in stores across Canada.
I enjoy your questions and tips, keep them coming!
www.householdsolutions.org

Renovation & Design
Going modern doesn't have to break bank
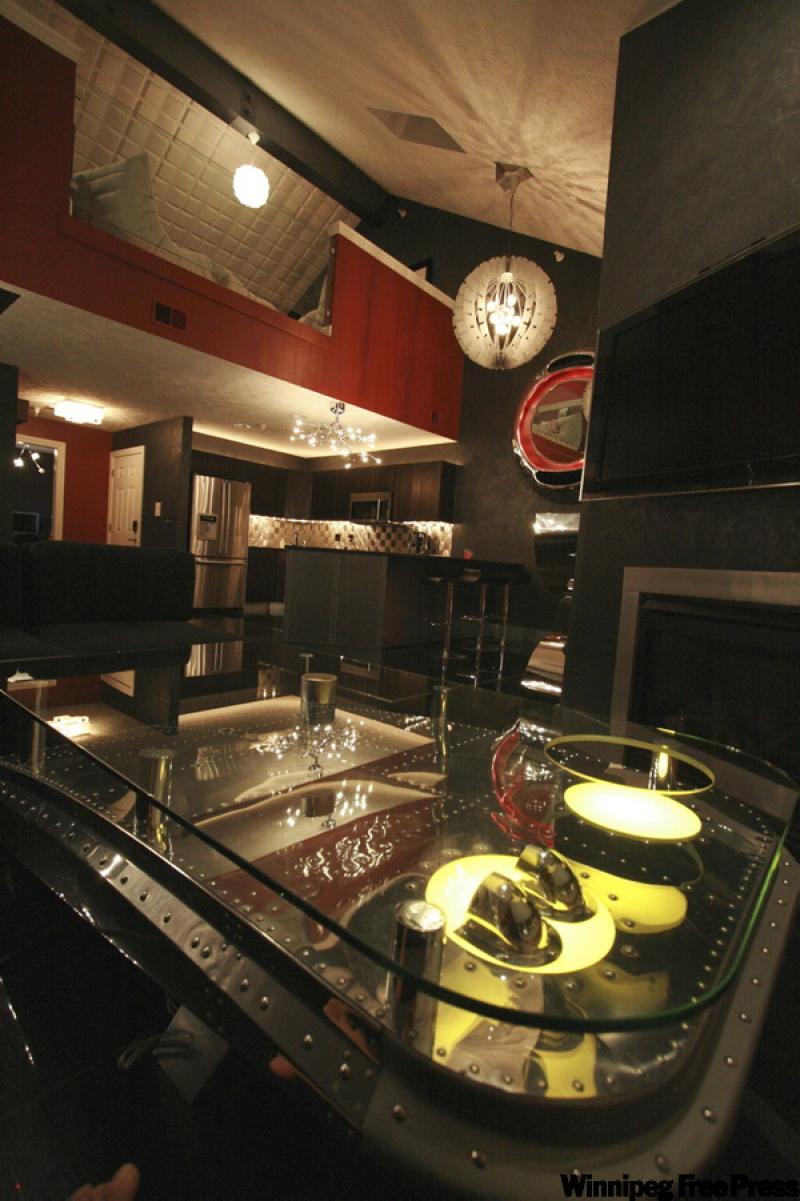
AVONDALE ESTATES, Ga. -- Keith Brown and Karen Hennessey wanted to give their ranch house the sleek, modern style they had come to appreciate from stays in boutique hotels in cities such as Paris, Cairo and Johannesburg.To keep the budget as minimalist as the design, however, they had to plan carefully. The keys, says Brown, have been patience, persistence and discipline.
"You get caught up in the trappings of looking at these (home decor) magazines," says Brown, a designer himself. "Most people try to figure out, 'How can I get that look?' and that's when you have to get really creative."
Not that Brown wasn't seduced by the glossy pages of modern mag staples such as "Dwell" and "Wallpaper," which are piled up in stacks around the house. That high-end influence is evident throughout the home, in touches like faucets, bathroom vanities and marble floors.
But look again. The vanities in the master and guest bedrooms? A repurposed television stand and bookcase from Ikea. The kitchen sink faucet? Home Depot.
Brown admits that as a designer, he has an advantage over the average do-it-yourselfer. But he insists the deals are there for those willing to look.
"You have to simply figure out how to use the Internet to your advantage, and shop wisely and get good deals and take the risks that are associated with not being able to go into a showroom and see something," he said.
Not that he wasn't willing to get out and shop for a deal.
"Two or three times a week, I would get in my car and go to these places," he said, rattling off bargain electronic stores and discount appliance retailers. "We hunted. And there's nothing defective about any of the products we bought. It was almost just like going on a scavenger hunt."
Brown seems to relish the process nearly as much as the finished product. He is especially proud of the kitchen, a study in high-gloss white minimalism. He estimates the high-end version of the space could have cost $150,000 or more, not including the appliances, but offers a glimpse into what he was able to save by shopping around:
A $7,800 refrigerator for $2,500.
A $1,600 convection oven for $300.
Dishwasher drawers, normally $1,200 to $2,000, for $700.
"Overall, we've been able to do what we did with modern because we've been smart," Brown said. "There are days when I look at this house and say, 'I know I can do this, and I wasn't dealing with half of the money some of these other people are dealing with."'
Patrick Johnson, an architect with the Atlanta-based design firm AI3, worked with Brown on the project. He said the Internet, Ikea and magazines like "Dwell" have done a lot to further the resurgence of modern design.
"I don't like the word 'elite,' but there was a symbolic quality that modern design had, probably until the last five years," Johnson said. "There's an acceptance because it's more accessible now."
The key to keeping costs down, Johnson said, is being hands-on. "There are ways of getting a look with standard, off-the-shelf building materials. But you've gotta be willing to hunt."
--The Associated Press
Renovation & Design
Beware of over insulating attics in older homes
111There are several existing vents near the peak of the roof but they are usually covered with snow. I want to add more insulation but I have to solve the ventilation issue.Thank you for any information you may be able to provide.
--Tina, e-mail
ANSWER -- The condensed answer to your question is that you should be able to install air chutes from inside your attic before upgrading your insulation. The only concern is that they will not serve to add increased ventilation to your attic, but may prevent another potential problem.
In homes of your design, with brick exterior walls and no soffits, adding additional ventilation to the attic from the eaves may be nearly impossible. While the addition of vents to allow cold air infiltration from this area is highly desirable before upgrading attic insulation, it is not critical. What is very important, however, is to avoid over insulating the attic at the perimeter, near the eaves. Yes, I did say over insulating. While this may seem contrary to much of the current information available to homeowners, it is a potential problem which I will further explain.
Most older homes, especially those built in the early part of the last century like yours, have very little room between the top of the ceilings and the underside of the roof sheathing at the ends of the attic. This area is often called the hip, and is quite small due to the older practice of notching rafters where they join with the top of the exterior walls of the home. The ceiling joists and rafters are often constructed of two by fours, which limits this space even more. This area was not given much consideration when your home was built, because insulating attics was not a high priority back then.
Current homes with manufactured trusses have enlarged hips, allowing for installation of large amounts of insulation in this area. Because of the small space at the perimeter of your attic, there is minimal room for insulation between the ceiling and the roof, certainly not enough to accommodate conventional insulation up to current standards of R40 to R50. For this reason, it is quite easy to fill this entire area with insulation, especially when loose fill insulation is blown in.
When this area is filled to capacity with conventional fibreglass insulation, or other highly breathable types of insulation, warm air intrusion from the home is very likely through the ceiling or exterior walls. If this insulation is touching the roof sheathing there will be little or no way for this warm air to escape into the main part of the attic. In that case, condensation will be a certainty, often causing moisture related problems in the attic or home. In the worst cases this condensed air will turn to heavy frost in the winter and may melt and run back in through the ceiling or walls during the spring thaw. Also, this insulation may trap enough warm air to prevent excess condensation but will alternatively melt the snow on this part of the roof causing ice dams and rapid deterioration of roofing.
Either way, over insulation of attics at the eaves is one of the most common defects I seen in homes. I probably have taken four or five hundred digital pictures of attics with this problem, during the course of normal inspections. The interesting thing is that the problems can normally be prevented, quite easily, before adding insulation. The solution in your home is to install a baffle between the rafters in this area to prevent the insulation from touching the roof sheathing. While these components are often called air chutes they can also serve a dual purpose as insulation stops, in situations like yours.
Insulation stops are normally available constructed of either foam or coated cardboard and can be installed, and secured with a staple gun or large-headed nails, between the rafters at the perimeter of the attic. They are designed to leave approximately three to five centimetres of open air space between their tops and the underside of the roof sheathing. This opening may be sufficient to prevent excess frost from developing on the underside of the roof, but will certainly help maintain a cooler roof deck, preventing shingle damage. If there are any small openings between your rafters and the exterior brick walls some beneficial air infiltration may also occur, further improving the situation.
Unfortunately there is one drawback of installing the air chute/insulation stops in the manner I recommended and that is minimal insulation in this area compared to the rest of the attic. While this may prevent ideal levels of attic insulation, it is unavoidable with conventional insulation. However, this will certainly be preferable to damaged roof sheathing, shingles and possible leakage. Fortunately, there is one upgrade that will improve this dramatically, but may somewhat more costly.
After the insulation stops are installed, and old wood shavings or poor quality insulation removed from between the ceiling joists at the attic perimeter, a higher quality product may be added to this area. Blown-in polyurethane foam insulation can be installed to provide a more complete air seal and higher insulation value. A few centimetres of this material may be enough to stop most air infiltration through the ceiling, while adding a reasonable level of insulation compared to the much thicker material in the rest of the attic. This will be the best of both worlds, eliminating the moisture problems while adding maximum insulation value even in areas where there is not enough height for regular insulation.
Ari Marantz is the owner of Trained Eye Home Inspection Ltd. and the President of the Canadian Association of Home & Property Inspectors - Manitoba (www.cahpi.mb.ca). Questions can be e-mailed or sent to: Ask The Inspector, P. O. Box 69021, #110-2025 Corydon Ave., Winnipeg, MB. R3P 2G9. Ari can be reached at (204) 291-5358 or check out his website at www.trainedeye.ca.
trainedeye@iname.com
Renovation & Design
A good centrepiece is key to a great table
You've worked all day for your dinner party. The table is set, the wine glasses polished, Molly Johnson drifts invitingly from the CD player. And yet it feels as if something is missing.Maybe, you think longingly, just maybe one of the guests will bring flowers so you won't have to pull the emergency candles out of the utility closet and stuff them into those candlesticks you purchased, inexplicably, at the church garage sale.
Too often, a centrepiece is the last thing hosts think about, which is a shame, because it is the first thing guests notice when they enter the dining area. With the purchase of a couple of staple items that can be reused over and over again, an inviting centrepiece is both easy to create, and a pleasurable part of dinner preparation.
Wendy Turner, co-owner of Artworks in Edmonton's City Centre East mall, says home entertainers don't need a big budget or a china cabinet full of crystal to create a stylish heart for the dinner table. The centrepiece she designed for the Edmonton Journal is simplicity itself -- three glass vessels filled with river rock, moss and orchids -- and could be put together in a short amount of time, and for little money.
A variety of inexpensive glassware and jars of polished stones ($3.99 at any Superstore) line the shelves at any big box grocery store worth its giant asphalt moat. A single stem of cymbidium orchids would yield enough blooms to fill several small containers. Depending on where you buy your flowers and glassware, a trio like Turner's could be put together for less than $50.
Turner says home hosts with a centrepiece fantasy should start by thinking about the tone of the evening.
"Is it elegant? Is it a casual get get-together? Or a few friends making their own pizzas?" she says.
A sophisticated evening might be reflected in a flower arrangement that leans towards soft greens, or neutral tones. A night that focuses on fun may demand a bold pop of colour, or benefit from a casual arrangement of flowering branches such as coffee berries, with their inviting red, orange and brown fruit.
Turner challenges decorators to get away from the concept of vases, and just think about "vessels" -- which can be anything from a teacup to a pop bottle. At her dinner parties, Turner likes to put "a lot" of small vessels on the table (as many as a dozen depending on the size of the table and the scale of the vessels). Each one may hold a different flower. She favours ranunculus (which looks like a tiny rose, but is actually a bulb) as well as freesia, miniature hydrangeas and tulips.
Another idea is to place blown glass flower floaters topped with, say, gerbera daisies, in a bowl of water. Then let them bob happily while the guests gab.
Turner says not to worry about making sure that things match. It's often better to let the creative spirit wander and see what emerges.
--Canwest News Service
Renovation & Design
In Brief
Save energy and money with timely home tipsWinterize -- You've officially retired your shorts and T-shirts for winter, making room in the closet for cords and sweaters. But how do you get the rest of the house ready for the long, cold season ahead? The Home Depot offers the following suggestions to heat up your home and help the environment at the same time:
Install a programmable thermostat and stop wasting energy (and money) by heating the house when you're away.
Install weatherstripping to minimize heat loss through doors and windows.
Turn off the lights when you leave a room.
A long, hot shower on a winter morning is a luxury. Try to keep it under 10 minutes, and install a low-flow shower head to minimize water waste.
Install a ceiling fan in vaulted areas to push down hot air as it rises.
Shovel away winter worries
DON'T freak out as the flakes start to fall. Instead, take control of old man winter with these cool snow tools from Garant:
The Sleigh Shovel is ergonomically designed and allows for easy snow removal by scooping and sliding, with no need to lift and hurl snow in the traditional manner. It comes in three different sizes.
The Twinter is a snow broom that does double duty sweeping snow off outdoor steps and around doors and balconies, and also brushing the white stuff off cars. The gadget comes with a removable ice scraper.
For those who just want a regular shovel, Garant delivers with a range featuring VersaGrip handles. This allows multiple hand positions, the idea being to facilitate better shovelling posture and avoid back pain.
Garant's winter snow removal products are available at hardware stores such as Home Hardware and RONA. Go to garant.com.
U.S. for the birds, snowbirds, that is
THE percentage of North Americans, led by Canadians, buying U.S. homes is up almost 10 per cent this year from 2007, says a study.
A survey by the U.S.-based National Association of Realtors says 32.7 per cent of homes bought in the U.S. went to Canadians and Mexicans --- up from 23.4 per cent in 2007.
Doubtless, the rising value of the Canadian dollar, and the declining fortunes of American real estate, were two of the key reasons.
The North American contingent replaced Europe -- which declined to 31 per cent this year -- as the most active buying region.
-- Canwest News Service
Renovation & Design
Straighten up! There's no excuse for clutter
There's a reason it's called the mud room. Kids track it in, along with leaves, pebbles and other debris from the yard. After they kick off their shoes, and throw coats, hats and gloves onto the accumulating pile, what you get are dirty clothes.This is why, in many newer homes, the laundry room and mud room have been combined.
But I digress.
As fall progresses, the mud room seems to collect far more clothing items than its meagre shoe cubbies and coat hooks allow. This in-between-season calls for Crocs and a hoodie one day; boots and a down vest the next. Add kids to the mix and the space becomes not just cluttered, but chaotic.
I wish I could say that before I had children my mud room looked like an ad from California Closets. With custom-built lockers in the back entry it definitely had potential. Sadly, shoes have always been my downfall, leaving their multiple muddy prints on clean tiles before piling up for lack of enough room to properly line up. Now there are even more pairs kicking around -- my son's tiny Robeez slippers and my daughter's white and pink Adidas and fashion-forward leopard-print flats all need floor space.
"Girls like our shoes and our purses ... we get too (many) of them," says professional organizer Deanne Eade of Dee-Clutter. She organizes closets for a living and frequently works with young families. She understands how extra sets of shoes and mittens can snowball into a style crisis that needs straightening out.
Eade also has two children of her own, a 13-year-old son and 10-year-old daughter. Apropos of an organizer, she engendered in them a love of all things neat and orderly from an early age. As soon as they could walk and talk, Eade had them putting away their runners and stowing their scarves.
So, perhaps I have been the architect of my own angst for failing to train my three-year-old in a similar fashion. Which raises the question: At what age is it reasonable to expect children to put away their own stuff when they breeze through the front door?
"It depends on what age you send them to military school," says Calgary interior designer Bruce Johnson of Johnson & Associates.
He's joking. Sort of. His five-year-old daughter started on the path to cubby super-stardom at the age of three, while his 10-year-old son still needs to be reminded. Every day.
It helps if kids have a designated space to discard their outdoor wear, say Johnson and Eade. It could be their own entry locker complete with shoe stall, drawer for hats and gloves, and hooks for coats and backpacks. Or, in a traditional entry with a coat closet, it could be a shelf and basket for shoes and accessories. Show your children where everything goes, and involve them in the organizing process.
Once they're willing to help, the space is easier to keep tidy and the battle half-won. Winning the war -- getting organized in the first place -- is tougher. Eade and Johnson offer these ideas:
Entry closet
If you didn't design it, there are options for turning a builder-standard entry closet into an organized, kid-friendly space.
"It's really looking at the space as a vertical space" instead of a horizontal one, Johnson says.
Move the coat bar higher, then add another half-width bar low enough for kids to hang up their own coats.
On the other half of the closet, install shelving. Use the bottom shelves for shoes (keep in mind winter boots are taller and require more room). Make sure it's a tight wire-mesh or solid shelf so children's shoes don't fall through. Place rubber mats on the floor to catch mud and water drips from footwear. Beware too-deep shelves: "Stuff just gets lost back there," Johnson says.
Purchase some plastic bins or wicker baskets for the top shelves. Use them to collect hats, gloves, scarves and other accessories.
Ideally, each family member will have his or her own shelf and basket.
Can't be bothered with shelving? Move an old chest of drawers into the hall closet. Each drawer becomes an insta-cubby and the top becomes a shelf.
Open mud room or entry
Many newer homes have a mud room connecting the garage to the kitchen; older homes have an open entry with a tiny coat closet. Without designated places to put stuff, these spaces quickly become overwhelmed when kids pull off hats in a hurry.
Invest in a coat tree. An antique adds classic style and offers a place to hang your hat and coats.
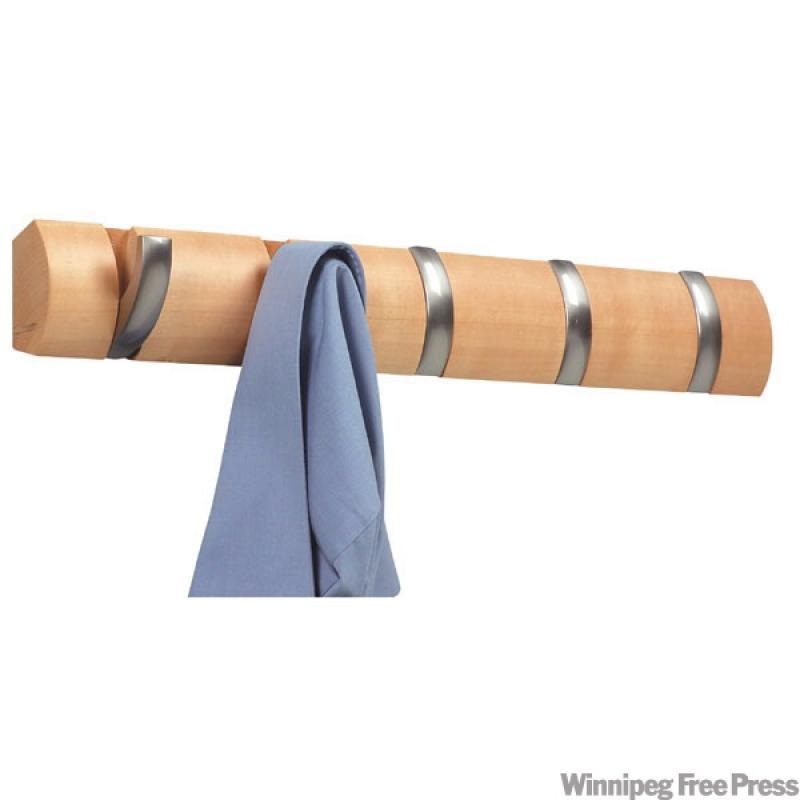
Mount a row of double coat hooks on an entry wall. Ideally, they'll be in a place that's not in the way. Hang one to two hooks per child, at an accessible height.
A simple shelving unit pushed against an entry wall can be dressed up with inexpensive lined wicker or faux-wicker baskets purchased from a retailer such as Superstore or Ikea.
-- Canwest News Service