Renovation & Design

Renovation & Design
Use only liquid stone soap on marble floors
QUESTION -- I have a problem with stains on marble flooring. Most stains are water and the tiles are also dulling with no shine, is there a cure? Many thanks in advance, Glenn, Dauphin
ANSWER -- Regardless of anything else you may have heard, don't ever allow yourself to be tempted into using normal household cleansers on your marble floor. Not even in a pinch. If visitors are coming just when you happen to be out of marble and stone cleaner, mop with warm, clean water only.
Marble is a soft material made from calcium carbonate that is very sensitive to any acid or high alkaline chemicals. Do not use any tile cleaners, vinegar, ammonia, alcohol (Windex), Ajax, etc. on your marble floor. Use only liquid stone soap or neutral cleaners that have pH 7.00 and were made specifically for cleaning stone. In this way you prolong the stone life. When you clean your marble flooring, make sure to use lukewarm water and soap.
Skilled natural stone floor experts can turn your dull and stained marble floor into a new one, their work is very specialized, and with the explosion in stone floor installations that are being done in new construction, the number of restoration contractors to choose from is growing fast. You should be able to get several quotes and evaluations.
Keep a spray bottle of marble and stone cleaner handy to clean spills and marks as they happen. If you make a practice of doing this, stains will be kept to a minimum and all you'll need to do on floor washing days is pass a cotton mop dampened with warm water over the floor. With the stains and dullness that you are encountering, pour some of your marble and stone cleaner from your spray bottle into the warm wash water and mop as usual.
If you do not want to consult a professional and you do not want to use commercial cleaners, you can wipe the marble with three per cent hydrogen peroxide and buff with a soft cloth. Some people advise on using acetone on marble but this sounds too risky to me. Another option to give marble a quick shine is to crush a child's stick of common white chalk (made of limestone) into a fine powder. Dampen a clean white wash rag and dip it into the chalk powder. Rub it on the marble with smooth, overlapping back and forth strokes. Allow to dry for a moment, then rinse with fresh water on a damp rag, and dry thoroughly.
Lastly, after your floor has been professionally cleaned you may want to consider sealing the floor so that its beauty lasts for a long time. All the best!
QUESTION -- Do you have a solution for cleaning an antler handled carving fork, it is very old, and was stored in a dampish atmosphere for perhaps two years. The handle has a strong mildew musty smell. Any suggestions on how I might rid the bone of this smell? Look forward to hearing from you, Kerrie, Winnipeg
ANSWER -- Wash the handle with one quarter cup three per cent hydrogen peroxide and one cup of warm water. Wipe well. Next polish the handle with linseed oil, the smell should disappear and the handle will look like new. Another suggestion (and this is what I would use) -- wash the handle with non-gel toothpaste, scrub with an old toothbrush. Leave for at least 10-15 minutes and rinse.
QUESTION -- We have just purchased two cream-coloured leather sofa's second hand. They are in wonderful condition, however, the previous owner was a smoker. I have wiped them down with warm water and then used leather cleaner. The smell is not as strong but they still have a stale smoke smell to them. Can you suggest anything to get rid of the lingering odour? Christine, Winnipeg
ANSWER -- The first thing I would do is clean the entire surface with saddle soap. You can get it at the same place you buy shoe polish. Moisten a soft cloth, rub it over the saddle soap and wipe the leather. You will likely see smoke colour come off onto the cloth (it will look dark and smell). Change to a clean place on the cloth and repeat until that section of the seat no longer smells. You will need to take a clean damp cloth and remove any excess saddle soap and then buff it with a dry cloth. Saddle soap is not typical "soap" therefore don't expect to see suds.
If you cannot find saddle soap, sprinkle the furniture liberally with baking soda, leave and wipe off with a damp cloth. Or make a spray of enzyme cleaner and water (purchase this at your local pet store). Or create a solution of white vinegar and tea tree oil (found at grocery and health food stores). Wipe the leather down with the solution and dry with a soft cloth. Another option is to wash down the sofa with commercial leather cleaner or Murphy's Soap Oil. As well, if you happen to have sprigs of eucalyptus in your home, lay them onto the furniture everyday for three days to help zap the odours.
Here is your last desperate resort solution: In a ventilated child free, pet free area, preferably outside, elevate the couch and place a plastic pan of household ammonia under the couch. Do not allow any ammonia to touch the leather. Cover the entire couch with plastic drop cloths and tape the edges down so that no air enters the enclosed leather couch area. Leave for 3-5 days. While wearing a mask and gloves, remove and discard ammonia and drop cloths. This should zap any smoke odour. Note: Ammonia is not considered a safe product, although it is found in many commercial household cleaners. Use ammonia with great caution! Test all solutions on a small inconspicuous area first.
Fabulous Tips of the Week: Put a rubber-backed bathmat over the edge of the bathtub to help prevent children from slipping when getting in and out of the bathtub. This also works for seniors.
Reena Nerbas is the author of the national best sellers, Household Solutions 1 with Substitutions, Household Solutions 2 with Kitchen Secrets and the soon to be released book Household Solutions 3 the Green Edition available on-line and in stores across Canada.
Renovation & Design
Oh, oh; Don't use tin foil in self-clean oven
QUESTION -- I have a bit of a challenge. We have a new self-clean oven which hasn't had a lot of use yet. As my wife was out, I decided to heat up a frozen pizza for supper. It was one of those that you place directly on the grill. To protect the bottom of the stove I put some tin foil down in case some the cheese dripped down during cooking. Well I was informed after the damage was done that one of the no-no's of a self-clean oven is that you don't use tin foil. The foil has melted in to the stove and has now left a noticeable residue which I can't seem to get off. Any ideas as to what I might try to try and get the film off and maybe get back into my wife's good graces. Thanks, Blundering Bob, Rosenort.
ANSWER -- I want to give you two solutions to tackle this mess; the first is (with the oven off) sprinkle baking soda to cover the affected area well. Use enough white vinegar to wet the soda. Leave the mixture on the area for a long time; overnight, if possible. The resulting chemical reaction should do most of the work for you. If need be, repeat the procedure. Or the second solution, (with the oven OFF), soak a towel in water and lay it onto the affected area. Leave overnight and gently scrape or wipe the foil off.
QUESTION -- My daughter suspects that she has a black mould problem in her bathroom. Is there any way to ascertain that it is indeed black mould? If it is, what are the measures and precautions to take to get rid of it? Anon. Winnipeg
ANSWER -- If you detect black mould, it is important to act quickly as it can lead to health issues if it is not removed. There are many types of mould and working with a professional mould inspection company is the surest way to guarantee that mould problems in the home are identified and treated appropriately.
Any location where there may be excessive moisture or inadequate ventilation is an area prone to mould. Mould may be any colour: black, white, red, orange, yellow, blue or violet. Dab a drop of household bleach onto a suspected spot. If the stain loses its colour or disappears, it is likely mould. Humidity is the single biggest cause of black mould therefore in order to get rid of black mould in the bathroom, make sure that your fan circulates the air and keeps the humidity down.
When removing black mould from particular rooms seal it off as best you can from the surrounding areas using plastic sheeting and duct tape. Ensure that you have dampened the area you are working on to minimize the release of mould spores. Clean the area as much as possible using soap and water. Then disinfect the area with a bleach and water solution, leave for a few minutes (usually about 15 minutes) and then rinse thoroughly and dry rapidly.
When you get ready to start black mould removal, wear a facemask and rubber gloves so that you don't breathe in the black mould spores or let them touch your skin. There are removal products on the market that kill the black mould. But make sure you always read the label and follow all safety procedures for use of the product. Black mould removal is something that you may have to do several times to make sure you kill all of the spores.
QUESTION -- We have hardwood floors and have a rubber based mat or carpet at the front door (to wipe feet as one enters the house). We had our house painted last summer and prior to painting, the painter hosed down the house with a power washer. Unfortunately some water seeped under the front door and under the mat, leaving rubber marks on the hardwood floor. What can we use to get this rubber off the floor? Thanks so much in advance. Your advice is so useful. Marion, Ste. Agathe
ANSWER -- You always want to start with the easiest solution and then move towards more drastic measures only if needed. Begin by scrubbing the area with a white or pink rubber eraser. This may be all you need to remove the marks. Keep me posted!
QUESTION -- I'm looking for a solution for getting rid of the potentially decades old smell of moth balls in a recently acquired antique six plank chest. It is a beautiful rustic piece that we use as a coffee table. Unfortunately the interior reeks of moth balls (strangely the scent wasn't apparent upon purchase). I'm wondering if there is a permanent method to get rid of the smell from the chest. Perhaps letting it air out in the winter cold? To date I've tried to counter the smell with cedar balls with little success. Any ideas would be much appreciated.
Also, is there any hope for ridding the smell from games in cardboard boxes and wooden games we have stored inside the chest? Thanks for all the good work you are doing in testing and promoting safer household solutions. A big fan, Emma, Lac Du Bonnet
ANSWER -- Let's start with the antique chest, I would begin to zap the odour by washing the chest with Murphy's Oil. If the smell remains, wash the table by painting is with vinegar and a few drops of tea tree oil or straight vinegar if you do not have tea tree oil, allow the table to air dry (this has had great success). Also, place coffee ground, sprigs of eucalyptus or charcoal inside of the table to absorb odours. After a few days, remove the contents and STUFF the chest full of newspaper. Leave for at least 4 days. Another option is to purchase a product called Odorzout (www.88stink.com
As for the board games; clean board games with a sponge and a little dish soap and water or white vinegar and a few drops peppermint extract. Lightly dampen the sponge and move it in a circular motion. Store a fabric softener sheet inside each board game box.
Reena Nerbas is the author of the national best sellers, "Household Solutions 1 with Substitutions", "Household Solutions 2 with Kitchen Secrets" and the soon to be released book "Household Solutions 3 the Green Edition" available on-line and in stores across Canada.
Renovation & Design
Outdoor planters need drainage
QUESTION -- We have planter boxes made out of treated plywood on top of composite decking. My question is do we line the boxes with anything and if so, do we also put drainage holes through the lining and bottom of planter boxes?
ANSWER -- If it were me I would certainly line the planters. If you are planning on growing vegetables in the planters, the treated plywood may leach into the soil and this could be a health issue depending on how the wood was treated. Secondly, lining the planters would help them to last longer. Even treated wood that is exposed to moisture for long periods of time can start to warp or buckle. Drainage holes are a must for the health of the plants you are growing in the planters.
I have tried growing plants in containers and planters without proper drainage and the result is always poor growth. I am now convinced that drainage holes are an absolute must when it comes to containers and planters. In fact, I will not even look at a container that does not have drainage holes built in or ones where I can't make the holes myself. For indoor containers with no drainage holes, you might be able to get away with having a layer of stone at the bottom of the pot with a layer of charcoal on top of that. However, this will depend on the type of plant you are growing and how tolerant it is of having its roots wet. The same does not hold true for outdoor containers. If the container is open to the elements, gets rained on and does not have drainage, the plants will suffer and likely die in time.
QUESTION -- I saw on TV the other day that there are Asian, Chinese and Korean pear trees that can be grown in Canada, from coast to coast, no fertilizers or bug sprays needed. They apparently bear fruit too. Is this true? I live just south of Westlock and would like to plant one in my backyard, or would I have to plant more? I would like to plant next spring. Is this possible?
ANSWER -- I am aware of Asian pears being grown in B.C. and Eastern Canada, but have not heard of any hardy enough for the Prairies. I would certainly be dubious about the "no fertilizers or bug sprays" statement. Anything that sounds too good to be true usually is. I'll toss this out to see if anyone else has heard of these pears.
QUESTION -- Every year I cut my hosta leaves off to ground level and every spring the new leaves grow up around the dead ones from last year. I loosen the earth but there seems to be a "crust" of dead roots from last year. My Francee hostas were supposed to grow to be higher and wider than they are now. They've only grown to 30 centimetres high and less than 60 centimetres wide. I planted them five years ago. Any suggestions?
ANSWER -- I'm having trouble visualizing your question. If you are cutting the leaves to the ground, what leaves are left for the new growth to "grow around?" As for your Francee, I would try adding some fertilizer around the plant --15-10-5 or 10-10-10 would be good options.
--Canwest News Service
Renovation & Design
Bathroom fan moisture a source of worry
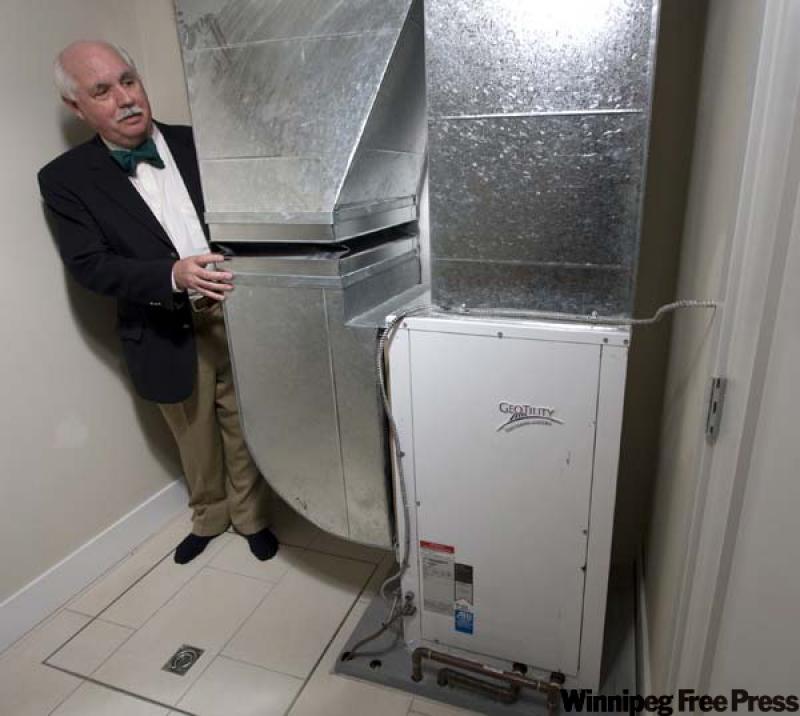
Question -- I have a question that hopefully you can answer, or at the very least, offer up some recommendations. I have a 1960s bungalow and recently had the bathroom renovated, which included the installation of a new bathroom fan. The fan that was installed is a high-end model and has more than adequate air flow for the size of the bathroom. The old fan was vented through the roof. The new fan is vented through the attic space and exits out the gable end and has approximately a 20-foot run. The fan is initially connected to solid metal venting and is then connected to flexible tubing for the remainder of the run. The venting goes up a short distance from where it connects to the fan, turns 90 degrees and is sloped downward towards the vent cap. Both the fan and vent cap have flappers to prevent back drafts. The venting is wrapped in insulation.
Please note that the fan was installed just prior to the winter. Also please note that the fan has not been used. The problem is that moisture came down the outside of the fan housing and damaged the drywall ceiling. The moisture does not appear to be coming from within the fan. Upon investigation, we discovered that the outside of the metal venting and fan housing is covered with a thin layer of ice, which is melting near the fan and running back into the ceiling. There is also a buildup of ice inside the venting, but I assume that this is due to the use of flexible venting.
Given that the fan has not been used, because we are not using the bath or shower, this is not the cause of the moisture. In layman's terms, it appears that the moisture that is naturally in the attic space is condensing on the outside of the fan housing and venting, and then following gravity back down the outside of the housing and into drywall ceiling. I have done a little research and have learned that the use of flexible metal venting is not recommended. I have also seen it suggested that one can use 4-inch plastic sewer pipe as it is smooth and not subject to condensing and icing as is metal venting.
What do you think about using plastic tubing instead of metal? What is the correct type of insulation and insulating wrap to use given our Winnipeg climate? What is the proper way to insulate around the fan housing and the venting that runs up from where it connects to the fan and before it turns 90 degrees and then slopes down to the where it exits the gable?
Any suggestions will be much appreciated.
--Bob Bouchard, email
Answer -- As the recent, bitter cold snap appears to be behind us and the temperature approaches the freezing point, I have been receiving numerous phone calls and e-mail regarding water leakage into homes, similar to yours. Consequently, I thought that this warm spell would be the ideal time to deal with this common issue, often not experienced until the Spring thaw.
With several weeks of constant, bitter cold weather, nearing -30C every night, we often experience an invisible issue in our homes. Excessive frost build-up can develop in attics, particularly in older homes, on the underside of the roof sheathing and gable ends. With normal winter temperatures, sunny days, and adequate attic ventilation, this frost may slowly melt, the water evaporate and be eliminated from the attic through the vents. With an extended period of unusually cold weather, like that just behind us, the frost may not melt and will continue to thicken until a heavy layer covers all the wooden components in the attic. While the temperatures remain in the sub-arctic range this causes little problems and will not usually be noticed until there is a sudden warm spell, when the frost may melt very quickly and saturate the insulation in the attic. As we have just seen, this can cause leakage into the ceilings and walls in the home.
The same thing can occur even in a well insulated, air sealed and vented home, through the one large opening in the attic floor, the exhaust fan. While there may be little area for warm, moist house air to infiltrate your attic in most of the ceilings, this is quite possible though a poorly sealed bathroom exhaust fan. The small damper in the fan is not often well sealed enough to prevent warm air intrusion into the duct from the bathroom. While this may cause some condensation and leakage, it may only be a portion of the problem in your bathroom.
The housing for most bathroom exhaust fans is made of metal, has several small holes and will conduct heat quite well. Considering that the underside of this fan housing is at room temperature and the top side exposed to the freezing attic, it is highly prone to condensation. Not operating the fan may exacerbate the situation, as warm air may sit in the fan housing and not be blown harmlessly out through the normal ducting and vent hood. A lack of high-volume air movement may contribute to frost building up in and around the fan ducting, due to a lack of fresh, warm air to melt the existing frost. I would operate the fan, periodically, even if you are not using the shower, to prevent this.
The ultimate solution is to ensure that the ducting and housing in the attic is well sealed and insulated. This can typically be accomplished with a combination of several small cans of blown-in polyurethane foam insulation and conventional duct pipe wraps, or pre-insulated ducting. The foam should be blown to a thickness of five centimetres or more, around the entire fan housing and the solid metal ducting, and then covered with conventional insulation to match the rest of the attic floor. If the flexible ducting connected at this point is not insulated, it should be discarded and replaced with pre-insulated flexible ducting or solid metal, which can be then wrapped with several layers of pipe wrap insulation. While solid piping is a better choice than flexible ducting to prevent loss of air volume, rarely is plastic piping used in this situation. I don't see any reason not to use ABS pipes, as you have suggested, other than the difficulty working with long lengths of this rigid piping in the confined space of your attic and the added cost, but it will still have to be insulated to prevent freezing.
Ari Marantz is the owner of Trained Eye Home Inspection Ltd. and the President of the Canadian Association of Home & Property Inspectors - Manitoba (www.cahpi.mb.ca). Questions can be e-mailed or sent to: Ask The Inspector, P. O. Box 69021, #110-2025 Corydon Ave., Winnipeg, MB. R3P 2G9. Ari can be reached at (204) 291-5358 or check out his website at www.trainedeye.ca.
Renovation & Design
New receptacles tamper resistant
TORONTO -- New parents who babyproof their home normally place plastic covers over the electrical outlets, but revisions to the Canadian Electrical Code announced Thursday mean that some day that will no longer be necessary.
The updated code requires new homes to have tamper-resistant receptacles, designed to prevent children from inserting objects like hairpins, keys and nails which could cause them to receive a shock.
"The great thing is that finally we have some technology that's actually passive -- it doesn't rely on the parent to actually make sure that there's any covers in place," says Denyse Boxell of Safe Kids Canada.
"So we're very, very pleased that finally there's technology that would be permanent on the wall and would have an automatic shield closure, which is what we've been asking for for quite some time to prevent these kinds of injuries."
The new receptacles have a built-in shutter system that prevents anything from going into just one hole. The shutters will open only if two prongs are heading into the holes at the same time.
Boxell says it would be unlikely for a child to stick two pins into an outlet at the same time.
"We know from the research and obviously child development, and such things, that children don't do that," she said.
"Because at the stage of development where they're curious and they're exploring these types of things, like what object fits into what slot, it's beyond their level of cognition to actually do that."
And although it's not required for existing homes, Stephen Brown, director of electrotechnical codes and standards for the Canadian Standards Association, says homeowners may wish to replace their receptacles.
"The cost of actually installing one of these receptacles is very, very inexpensive," he said in an interview.
Boxell said anyone intending to do this should call an electrician if they don't have the skill and training to do it themselves.
And for those who choose not to make the change, she said they can continue to use the plastic covers -- although they're not ideal.
"Research has showed that small children can still pull them out of the socket and also they're very small so children who like to mouth things have been known to put them in their mouths and choke," she said.
"So we do strongly recommend, if you have young children, to retrofit your home and put in the new tamper-resistant receptacles."
The first version of the Canadian Electrical Code came out in 1927, and it's routinely updated by the Canadian Standards Association, a not-for-profit member-based organization that develops and implements standards and codes. The association is celebrating its 90th birthday this week.
This is its 21st revision, Brown said.
Once an item is in the code, it's up to the provinces to adopt it, Brown said, and he expects a majority will do so within six months.
"This is a change that actually helps protect children from electrical injuries," Boxell said.
She noted that on average, there are about four deaths each year in Canada due to electrical injuries.
"And we have about 121 emergency room visits as a result of an electrical injury, and that's for children under the age of 14," she said.
The code is more than 700 pages and this version includes 118 revisions, Brown said.
In addition to the electrical outlets, he said homeowners with swimming pools will find new bonding requirements for pools installed or retrofitted with saline chlorination systems.
-- The Canadian Press