Renovation & Design
Renovation & Design
Slow city
The Society for the Deceleration of Time, the World Institute of Slowness, the International Institute for Not Doing Much. Though all of these may sound like farcical organizations, and the last one perhaps is, the global "Slow" Movement is not only quite real, it is picking up momentum.
Rooted in the Slow Food movement that started in Italy, the trend has evolved to encompass everything from Slow Cities and Slow Design to Slow Reading and Slow Sex. In 2005, Carl Honore, a Canadian living in London, brought widespread attention to the movement with a book, In Praise of Slow: How a Worldwide Movement is Challenging the Cult of Speed.
This September, Cowichan Bay on Vancouver Island is hoping to announce it is the first town in North America to be inducted into Cittaslow (or Slow City), an internationally recognized network of towns committed to putting quality of life first.
Cittaslow was founded in 1999 by four towns in Italy -- Bra, Orvieto, Greve-in-Chianti, and Positano -- that believed the principles of Slow Food could be applied to the environment to make towns better places for residents and visitors.
Today, the organization's manifesto sounds very similar to many of the guides on sustainable design and development. Its 55 criteria are grouped into six categories: environmental policy, infrastructure, quality of urban fabric, encouragement of local produce and products, hospitality and community and Cittaslow awareness. While city planners, development specialists and urban residents across North America debate and struggle over how to make cities more sustainable, almost 120 municipalities across Europe have pledged to transform their cities into havens of slowness.
"Slow is just a new word to understand old problems," Honore writes. "It's a refreshening of ideas that have been there since time immemorial. But there's a new appeal about the word slow. It's pithy, it's countercultural."
Although Slow Cities aim to preserve and promote local traditions -- architecture, crafts, cuisine, etc. -- the campaign is far from Luddite in nature. "Being slow does not mean being torpid, backward or technophobic," Honore writes.
Mara Jernigan, of Fairburn Farm in the Cowichan Valley and president of Slow Food Canada, describes the Cittaslow movement as a tool for protecting local communities. "If people moving into brand-new houses are not aware of the history and the biodiversity of a region, they don't value it."
For those looking at adding a slice or two of Slow to their daily sandwich of urban fervour, a growing number of designers, including the founders of SlowLab, in New York, are creating objects to operate like speed bumps for those who may be living life too fast. Thorunn Arnadottir, an Icelandic designer, made a clock using a string of beads draped over a notched metal disc. One bead drops every five minutes, marking time in a way that seems to slow it down.
Closer to home, John Brown, a Calgary architect and University of Calgary professor, is urging people to just say no to cookie-cutter houses in new developments. Likening such design to fast food -- a supersized hamburger and fries -- Brown feels that people are being undernourished by awkward spaces and huge houses.
In 2006, he launched theslowhome.com in an effort to educate people on how to create deeper and more intimate relationships with their homes.
-- CanWest News Service
Renovation & Design
The Home Renovation Tax Credit plan: A primer of consideration
THE Home Renovation Tax Credit plan is part of the federal government's aim to inject $3 billion to stimulate the economy. It has met with a lot of enthusiasm -- but also with a lot of questions.
The plan seems simple enough at first glance: spend up to $10,000 on renovations and construction on the family home, and you get a tax credit of 15 per cent back, up to a maximum of $1,350. It's a credit, so it reduces the amount of federal tax you have to pay; it doesn't mean you get a cheque for $1,350.
The plan will be administered by the Canada Revenue Agency.
The plan encourages homeowners to open their wallets with the promise of a reduction on personal income taxes paid next year.
"It's money in the pocket," says Ian B. Lawson, a certified general accountant who operates a practice that bears his name. "It's a win-win situation for homeowners and legitimate, taxpaying businesses."
He notes that the incentive is also a boon to the Canada Revenue Agency, as homeowners will be keen to use legitimate contractors who can supply invoices for work performed. Operators of unlicensed, non-taxpaying companies or people who ask for payment under the table will likely see their business suffer.
How do I apply?
There are no application forms. There will be a line in the 2009 personal tax return.
Do I need to be pre-approved before work can start?
No.
What is the eligibility period?
The credit is based on work done and materials acquired after Jan. 27, 2009, and up to Feb. 1, 2010.
When will I get the tax credit?
The tax credit will be applied when homeowners file their 2009 tax return next year.
If the tax credit is more than my personal income tax paid for 2009, will I get a refund?
No, it is a non-refundable tax credit.
Can credit be carried forward?
No, it can only be applied for the 2009 tax year.
Who is eligible?
The plan is family based. In the eyes of the CRA that means an individual or an individual and his/her spouse or common-law partner, including children under 18 at the end of 2009.
What if two or more members of a family co-own a property?
Each family member will be eligible to file for their own separate credit.
What is the definition of a family for the purposes of this credit?
A family is generally considered to consist of an individual and spouse or common-law partner if applicable.
Are just houses eligible?
No, the credit also includes work on condominiums and cottages owned for personal use.
Does it include rental units, such as basements or apartments?
No, just property owned for personal use.
Do I have to spend $10,000 to qualify?
No, homeowners can spend a lesser amount and receive a proportionate amount in tax credit.
What if the work is over $10,000?
Homeowners are free to spend more than $10,000 on their renovations but they will not get a credit on any work over the limit.
How is it calculated?
The 15-per-cent credit is based on expenditures of more than $1,000 of work, but not more than $10,000. The maximum credit of $1,350 is based on 15 per cent of $9,000.
Can I do the work myself?
Yes. In such cases, the tax credit will apply to the materials, fixtures, rentals and permits purchased. Keep those receipts as well as delivery receipts to show the goods came to your principal residence.
Can I hire somebody in my family to do the work?
It depends. Usually the work should be done by an individual dealing at arm's length. But if the person doing the work is registered for the GST/HST under the Excise Tax Act, the expenditure will be eligible.
What are eligible expenses?
The cost of labour and professional services, building materials, fixtures, rentals and permits.
Does the work have to be done by a business?
No, an individual can perform the work. But that individual has to be able to produce receipts and invoices for homeowners to apply for the credit.
Is it just on renovations?
No, the credit can be claimed for new construction, such as alterations and additions to a property.
Are roofs covered?
Yes. According to the CRA, the credit applies to any renovation or alterations of an enduring nature and integral to the dwelling.
I want to build a wheelchair ramp. Can I also claim the Medical Expense Tax Credit?
Yes, a homeowner can claim both credits.
Can we piggyback on other grants currently being offered?
Yes. Homeowners are eligible for both.
What documents do I need to submit?
Homeowners need to retain all agreements, invoices and receipts for the work performed available in case the CRA requests them. The documentation must identify the goods purchased and services provided, and must identify the contractor or vendor. The invoices must be dated. They must also provide proof of payment.
-- Canwest News Service

Renovation & Design
SOLUTIONS: Baking soda, vinegar great cleaning combo
QUESTION -- I read your column faithfully in the Winnipeg Free Press and have purchased both your books. Unfortunately, I packed them up in readiness to move. I remember reading recently about cleaning a self-clean oven without damaging the finish or turning it on -- it involved vinegar. Could you please let me know how I should do that as I want to try the method? Thank you, Carole (Winnipeg)
ANSWER -- Begin by checking with the manufacturer's recommendation for oven cleaning. The following directions are to be used on manual ovens. I tossed my oven cleaner out a long time ago and in its place I bought vinegar and baking soda. Sprinkle a liberal amount of baking soda onto the interior oven floor, then pour a generous amount of white vinegar. Leave for 10 minutes and wipe with a green abrasive pad. Using the solution on the oven floor wipe the walls until clean. Scrub and rinse with water. You will be amazed!
QUESTION -- You helped me in the past with a homemade eyeglass cleaner so I thought you might be able to help me with getting a rust stain out of carpet. I had a freezer sitting on carpet and when I moved the freezer I noticed that it left some rust stains on the carpet. Do you have any tips on how to get this out? The carpet is a lighter brown/grey colour. Thanks, Sharon (Landmark, Man.)
ANSWER -- Begin by combining one-quarter teaspoon dish soap and one cup of water into a measuring cup, then blot the area. Rinse and leave to air dry. Another option is to pour lemon juice mixed with cream of tartar onto the area, then let sit for a few hours. Blot with a white damp cloth. Or pour a generous amount of white vinegar onto the area and blot. If the stain remains, check out the Fantastic Carpet Stain Remover recipe in Household Solutions 1 with Substitutions. The recipe works wonderfully on pet stains, rust, vomit, tea, coffee and wine (test all solutions on an inconspicuous area first). Another option is to purchase a rust remover specifically designed for carpets at your local hardware store.
QUESTION -- In the Winnipeg Free Press last week, you mentioned mixing vinegar and tea tree oil to remove mould from the bathtub. Where can I buy tea tree oil? Lois (Winnipeg)
ANSWER -- Tea tree oil can be purchased at most grocery stores as well as health food stores in Winnipeg. It has many uses as it is a disinfectant, deodorizer, and plant spray. Into a spray bottle combine eight drops of tea tree oil and 32 ounces of water, add 16 drops of three per cent hydrogen peroxide. Mix well. Tea tree oil is safe for counters and can be used as an all-purpose cleaner: add 10-15 drops of tea tree oil to two tablespoons of vinegar and one teaspoon of borax. Put solution in a 12-ounce spray bottle, then fill bottle with water. Shake until borax dissolves. Tea tree is also great for killing lice as well as athlete's foot.
Reena Nerbas is the author of the national bestsellers, Household Solutions 1 with Substitutions, and Household Solutions 2 with Kitchen Secrets.
I enjoy your questions and tips, keep them coming. Check out my website: www.householdsolutions.org
Facing flooding?
Important tips for flood victims:
Check to see if all surface and subsurface drains are functioning. Use a hose to see if roof and gutter water is being directed away from the foundation wall. Observe the path of all surface drainage around the house during prolonged or heavy rainfall. Watch for ponding near the walls. Check to see if the foundation drain is operating by looking for evidence of seepage from the ends.
Some problems may be solved simply by repairing an obvious gutter or downspout leak, while other problems may have causes that are difficult to identify and very expensive to fix. Severe crawl space water problems may cost several thousand dollars to remedy. Always use a competent professional to help you find and eliminate the source of your problem. Don't settle on quick and cheap fixes that merely deal with the symptoms of the problems.If your basement begins to flood, call 311. For more information visit the City of Winnipeg's website: www.winnipeg.ca
Renovation & Design
Manitoba climate poses special problems for A/C systems
QUESTION: I wonder if you might offer some suggestions for a couple of problems we have had since the installation of an attic air conditioning system?
Six years ago we decided to rid ourselves of our one large in-the-wall A/C unit and put in a system that would cool the upstairs with the bonus of a couple of outlets on the main floor. The drawback was that each fall the system required insulation to stop the leakage of warm air up into the ducting, which was causing the first problem. We have excessive condensation and deterioration of the ceiling around each exhaust vent.
Over the years we have developed more and more elaborate stopgaps and paraphernalia to insulate the ducts in the upstairs. These include collar extensions to the original duct work coming down from the attic to stop seepage onto the ceiling plaster, additional foam insulation on the ductwork in the attic, and new vents that close more tightly. We also experimented by replacing one section of ducting with a pre-insulated duct that came right through the ceiling leaving no place for water to leach out onto the plaster and caulking.
Each year we stuff the ducts with a plastic bag filled with foam, which creates a tight seal on the inside walls of the duct. The problem with this is that the new vent covers now have a long central screw for opening and closing the louvers on the vent covers, which requires that the foam block be pushed up higher into the duct leaving a larger air-space. Each year we have had major condensation and the ceilings around the vents have been damaged and repaired over and over.
The second major problem is the smell. Each spring we have the system thoroughly cleaned. I go up in the attic with the serviceman to ensure that all the nooks and crannies, coils and fan blades are thoroughly sprayed down, brushed and cleaned, but as the summer progresses the pungent sour smell starts to increase.
We have had the pan in the attic tipped to ensure optimum drainage, but this doesn't seem to help. My husband buys quantities of Lysol, etc, which he sprays directly into the ducts. The rooms are closed up for a few hours after spraying and the smell is gone for a period of time but is soon back. I think this method just increases the contaminants that we are breathing in.
We have tried to work this through with our original installer, but it seems he no longer has any ideas, apart from running the system for the entire winter to solve the condensation problem. Debbie
ANSWER: I want to commend you on the very detailed question and well-described issue in your home. Unfortunately, that is the only thing I will be commending you or your "installer" on for the remainder of my response. Some ideas are simply bad and there is no way to make them right.
I have seen only a few systems such as yours for central air conditioning installation in older homes that may be difficult due to hot water or steam heat. I am assuming that this is the reason for the attic installation of this unit. Most of the systems I have seen have some issues with condensation, but some have major problems like yours. The problem with this type of installation is that it does not work well, for several different reasons, in our area.
The first problem with this type of system is due to our climate, which includes very hot summers and brutally cold winters. It may be next-to-impossible to properly seal any ducting that is going through the upper floor ceilings and walls in your home to prevent air leakage and condensation in the attic. When this condensation and frost melts, it will not only drip into the living space, but may also leak into the attic, wetting the insulation and plaster ceiling, which may be one cause of the smell.
The second problem is with the air-handling unit and coil installed in your attic. These units are designed to be typically installed in the basement of the home, where there is sufficient room for air movement and a proper drain. Central air conditioners cool partially by dehumidification, so they produce a large amount of condensation on the coil, which drips into a pan below the coil and must be properly drained to avoid leakage. On very hot days, the A/C may run almost continually and, if there is not enough air movement over the coil in the attic, it may frost up or sweat excessively. This or a blocked or poorly drained condensate hose may cause the attic and insulation to become wet and hot at the same time. This is a perfect recipe for mould growth.
Sometimes when experimental or new things are added to a home, the consequences are not properly thought out and major problems like yours, occur. In those situations, the only solution is to stop putting more good money and efforts after bad, and cut your losses. This poorly designed and installed attic cooling system should be dismantled and removed and the attic properly resealed and insulated. There are now higher-quality and more efficient interior wall-mounted units, that incorporate an exterior unit, which can be installed to properly cool the upper floor of your home. I recommend calling an experienced, licensed HVAC contractor for more information.
Ari Marantz is the owner of Trained Eye Home Inspection Ltd. and the President of the Canadian Association of Home & Property Inspectors - Manitoba (www.cahpi.mb.ca). Questions can be e-mailed or sent to: Ask The Inspector, P. O. Box 69021, #110-2025 Corydon Ave., Winnipeg, MB. R3P 2G9. Ari can be reached at (204) 291-5358 or check out his website at www.trainedeye.ca.
trainedeye@iname.com
Renovation & Design
Make your nest the best
TORONTO -- After the economic roller-coaster of 2008, design aficionados will be working to make their existing spaces cosier in 2009.
This move toward nesting, which was called cocooning during the last recession and dubbed "anchoring" by trendsetters this time around, doesn't mean that spaces will be boring. On the contrary, bright pops of colour and embellishments have appeared on the scene.
"I think the home is going to be a really important place" in 2009, says interior designer Nadia Geller, from TLC's While You Were Out and Date My House, in a phone interview.
"There will be more family dinners, more friends over to entertain," she adds. In these troubled economic times, "one thing we can make happy in our lives is our house."
Shauna Levy, vice-president of MMPI Canada and co-founder of the Interior Design Show, echoes this moving inside trend.
"What we're seeing and feeling and hearing, based on previous recessions, (is that) when times get tough, people go in," she explains. "I think it's all about reinvesting in your home, keeping your nest cosy to guard against what's going on (in the economy)."
She expects higher levels of renovations in 2009, such as adding a floor or finishing a basement, rather than moving, as well as a renewed focus on garden design to help "extend your environment outdoors."
As well, she says, with more people spending time and entertaining at home, there will be "an increase of technology in the home," such as home entertainment systems.
Geller says tough times also mean creative times, with a new focus on details, reusing or repurposing existing furniture and a "handmade kind of vibe."
"I see people looking at what they have and embellishing upon it," she says, for example by repainting or reupholstering current pieces. Geller adds that she purchased swan bathroom fixture accessories for towels and hooks, which she will have dipped in a new finish before using to add a touch of whimsy to a bathroom.
Both women say they expect a focus on quality furniture pieces. Levy says purchases will be less "but they're more specific. Less mass, more quality."
She adds that consumers will be drawn to limited-edition and quality furniture, as "they're putting a lot of care and thought into what they are buying."
Geller adds that she expects to see more mixing and matching, for example, pairing antique pieces with modern classics for a whole new look.
People "don't have to completely stick with a style. They can mix and match and have a cohesive space," she says.
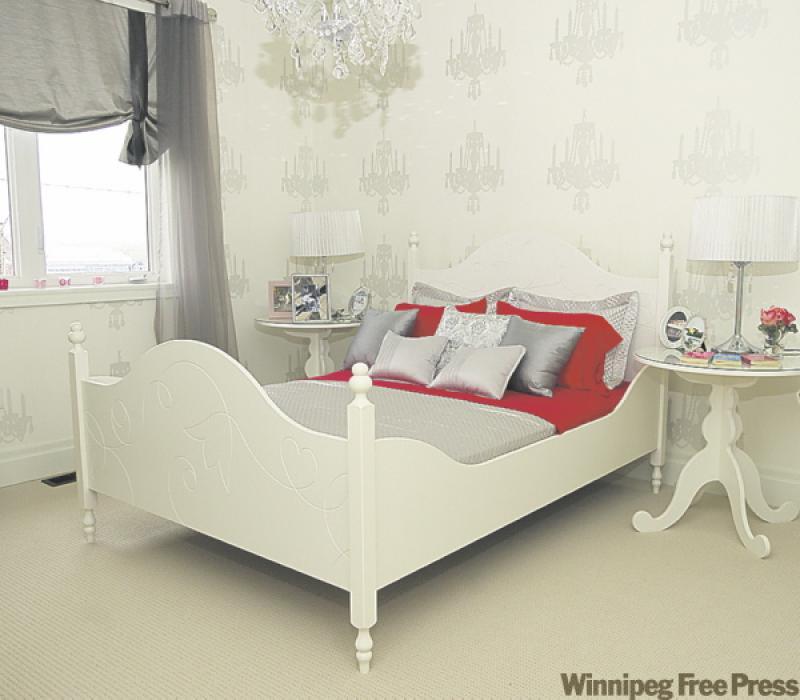
This mixing and matching will also apply to walls and colours, she says, explaining that wallpaper will continue to be a great option, as will "pretty natural tones" such as linens, wood and white, complemented by pops of bold hues such as purple, rust, teal and gold and bronze metallics.
"Stronger neutrals," such as gold and soft yellow, will be hitting the palettes in the new year, says Johanna McLellan, assistant brand manager with Para paints. She says Para is also forecasting a lot of blues and greens, such as a "deeper, more smouldering" navy, an offshoot of the cobalt-blue trend from two years ago, and a natural "mossy green" for those who aren't ready to embrace hues such as "lime soda."
"We're still saying 'try colour,"' she adds, noting that while they look to home decor and fashion for colour inspiration, "I don't think Canadians are ready to go as deep as they are in the runways." For example, she cites the company's "gift of the gab", which she describes as a fun purple that blends the deep plums of the runways and the neutrals.
"Canadians are going back to the use of great colour," Levy agrees. "My theory is when things are not always so positive, I think people are looking for that kind of positive energy in their environment."
She describes purple, which is the chosen hue for this year's interior design show, as "a happy colour" and adds that soda green "is going to be hot this summer. It's a happy, fresh vibrant kind of colour."
"It's all about being happy."
McLellan says that homeowners should look at 2009 as a chance to let their paint and colour choices reflect their own style and personality.
"Instead of taking one colour throughout the entire house, let each room showcase your own runway," she says. "Every room can have a different look, if that's what you want."
She, like Geller, also sees opportunities for adding details in 2009.
We saw "a lot of embellishments in fashion. In 2009, we're encouraging consumers to also consider embellishments in the home," she says.
And when the economy's tight, she says, "we want to brighten up our lives. Paint is the cheapest way to do it. It's something you can do on your own."
"People are looking for ways to not spend as much going into next year, so maybe you buy two gallons of paint to do that rather than picking up more expensive art or a new lamp."
For example, she suggests painting a wall in a matte finish, then take a gloss in the same colour to create a wide stripe. Another option for embellishment, she says, is to paint a matte on the wall to hang a picture over. "It's a good way to test the water with colour if you're not ready to take the plunge," she says.
-- The Canadian Press